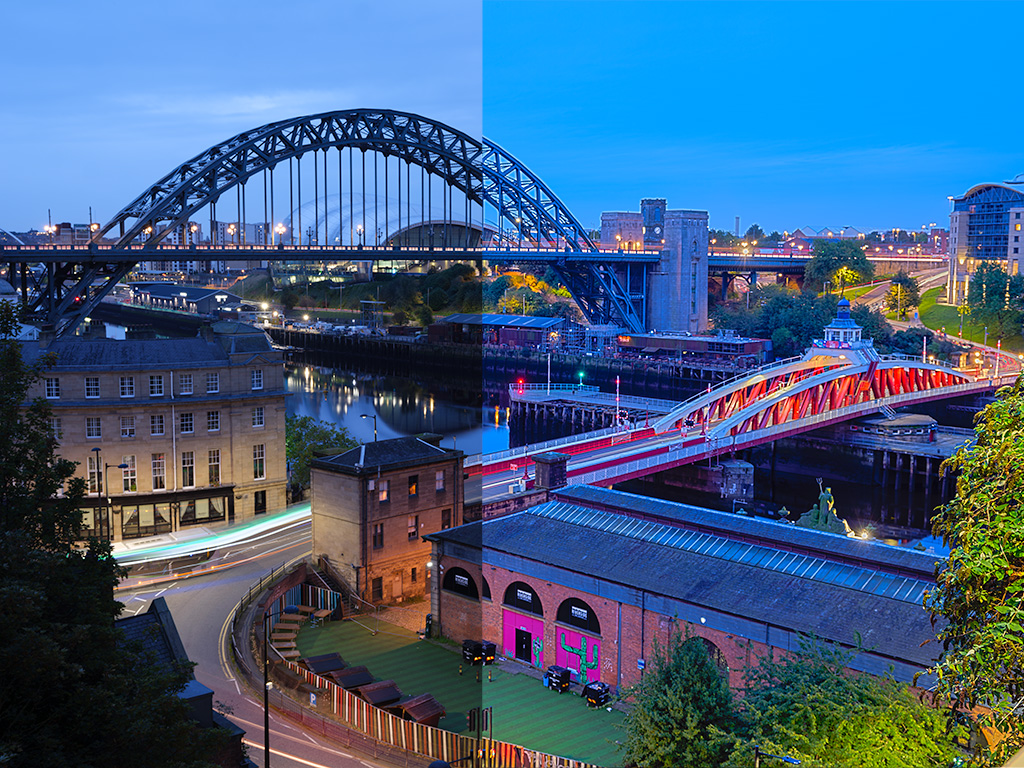
As photographers, we strive to take a perfect photograph. We compose carefully within our frame, properly expose our image, and make sure our white balance is set right. But, despite our best efforts, there are 5 essential edits that will improve almost any photograph.
The reasons why these edits might be necessary are varied. It might be a limitation of our technology. It might be a limitation of our equipment. It might be a limitation of our situation. It might even be that we were careful but in a hurry.
The reasons aren't as important as recognizing the fact that you can easily improve your photographs in a matter of minutes.
For this article, we have chosen to illustrate the edits using the RAW processing window of Photoshop. You could do these same edits with virtually any imaging software. It will just take a little effort on your part to find the appropriate windows, menus, or tools.
RAW Processing Window by Kent DuFault, on Flickr
In our workflow, we recommend the edits in the following order-
- Crop
- Levels
- Curves
- White Balance
- Noise / Sharpening
We also recommend doing the edits in your RAW processing window. The reason for this is that you are then free to change your mind at a later date without permanently altering your original file. This can be especially important when considering edits such as cropping, white balance, and noise / sharpening.
To demonstrate our 5 essential edits, we're going to take a single image and walk through the steps.
IMG_5890RAW from Camera by Kent DuFault, on Flickr
This location portrait was well composed and properly exposed with the tools available to the photographer. But minor edits will vastly improve this image. We will walk through each edit, give you our reasoning for performing the edit, and show you a side-by-side comparison at the end of our article.
1. Crop the image
You always want to compose as carefully as possible in the camera. The main goals are not to waste resolution by composing too wide, while at the same time giving enough room so that the image will fit any format that the end user desires.
The above image is a standard 2:3 ratio as output by a Canon T2i camera. The photographer composed tightly, but left enough space so that the client could choose any format for the final product. This image could effectively be reproduced as a wallet print, 3 1/2 by 5 inch print, a 4 by 6 inch print, a 5 by 7 inch print, an 8 by 10 inch print, and etc.
The photographer chose to crop the image slightly to increase head size and place the subject's face closer to the sweet spot as defined by The Rule of Thirds.
Crop by Kent DuFault, on Flickr
2. Levels
When you examine your histogram, it should look like a mountain range which peaks in the middle of the scale while tapering off at either end. You'll notice in our example below that the histogram shows spikes in the red, green, and blue spectrum. You'll also notice that there is a solid white field. The spikes in the RGB spectrum are due to the large quantity of those colors present in the photograph: the boy's blue shirt, the red, yellow, and green of the foliage behind him. What you're concerned with at this point is examining the solid white section. If your photograph isn't predominate in a certain color range, you will not see these spikes. The white section should also appear as a mountain range that tapers off at either end of the scale.
Levels by Kent DuFault, on Flickr
This is the most important issue with levels: the black point and the white point. The black point (which is the left side of the scale) should end somewhere between the numerical value of 8 – 12. If it's below that (at zero for example) your black values will appear inky and unnatural. Conversely, your white point should be a numerical value of 245 – 250. If it goes above that (255 for example) your white values will appear bleached out and lacking any detail.
Using your particular software, check these values by placing your cursor over the blackest area and the whitest area within your image. Read the the RGB value. If the value indicated is outside the suggested range, adjust the levels until they are within range.
black point by Kent DuFault, on Flickr
white point by Kent DuFault, on Flickr
3. Curves
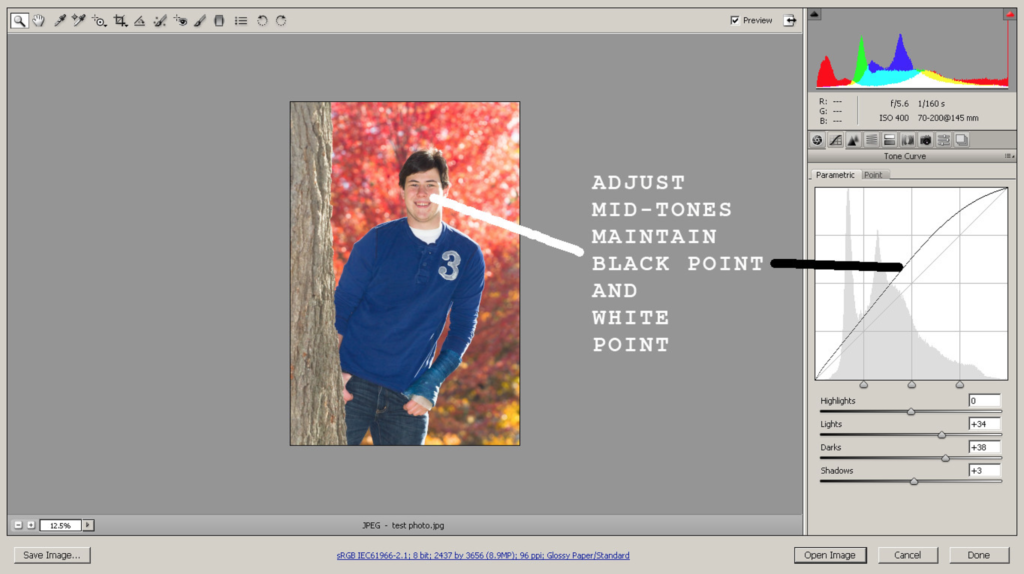
Once you have your levels adjusted, you will want to take a look at curves. The levels set the black point and the white point. Curves allow you to brighten up the values of the mid-tones while maintaining your black point and your white point. To begin this process, view your image at 100%. View the area of your image where the mid-tone value is most important. In our example image, this would be the boy's face. Adjust the curves until this area achieves a proper level of brightness. If you exposed your image properly, this should be a fairly minor adjustment. Your mid-tone values should fall between 130 – 220 depending on the subject matter.

mid tone curves by Kent DuFault, on Flickr
4. White Balance
White balance adjustments should generally be minor as well. Modern cameras do a pretty good job of capturing a decent white balance even in the “Auto” setting. However, you will occasionally notice a tint to your image, or perhaps, you might want to adjust the overall color balance of the image for aesthetic purposes. Our main suggestion here is to go lightly, and determine how much correction you're going to apply from a neutral mid-tone area of your photograph.
White Balance by Kent DuFault, on Flickr
5. Noise / Sharpening
Unless you're working with a professional level DSLR camera, you will most likely see some at ISO 400 or above. Noise also becomes accentuated if you underexposed your original file. You can determine the noise level by examining your photograph at a 100% view. Look for areas that appear granular. Our example photograph was taken with a Canon T2i at ISO 400. The image was properly exposed.
Here is the noise level at 100%.
Noise Example by Kent DuFault, on Flickr
Noise level can be reduced using third party software. The RAW processing window of Photoshop also has a simple noise reduction tool that works pretty well if the noise level isn't too bad. For this example we used that Photoshop tool-
Noise Reduction by Kent DuFault, on Flickr
Whatever noise reduction method that you choose, the goal is to apply just enough to eliminate noise without affecting your image sharpness. This takes some experience and practice. Pick a noise reduction method and stick with it.
Sharpening of digital photography is a subject of heated debate. Two things are an absolute. One, digital images need some sharpening. Two, everyone has a different opinion on how much sharpening should be applied. Too much sharpening can ruin your image. For this reason, we recommend sharpening in the RAW processing window. This allows you to easily change your settings later should it appear over-sharpened. We also recommend a very light sharpening. In the Photoshop RAW processing tool, we rarely go over a setting of 30 – 35. Another nice technique is to sharpen the overall image lightly and then spot sharpen important areas with the adjustment tool.
Your main goals here – Don't go too far with your sharpening and keep an original non-sharpened file.
Sharpen Image by Kent DuFault, on Flickr
Once you've applied these 5 essential edits, you will notice a significant improvement to your image!
Final by Kent DuFault, on Flickr


3 Comments
this article is very very helpful for me as new photographic artist
Similar article based on Lightroom would be helpful. I find PS too complicated !
FYI… adjustments in lightroom are essentially identical. Both PS and LR use the Adobe Camera RAW (ACR) adjustment tools. Blessings.