Although many of us now use image management programs to process our Raw files, Adobe’s Camera Raw is still one of the most comprehensive convertors around and benefits from being tightly integrated into Photoshop and Photoshop Elements. One bonus of this, is that its user interface will be very familiar to Photoshop users. In this brief guide, we will give a rundown of ACR’s interface and most important features.
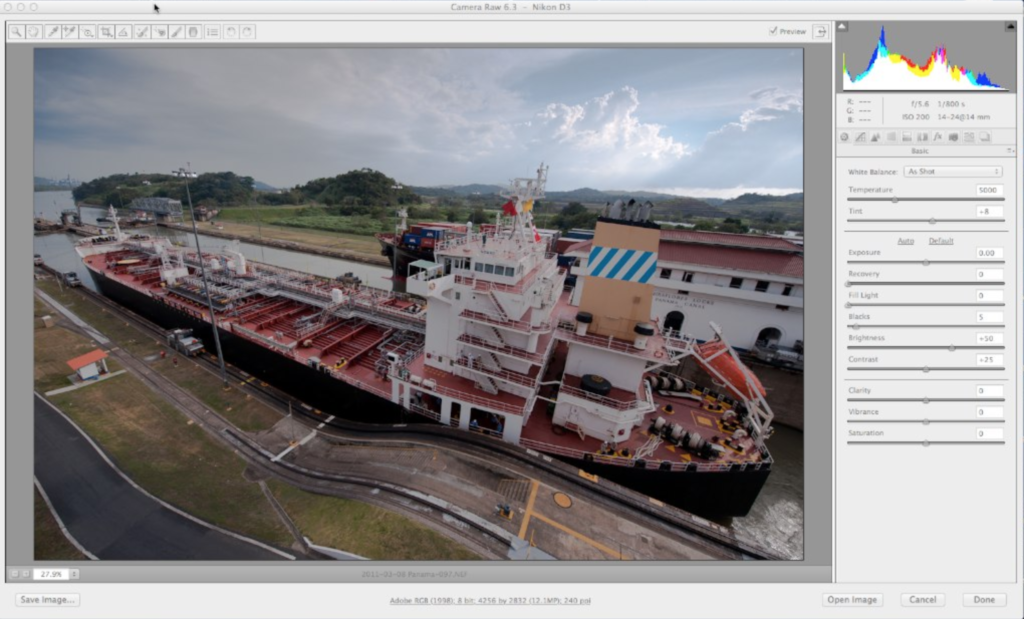
When you open a Raw file in Photoshop, the program will automatically open the ACR plugin and preview the image in a large window. Surrounding this window are the important tools you need for your Raw conversion. Running along the top of the preview window are a set of image manipulation tools, in essence, very similar to Photoshop’s own tool palette.
The first two tools from the left allow you to zoom in to, and move around the image. The next tool, the first of the eye droppers, allows you to set a white balance by clicking on a neutral grey area of the image. The next eye dropper tool allows you the measure the RGB value of any point within the image by clicking the tool on that point.
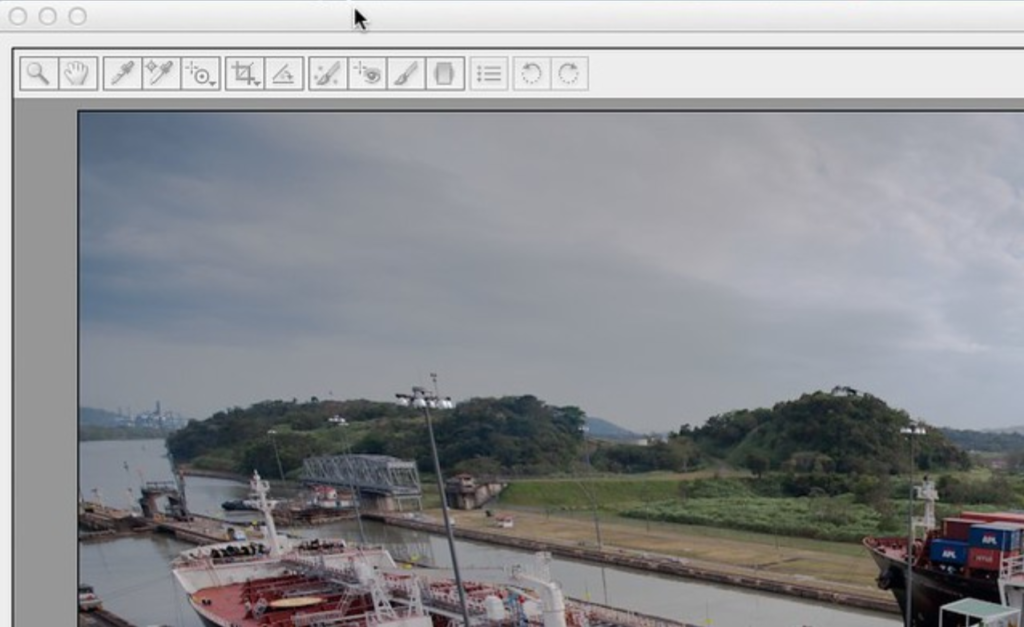
Next along we have a fairly new and very powerful tool, the Targeted Adjustment Tool. This will allow you to make adjustments on selected parts of the image, for example clicking and dragging it in an area of blue sky the tool will adjust only on areas of the image similar to the point selected. Right clicking in the image with this tool selected, will reveal a number of different adjustment types available, including curves, hue, saturation and luminance. One other tool of significance along the top, is the Graduated Filter tool. Clicking and dragging this tool in the image will create a rectangular selection area that can be manipulated using the adjustments in the palette on the right hand of the screen, these include exposure, brightness and contrast.
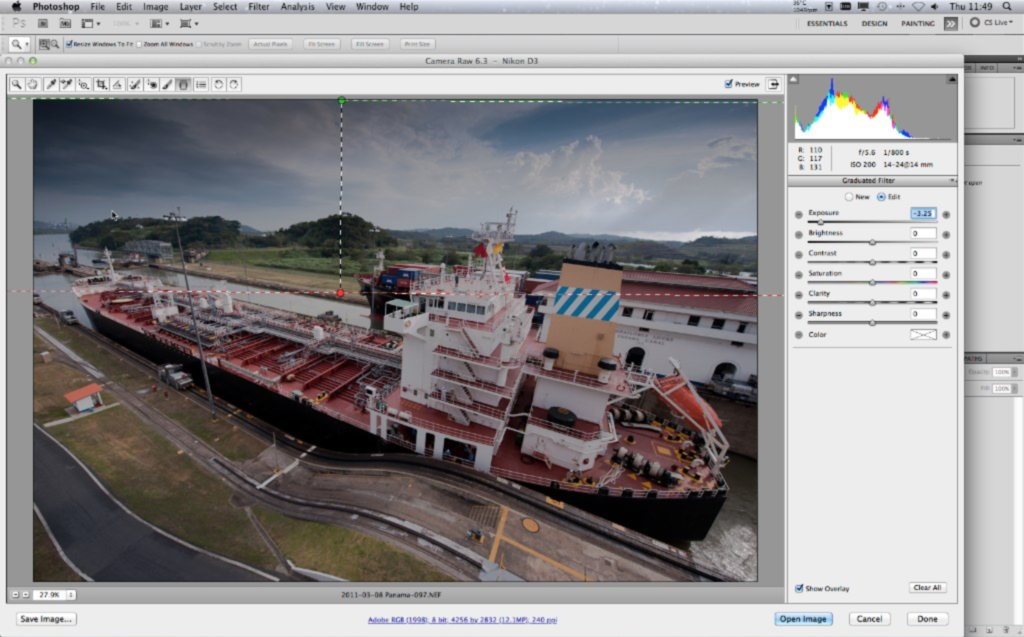
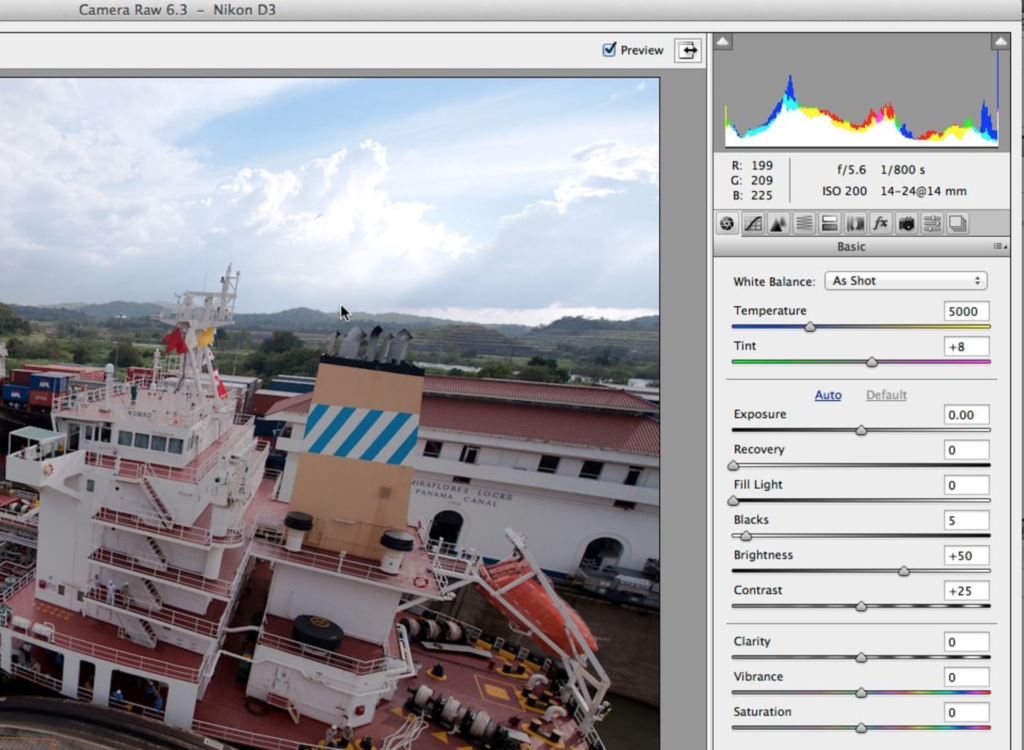
Moving to the main palette on the right of the screen, at the top we have the all important histogram. The two small triangles at the top left and right of the histogram, when clicked, will reveal areas of the image that are clipped. The white triangle shows the shadows clipping, and are shown in blue on the image, and the black triangle, the highlight clipping shown in red. Below the histogram is basic camera and exposure information. Below this is a selection of icons, each of which reveals a different set of tools.
By default when ACR opens this is set to basic mode. This allows you to control the most important image adjustments, such as white balance, exposure, recovery, which allows you to pull back the highlights and blacks which does the same for the shadows. The adjustments are very similar to the ones you would find in the image/adjustments menu in Photoshop. The auto icon will set values based on the histogram, to give what it believes is the optimum image and default reverses any corrections.
The next icon along from basic is the curve tool. When first opening you will see two tabs, Parametric and Point. Parametric allows you to adjust the curve using the sliders below the graph, whilst point is more accurate, allowing you to select points within the curve for finer adjustment.
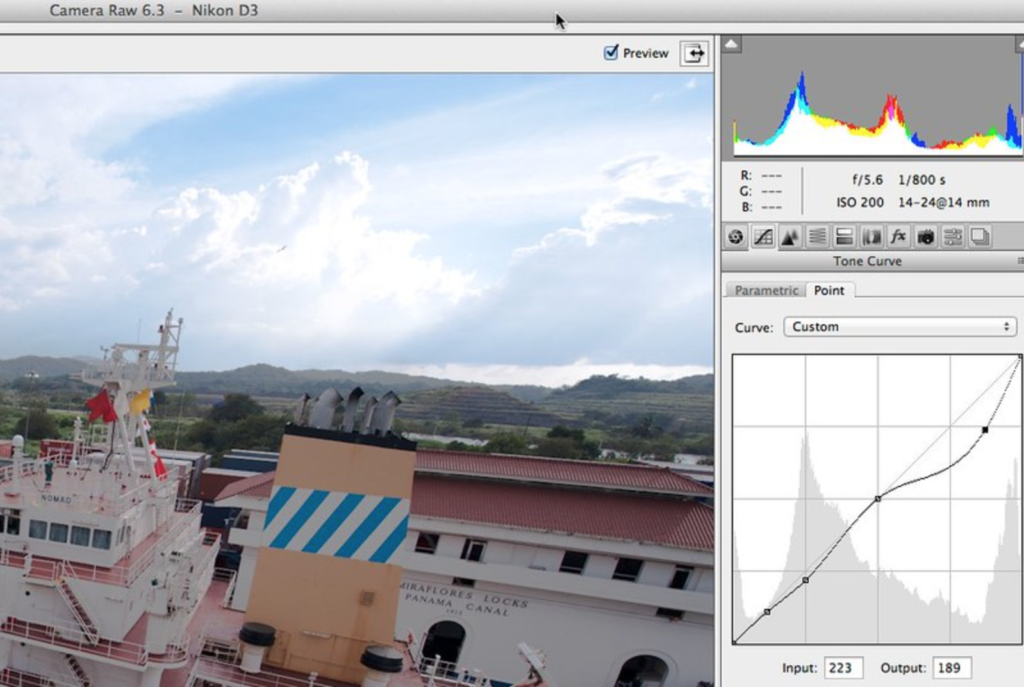
The third icon at the top, reveals a combination of sharpening and noise reduction tools, although you may find Photoshop’s own tools are more comprehensive. The fourth icon allows fine adjustment to Hue, Saturation and Luminance in eight of the main colors and also allows conversion to greyscale whilst still being able to adjust those colors. This is useful for attempting to simulate filter effects in black and white. The next icon, allows you to change the highlight and shadows saturation for any particular hue and is useful for removing color casts in the shadows.
The next along is the lens correction tool. Enabling this will give you a seres of drop-down menus where you can define your lens make and model. You can then use the sliders below to correct distortion, chromatic aberration and vignetting. You can also auto correct and create your own lens profiles. If your lens is not listed, clicking on the manual tab reveals a range of more specific controls. The remaining tools are less significant than the ones already mentioned, but allow you among other things, to take snapshots as you correct an image or create your own profiles.
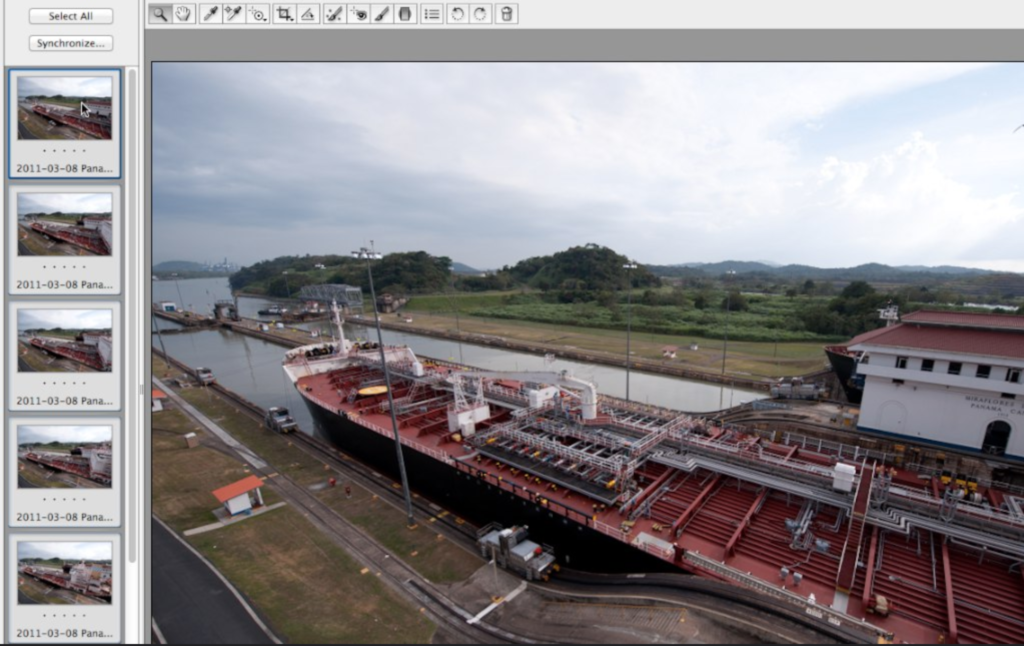
At the very bottom right of the screen you have three choices. Open image will open the adjusted image in Photoshop, cancel will remove all adjustments and close ACR and done will apply the adjustments and close ACR. One other useful ability ACR has is batch processing. If you open multiple Raw files in Photoshop, all of these will be shown in a browser to the left of the main image in ACR. You can then make adjustments to individual images or apply them to multiple images.
All in all, Adobe Camera Raw is a very powerful tool and may be very useful for those who do not use image management programs or people looking for tight integration into the Photoshop world.
Jason Row is a British born travel photographer now living in Ukraine. You can follow him on Facebook or visit his site, The Odessa Files. He also maintains a blog chronicling his exploits as an Expat in the former Soviet Union.


