The Adjustment Brush is the localized editing tool that is freeform. This tool has the ability to select small and large areas for specific adjustments. We explored the other two Lightroom localized adjustment tools, the Radial and Graduated Filter in two previous articles: How to Use Lightroom's Radial Filter to Enhance Your Subject and How to Use Lightroom's Graduated Filter. In post processing, a photographer can use one or all three across many areas of the photograph.
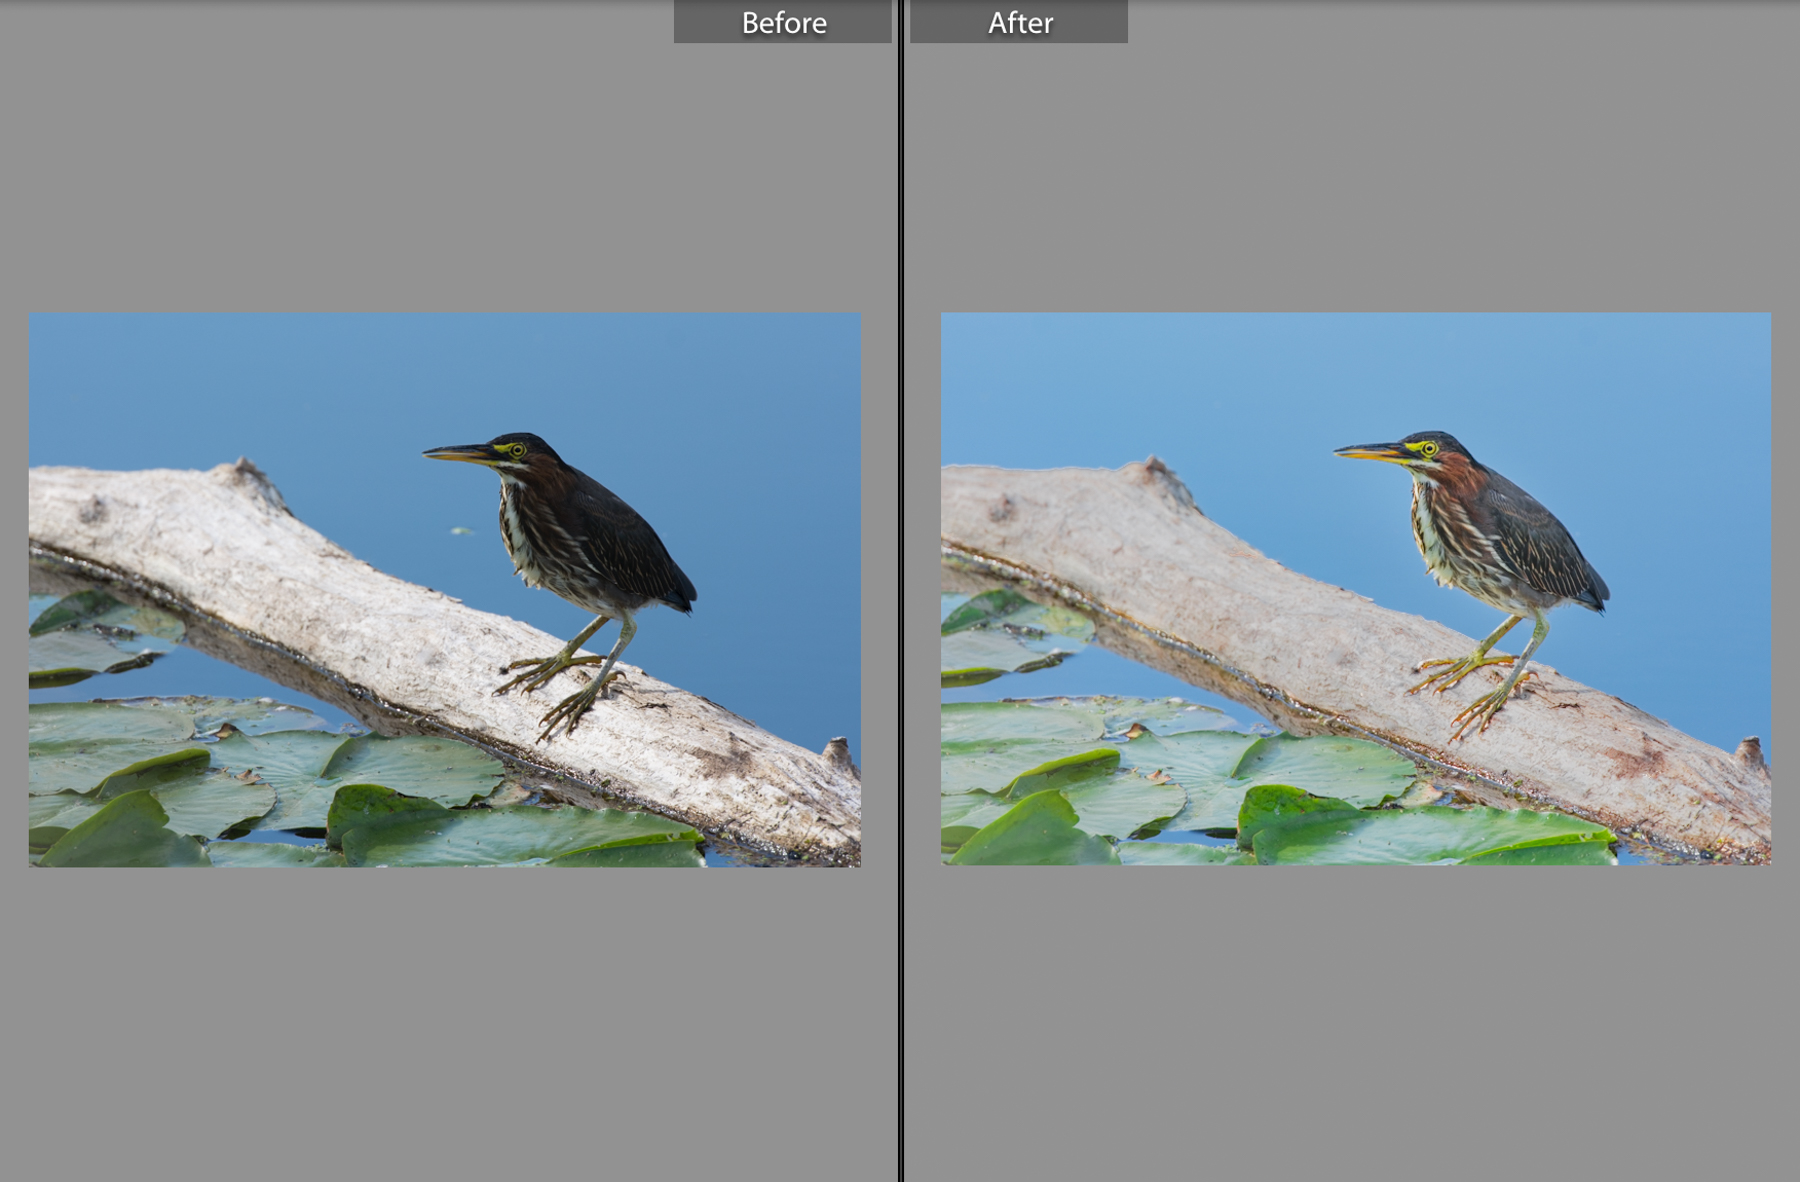
The green heron shows a before and after post processing view that used global adjustments along with the adjustment brush and radial filter. We'll review the Adjustment Brush tools and how this image was processed.
Adjustment Brush Tools
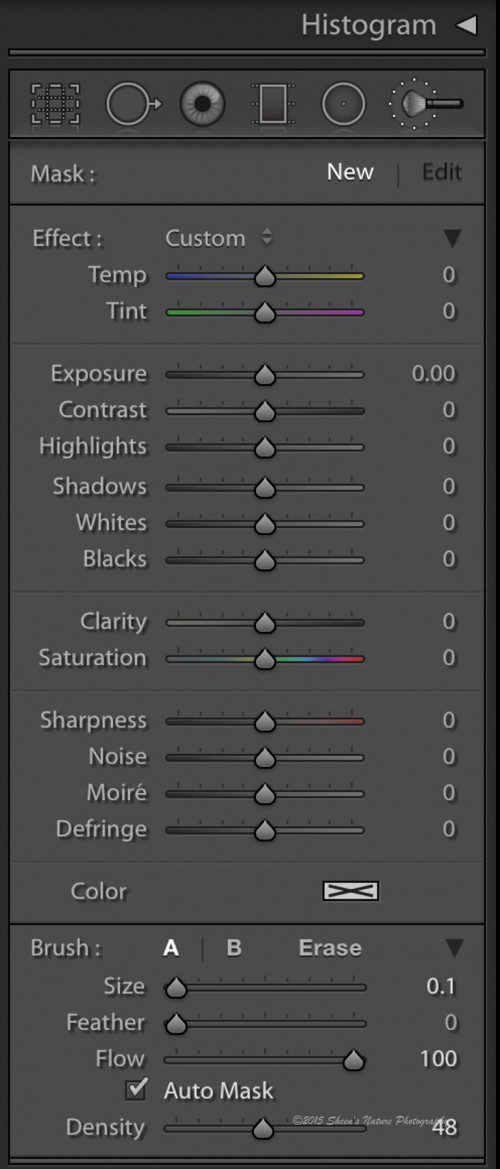
The Adjustment Brush panel pictured below is located underneath the Histogram and just above the Basic Panel. The brush is on the far right side. The tools inside the Adjustment Brush include White Balance, Tint, Exposure, Contrast, Highlights all the way to managing noise and sharpening sliders.
The 2nd panel at the bottom includes the sliders/tools that control the brush's aspects including:
- Size – how large or small the brush area – sliding to the right increases the size, or click on the numbers to type in a higher number or smaller number.
- Feather – control softness or hardness of the brushes' edge. At zero, the edge is hard and defined. On the farthest right, the edges are soft with a blending of the pixels.
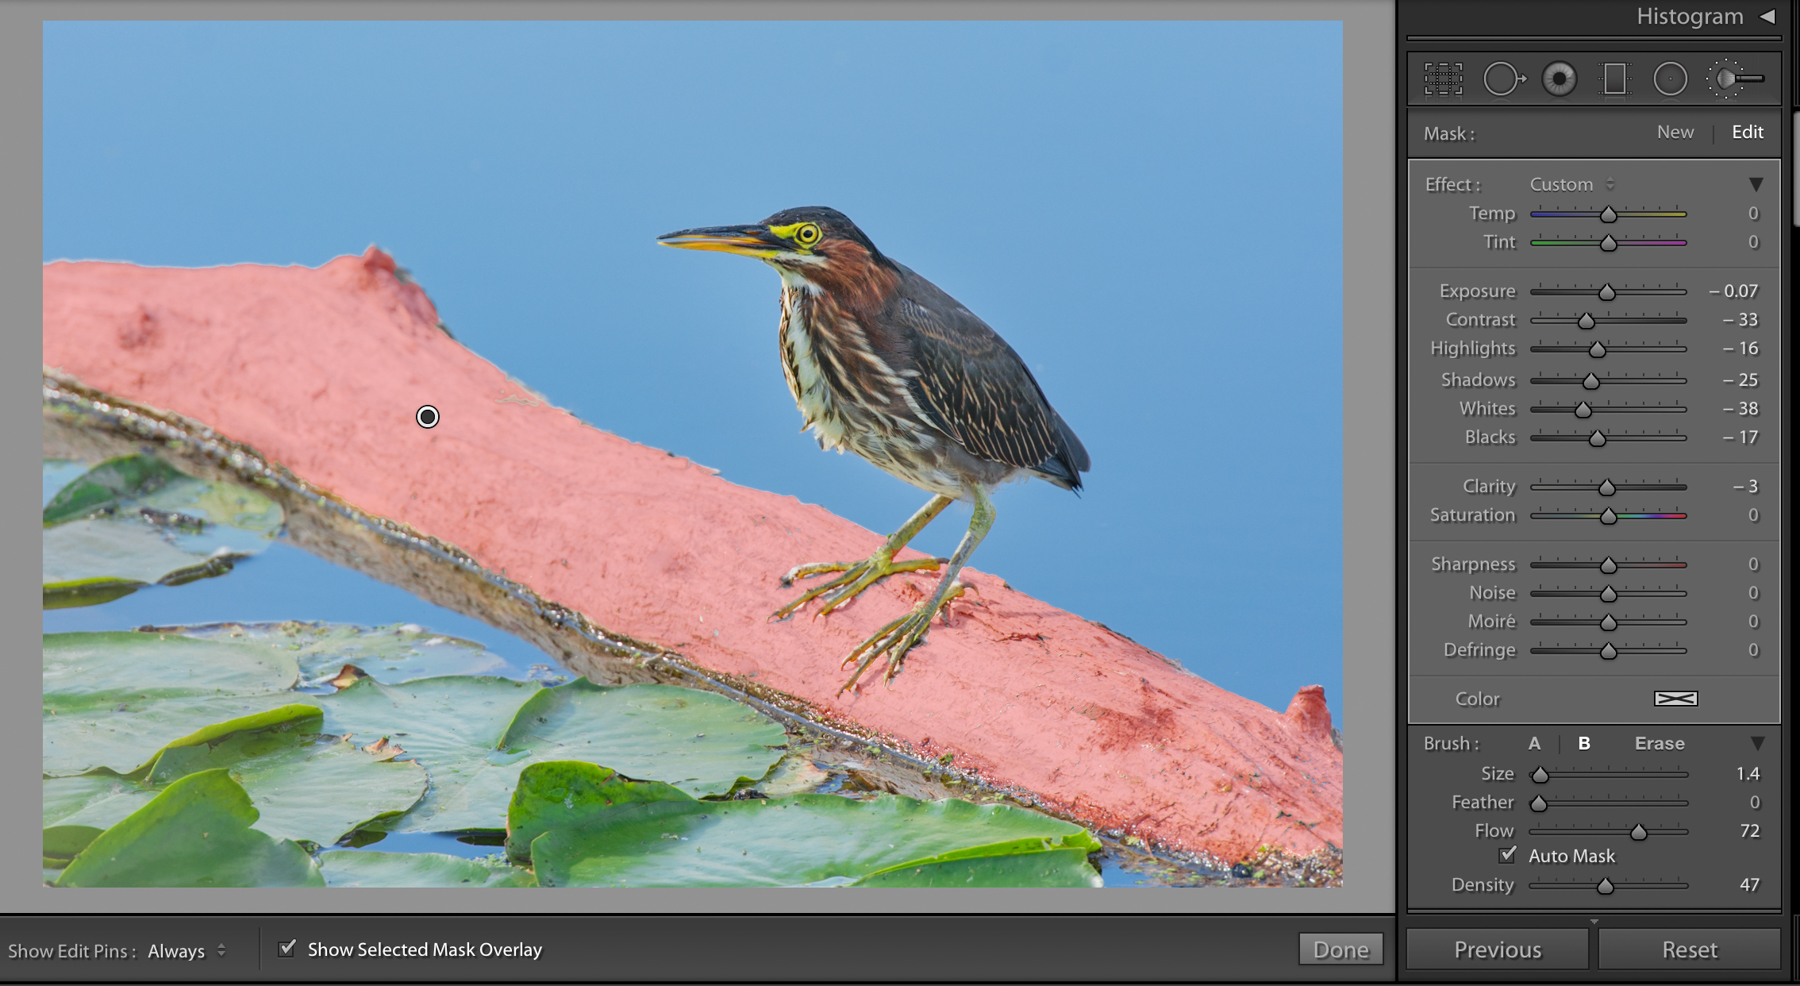
- Automask – adds a bit of intelligence when highlighting your area. Lightroom will apply your brush strokes to areas of similar color. (See the floating log below highlighted in red. Even though I may have accidentally brushed over the blue the highlighted selected area was only the white log).
- Flow – manages the amount of pressure, or push of the brushstroke. The higher the number, the thicker the coverage.
- Density – density manages the transparency of the brush effect.
- A/B/Erase – At the top of the brush panel there are three options: A, B, and Erase. Lightroom allows you to customize two different brush sizes (A and B). You can move back and forth switching between the brush sizes by clicking on the A or B. I usually have a larger one and one for the intricate details. The Erase brush can be used for correcting and cleaning brush mishaps.
Processing the Heron
The green heron was photographed late afternoon and was a bit underexposed. The white log was an important part of the scene but its brightness took away from the heron.
First, the lens correction was applied along with removing a couple of spots using the Spot Removal Tool. This was followed by global adjustments in the Basic (exposure, contrast, shadows, etc) and HSL panels. The adjustment brush was used on the log as it was too bright and stark, taking away from the heron. The mask overlay shows the brushed area. Multiple brush sizes were used to go along the edges and the herons talons.
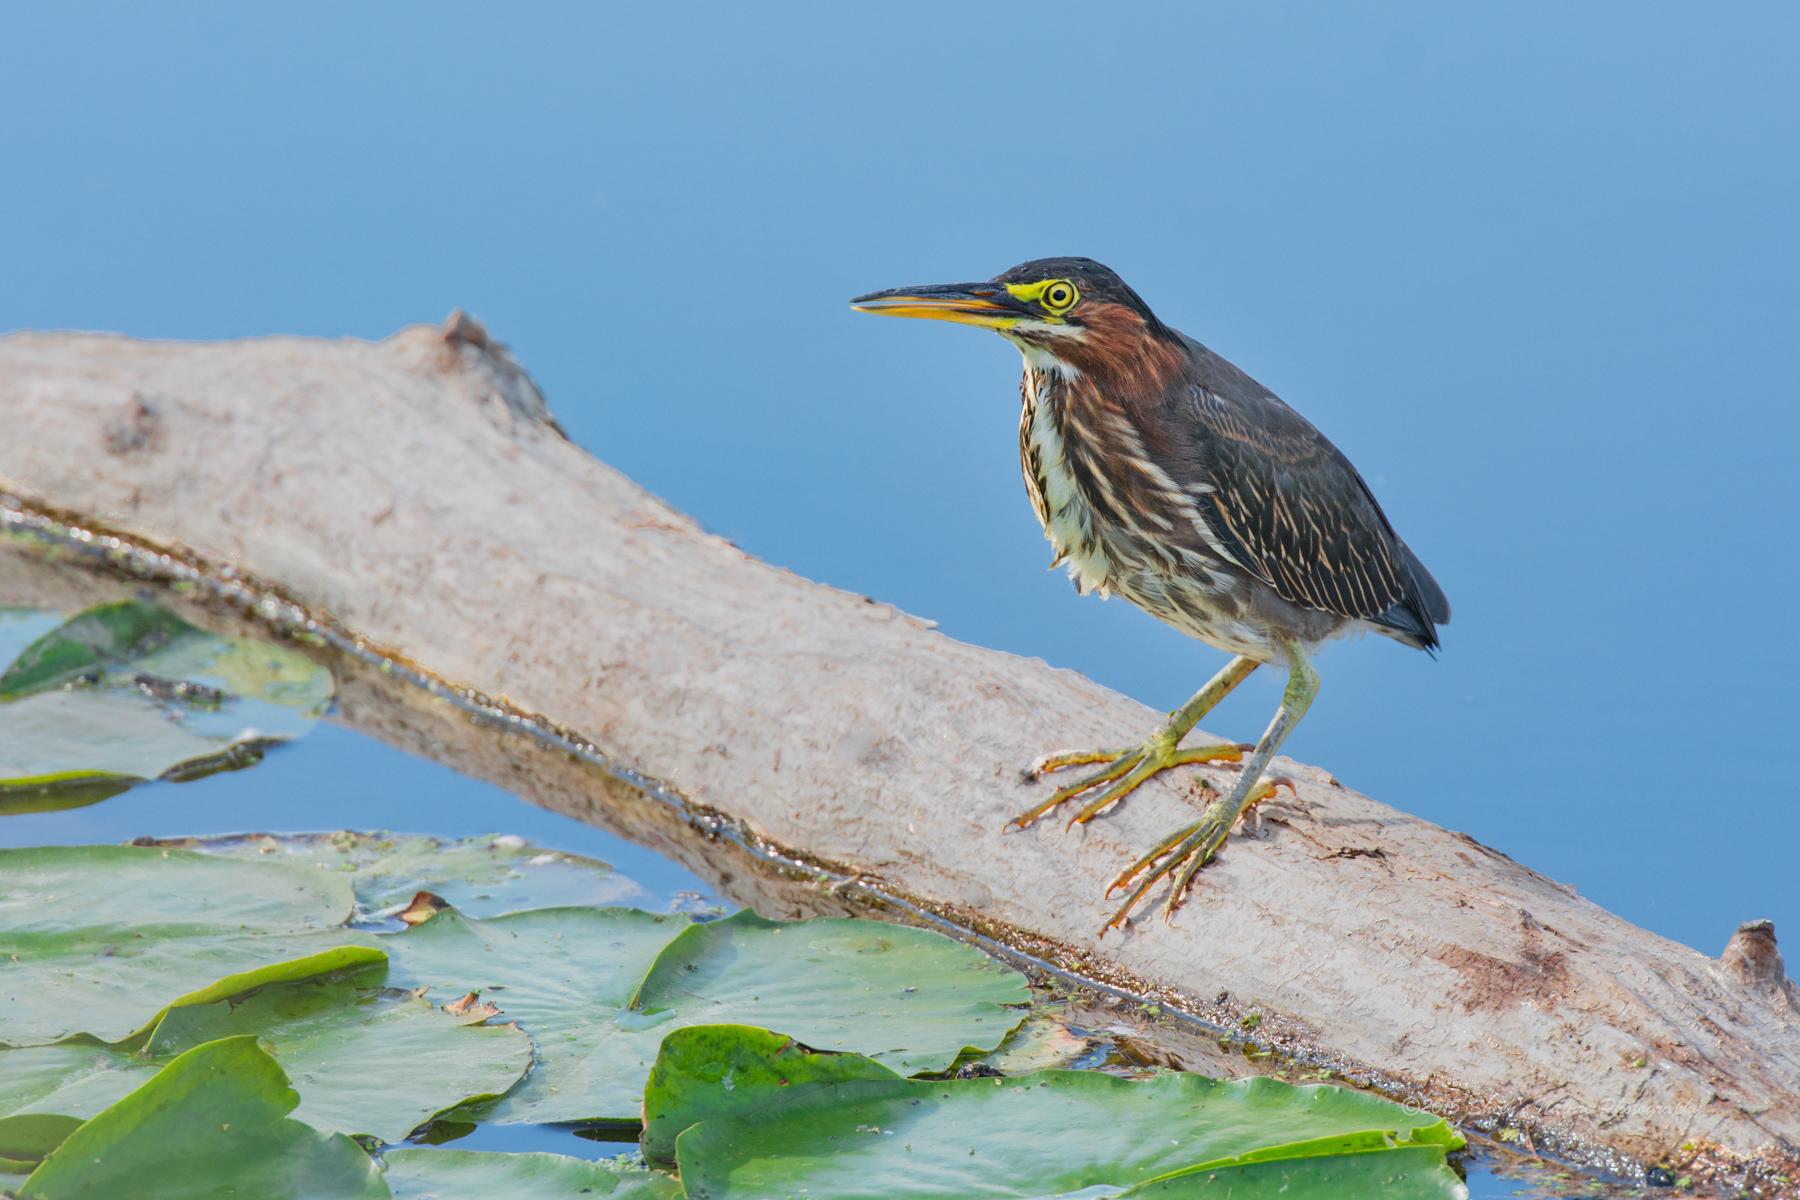
The final image is pictured below. In addition to using the Adjustment Brush on the log, I also applied the Radial Filter on the heron to brighten the shadows, feathers and increased the exposure a small amount.
Of course, our post processing work continues when we go back and revisit our files. After seeing this posted, there may be a couple of additional adjustments I want to make. The beauty (and curse) of digital, Lightroom and post processing options!




3 Comments
Additionally if you have an adjustment setting that you are happy with you can save it as a preset for the next photo.
never used it …yet…. but I certenly will give it a try now ! Thanks.
Great info,I will have to give it a try!