Photographers exert an awful lot of time and anxious energy fretting over how to light a subject; specifically, we all tend to fear shadows. Harsh shadows can ruin nearly any photograph. Whether it’s a portrait, a macro, or a product shot, the aim is typically soft, even lighting.
The fact is, however, we all need a break from the norm; we need to take advantage of opportunities to do things a different way. Those beautifully lit portraits that you’re obsessed with are important; they may even be the staple of your photographic repertoire, but there is another way to think about lighting — a way that is, perhaps, counter-intuitive but one that can be equally, if not more, evocative as any “perfectly” lit shot.

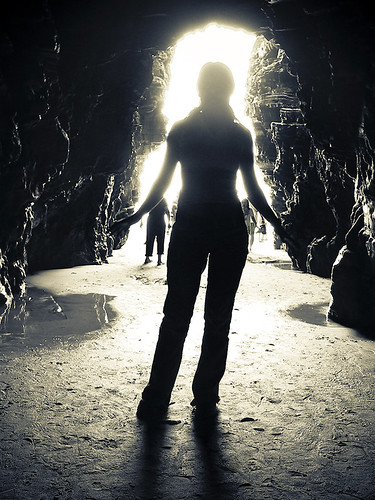
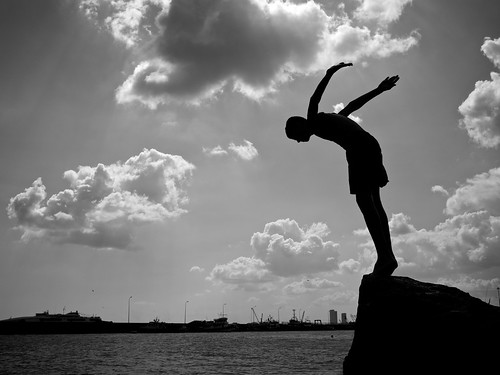
air time by sean, on Flickr
Portrait photographers know of rembrandt lighting, split lighting, butterfly lighting, all styles of lighting designed to light the front of the subject. But what about backlighting?
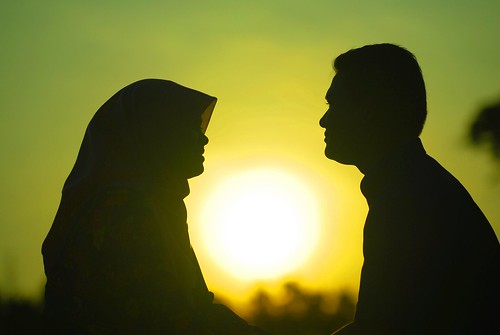
The Beauty of a Silhouette
A silhouette: that dark, featureless subject outlined against a bright background — is a photographic phenomenon created by backlighting. A photographic phenomenon that is capable of conveying mood, drama, mystery, and emotion in ways unmatched by more conventional styles of portraiture. Silhouettes are incredibly simple in form, yet they possess a great deal of aesthetic and atmospheric power, and they impart that power to the viewer by giving us the freedom to further use our imagination as we interpret those images.
Fortunately, silhouettes are also relatively easy to create. The tips that follow will help you get started.

How to Photograph Silhouettes
1. Choose a Suitable Subject – “Suitable” is admittedly a rather open-ended term; indeed, anything can be made into a silhouette. But you will find that some things work better than others. Bold, distinctly shaped forms separated from their surroundings tend to work best.
2. Set Up Your Lighting – If you’re using natural light — the sun — then there’s actually nothing to set up here. Your flash is useless in this capacity; in fact, all that stuff you learned previously in your photography education about how to light a subject is off the table. The goal is to put the light completely behind your subject. You don’t want any light falling on their frontside. The very best way to go about this is to position your subject in front of a rising or setting sun. Using the sun isn’t an absolute must, however; any light source that is large enough and bright enough will do…which means you can use a flash or two. Just set them up behind your subject.
3. Pose Your Subject and Frame the Shot – If you’re working with a person, be sure to pose them in an open area or in such a way that doesn’t cause them to blend in with surrounding objects. Furthermore, try to avoid photographing people straight-on; instead, photograph their profile. This will make their features more distinct, more recognizable.
4. Prepare Your Camera for the Shot – Shooting in manual mode is the ideal method of creating a silhouette. Again, you will probably find that the process goes against the grain of what you’re used to as you expose for the background and not the subject. Quite simply, this is how you get a dark foreground and a bright background — a silhouetted image. If you find that light is spilling over onto the front of your subject, just underexpose the background a bit and your subject will become increasingly darker.
You can accomplish this in auto mode as well. The trick is to keep the camera from doing what it tends to do so well: metering a scene for even lighting. To prevent this, point your camera at the brightest portion of the sky and press the shutter button half way to initiate the metering process. Then, with your finger still on the shutter button, move the camera back to your subject and take the shot. This method works the majority of the time, but if you want to be a bit more precise you should use “spot metering” if your camera possess that feature. Spot metering will allow you to meter for a very specific part of the frame (the background in this instance), thereby increasing the accuracy of your desired exposure.

Either approach can lead to successful silhouettes. Use the one that you’re most comfortable with or whichever works out best for you. Given that all you’ve got is a memory card to erase as opposed to rolls of film to buy, you can experiment as much as you want or need to.
5. Focus – The subject needs to be in sharp focus in order for your silhouette to have definition. How to get the subject in focus may not be so straightforward considering the metering steps discussed above. The camera will have to focus on the background in order to take a meter reading, which means that focus won’t be accurate when you move back to your subject. There are a couple of ways to tackle this problem:
- Use manual focus to re-focus on your subject after you’ve metered the shot, or pre-focus before you meter.
- Set a small aperture (larger f-number, f/8 or f/11, for example) to increase depth of field, which will increase the odds that your subject is clearly defined.
6. Post Processing – As always, what you do in this phase is entirely up to you. It’s likely, however, that you will want to boost shadows, blacks, contrast, and clarity; these adjustments will help define the subject more clearly. A small bump to vibrance and saturation might be useful as well, just to add some pop to the background, especially if the background is a colorful sunrise or sunset.

7. Optional Tools – Making a silhouette really only requires your camera, your subject, and a bright background. But if you happen to be working in a particularly low light situation where a slow shutter speed is necessary, then a tripod will certainly come in handy. And, if you like, you can use a circular polarizer to create more contrast and saturation for the background.
Conclusion
While the basic process will remain the same, your specific camera settings will probably be different for each silhouette you shoot because subject and lighting conditions won’t be identical on each occasion; so again, we see the luxury that digital photography has afforded us — we can adapt and experiment with no limits.
As you begin to think about and prepare for shooting shooting silhouettes of your own, I’ll leave you with some images to inspire you.

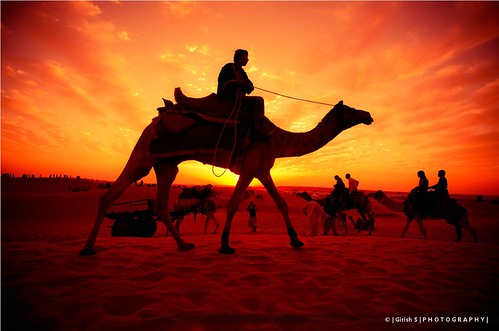
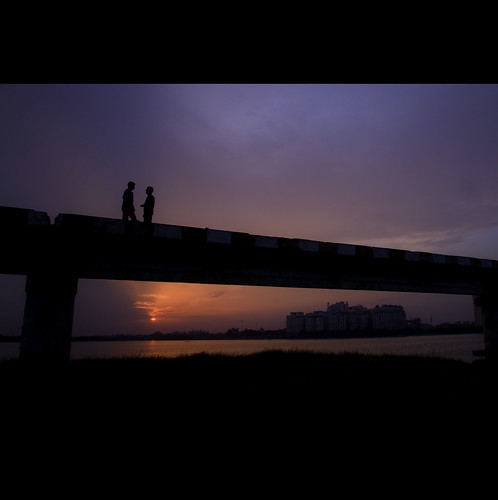
World's Favorite Sport by vramak, on Flickr

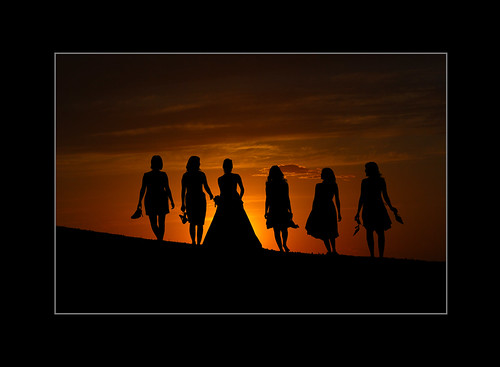
Dance When No One's Watching – Bokeh + Silhouette by vramak, on Flickr


1 Comment
Great piece, Jason. Thanks.