Photographing fire performers – and the trails they make – is an art form of its own. These incredible artists can put on quite a show, and photographers love the opportunity to capture surreal images using long exposure techniques.

Successful fire trail photography takes much skill and practice – moving fire combined with a darkened environment can be a difficult subject to capture and extends beyond simple long exposure techniques.
Below are some key technical points about capturing fire trails – your settings, the needed gear, and how to execute the perfect fire trail photo.
Aperture
In order to capture great detail in your fire trails, you need to use a sharp and narrow aperture. Wide apertures will allow too much light hit the sensor as the fire is moving, thus making your fire look more like light trails instead of showing any flame detail. When you use a narrow aperture, it takes longer for the bright flame to register on your sensor before it moves – which gives you great detail in the flames themselves without having that “smudgy” appearance.
You’ll also benefit from the other small aperture benefits – a sharper image and greater depth of field. An aperture setting of f/8 or above is common for fire photography.
Below is a comparison between wide and narrow apertures – you can see there's a huge difference in flame detail between f/4.5 (first image) and f/8 (second image).

Shutter Speed
Blown highlights aren’t too much of a concern when dealing with moving fire, so you do get a lot of room to work with when photographing fire trails. A small aperture will limit how long the fire is exposed on your sensor, so as long as the fire is moving you can tailor the exposure length to how long you want your fire trails to be. If you're aiming for flame detail, you probably don't want to extend it longer than a couple seconds as the trails will start to overlap, thus losing detail in individual flame streaks.
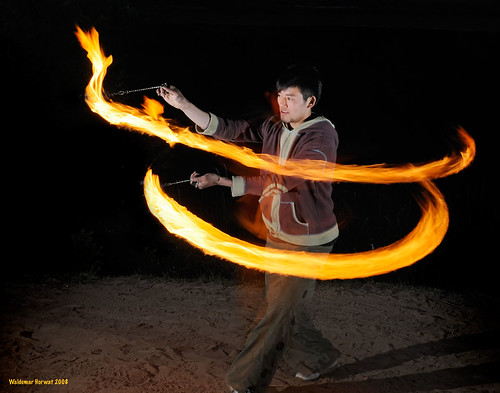
However, extended exposures with flame twirlers can produce just as stunning results (below is a 30 second exposure) – it all depends on your intent and what kind of image you wish to produce.
Freezing the Moment
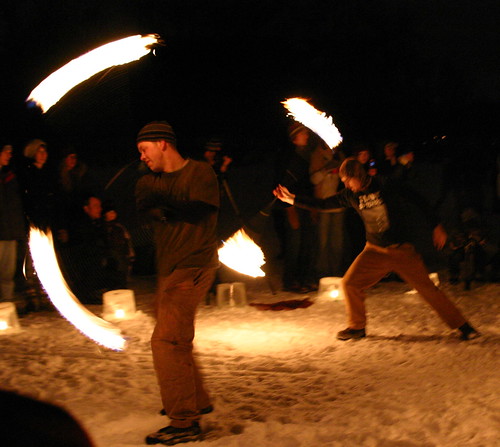
While blurry fire spinners can create an interesting effect and invoke a sense of movement, these kind of images can get repetitive. Some of the most successful photos are ones that show your main subject in sharp focus – this combined with detailed fire trails can create a stunning composition.
The best way to achieve this is by dragging your shutter – otherwise known as using a slow shutter speed to capture your environment and using a flash strobe to freeze your subject. This will give you the benefit of capturing your fire trails with a sense of movement and fluidity, while also having your fire spinner in sharp focus.
Dragging your shutter can be a difficult thing to master all on its own – for you flash enthusiasts, there’s a descriptive and very beneficial guide on this subject written by Neil van Niekerk that you can find here.
For fire trails, the best flash technique to use while dragging your shutter is rear-curtain sync – which means that you’re using a slower shutter to capture the fire trails, and at the end of your exposure you’re firing off your flash to freeze the performer.
Also note that direct on-camera flash can be cold and flattening – a side strobe light would be ideal to add drama and depth to your image (you can read much more about the benefits of off-camera lighting on Neil's flash tutorial linked above). Even with off-camera flash, you’ll probably have to adjust your white balance as flash looks cold and doesn’t match the mood you want to capture with fire.
You certainly don't need to use flash to capture fire trails, but it's a fantastic way to photograph both the trails and the subject in sharp focus.
Other Tips
Don’t increase your ISO too much. Most long exposures (especially at night) will produce an incredible amount of noise using higher ISOs, but this proves to be a particular problem when photographing fire since noise shows up more on darker tones. An ISO setting of 200 is safe, but if your camera handles ISO extremely well (such as with full-frame sensors), you can go higher if needed.
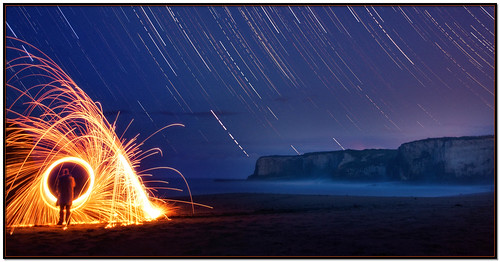
“Get creative” – this is a phrase you hear often in the photo world, but it still rings true. Try combining different types of photography with capturing fire trails – it helps if you know a fire performer, or better yet, are one yourself. A good example of this is the work of Andy Morris, who combined star trail photography with fire spinning.

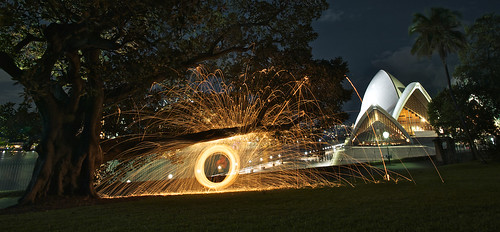
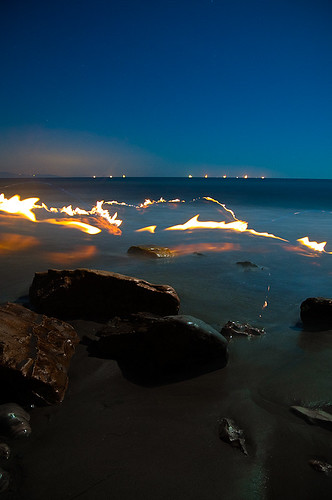
Finally, you don't have to utilize fire spinners in your photography – any kind of moving flame combined with a strong composition can produce stunning results.
It’s a delicate balance to find the right settings for your fire trails – each situation will be different depending on available light and how fast your performers are moving. However, following the steps in this guide will give you a head-start on creating unique, powerful photos of fire.


8 Comments
Lovely, although the guide for flash photography is a 404 / broken – Otherwise i thoroughly enjoyed this tut 🙂
Don’t know why that didn’t take. The correct flash link is here on dragging your shutter:
https://neilvn.com/tangents/flash-photography-techniques/3-dragging-the-shutter/
Thanks Vincent!
Hi links are not working ,have tried 2 , one by Neil van Niekerk and the other by Andy Morris .
Thanks
Ron
Thanks for the tips.
Very appreciated.
The link to Neil van Niekerk is broken 🙁
Excellent article with very helpful details.
great article. any advice on where to start if I am looking to purchase a flash strobe (kit)?
Thank you so much. Will try these tips soon when we hire a fire twirler.