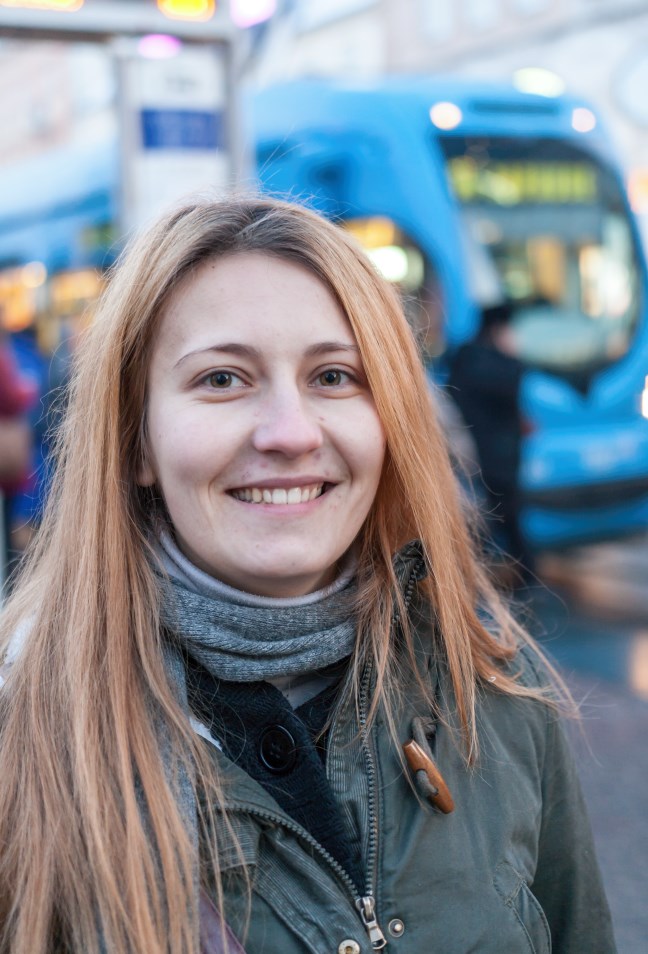
When you are just starting out in photography, retouching portraits can be a hard thing to tackle. But the basics really aren’t that hard. I’ll use one of my portraits shot in natural light to illustrate the process. Step-by-step guides accompany the portrait. Take this article as a quick portrait retouch guide, since I won’t be doing much detail work, just demonstrating the basics that can be done quickly.
How to Get Rid of Blemishes
First of all, we will start with the most obvious skin imperfections, the blemishes. The repair work will be done using the Spot Healing Brush Tool, set on Content Aware mode. The brush should be made with 100% hardness to avoid texture loss.
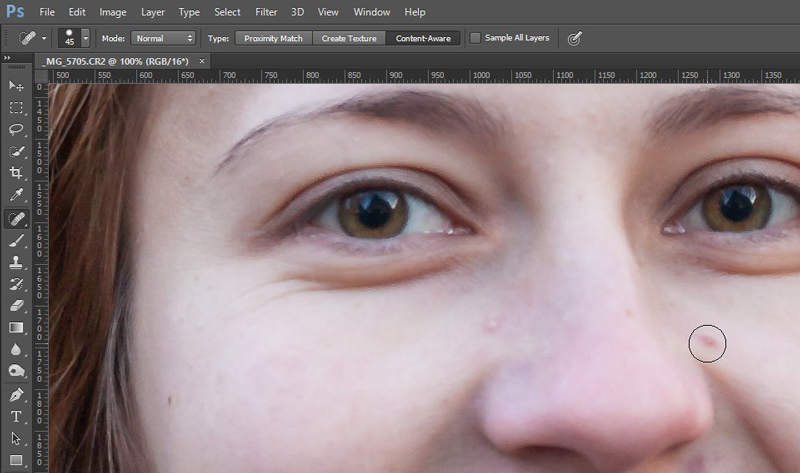
We will repair each blemish separately, brushing over it and some of the surrounding area. If, for example, the blemish is 30 pixels in diameter, we will try to paint over it in a circle of around 40 pixels in diameter.
Skin Tone Repair
Once we are done with the local blemish repair, we will need to target the skin redness, which is more generalized and harder to repair manually.
To do this, we will first make an adjustment layer of Hue/Saturation. We select the red channel, and then move the saturation and hue sliders all the way to the maximum. You should see a weird hallucinogenic image right now, like the one shown below. This is because we need to be seeing which areas of the picture the adjustment is affecting.
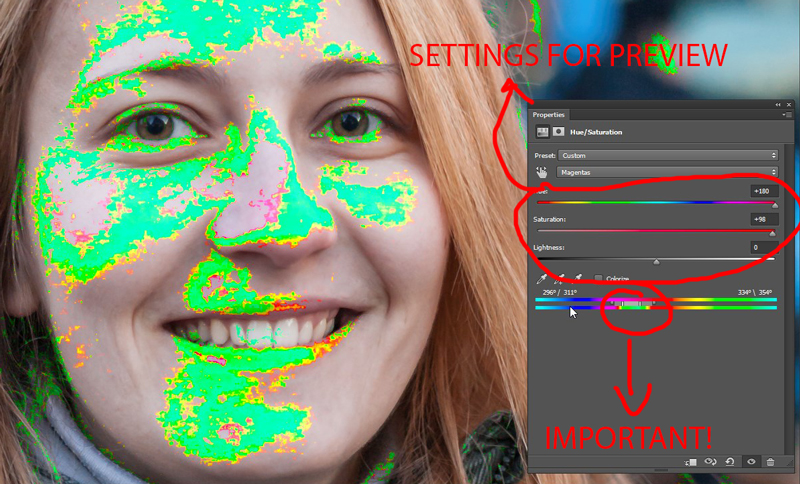
Now, we'll move the small slider down, as long as we can see that it is affecting what we want it to affect. Next, we reset the hue and saturation sliders to 0, and shift the hue slider slowly until the redness nicely disappears.
It will probably affect the mouth as well. That is why we will mask out the mouth with the brush tool, but we will select the mask first.
Teeth Repair
Even though this image doesn’t really need the teeth color being fixed, the process is similar to the redness fix. The difference is that this time we will be working with the yellow tones, instead of the red ones.
On the new adjustment layer, you should select the yellow tones, move the saturation slider to full power, and slide the color slider until the teeth are covered. Now just move the saturation slider in the opposite direction to desaturate the yellow tones. Don’t overdo it, however.
As you can probably see, the whole image is affected. Select the layer mask on the teeth adjustment layer and press CTRL+I. Now you see the effect being canceled out. Take the Brush Tool, set the color to white, and paint over the teeth. Be sure you're brushing over just the teeth, not the gums. This way the effect applies only to the teeth and nothing else.
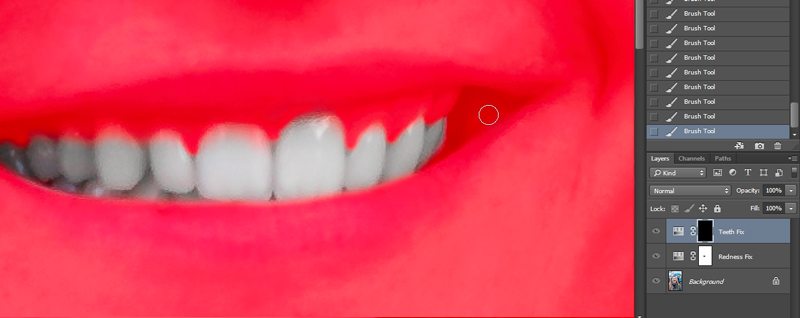
By pressing the \ key, you enable the mask overlay. This way you can see where you've enabled the effect. You can turn off the overlay when you are done by pressing the same key.
Fixing the Eyes and Burning Some Contrast
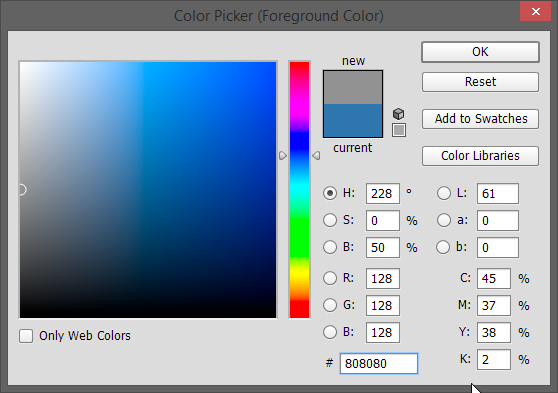
Once you are done with that, it is time for dodge and burn. We create a new layer, and fill it with 50% gray. For the filling process, select the Paint Bucket tool, and then press the foreground color on the right. Select the “B” and enter 50% there. Click anywhere, and you should see a gray screen. Set the layer blending mode to Overlay.
Take the Dodge Tool, set the range on Midtones and Exposure to 2-5 %. Now paint just a little bit over the catchlight on the eye, and a bit in the opposite side. Be careful to not overdo it.
Take the Burning Tool, and with the same settings as the Dodge Tool, paint over some areas which you want darkened In my case, I’ve put some strength in the shadow under the neck, in order to separate the face from the neck a bit more.
Color Grading
This is the last step. Using the Curves Adjustment Layer we will now color-correct and grade the image (only a slight bit, just to demonstrate some of the process).
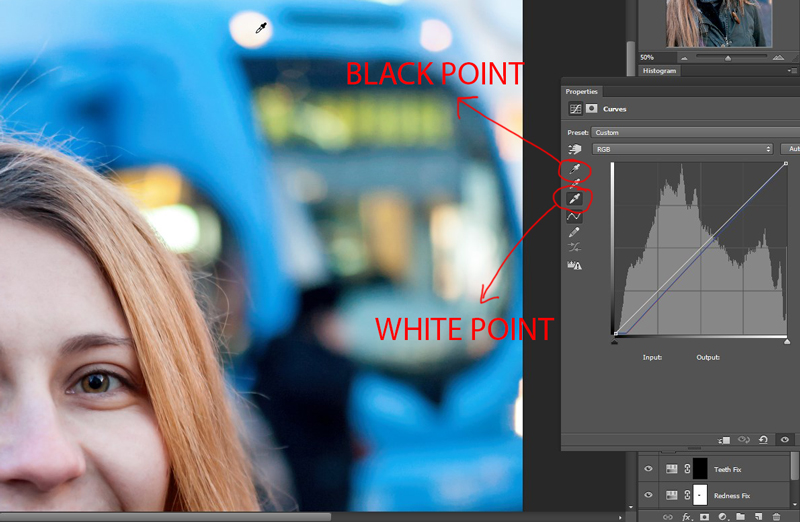
Pick the Set Dark Point Eyedropper tool and click on an area in the image which you perceive as pitch-black. Usually, an area of some shadow (in my case I used the shadow under the left ear) should be dark.
Now, pick the Set White Point Eyedropper tool and do the same on an area you see as being pure white. This time I picked one of the tram lights.
You can use the Set Gray Point Eyedropper tool to set the white balance on the picture, but you should use it on an area that you are completely sure is gray. Not blueish, nor reddish-gray, but truly gray.
Once you are done with that, you can create a new Curves layer to color-grade the image. You can do whatever you like there, adding any color tone you want. It takes some fiddling and practice, but it is fairly easy to pick up.
Just for the fun of it, I tried to make the image look colder and darker, as if it was shot later on in the cold day.
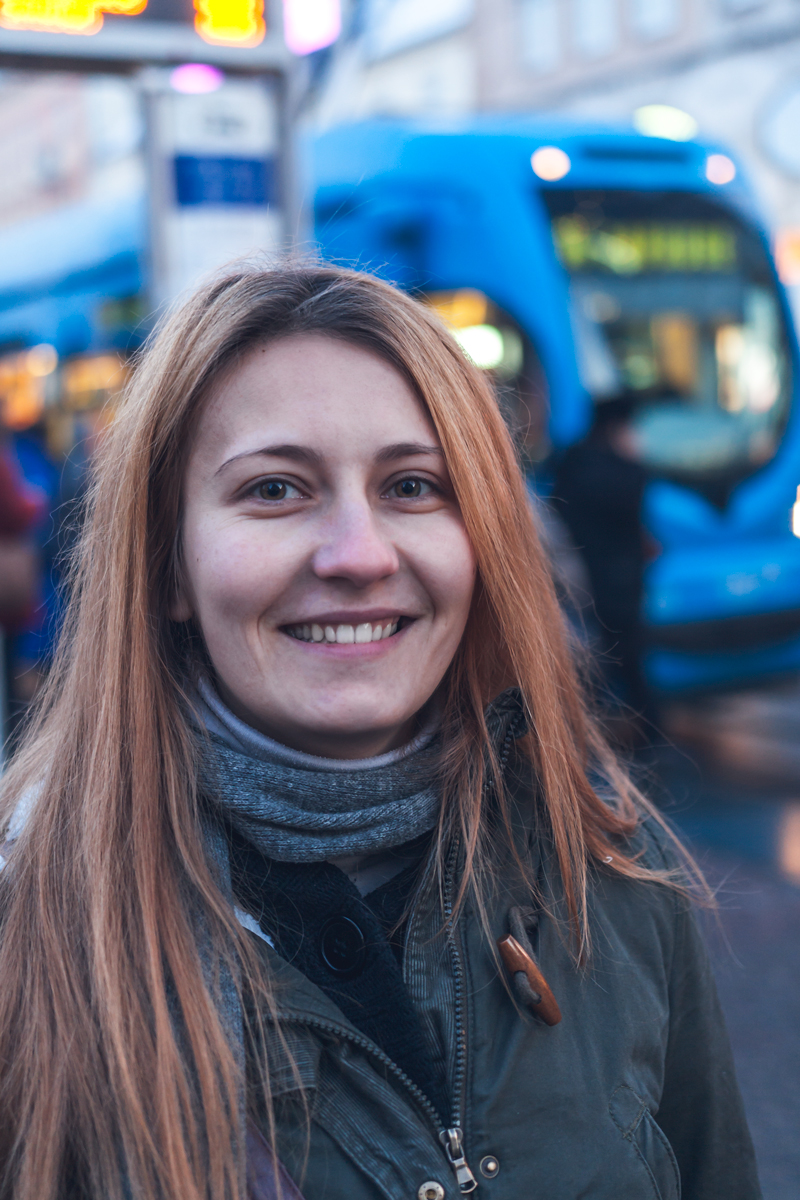
That would be all. This is the most simple technique out there which doesn’t require third-party plugins.
To learn more about portrait retouching, you can check out this useful guide on portrait post-production.

