This is a guest post with photographs from talented New Zealand wedding photographer, Perry Trotter. Check out his great photography iPad app.
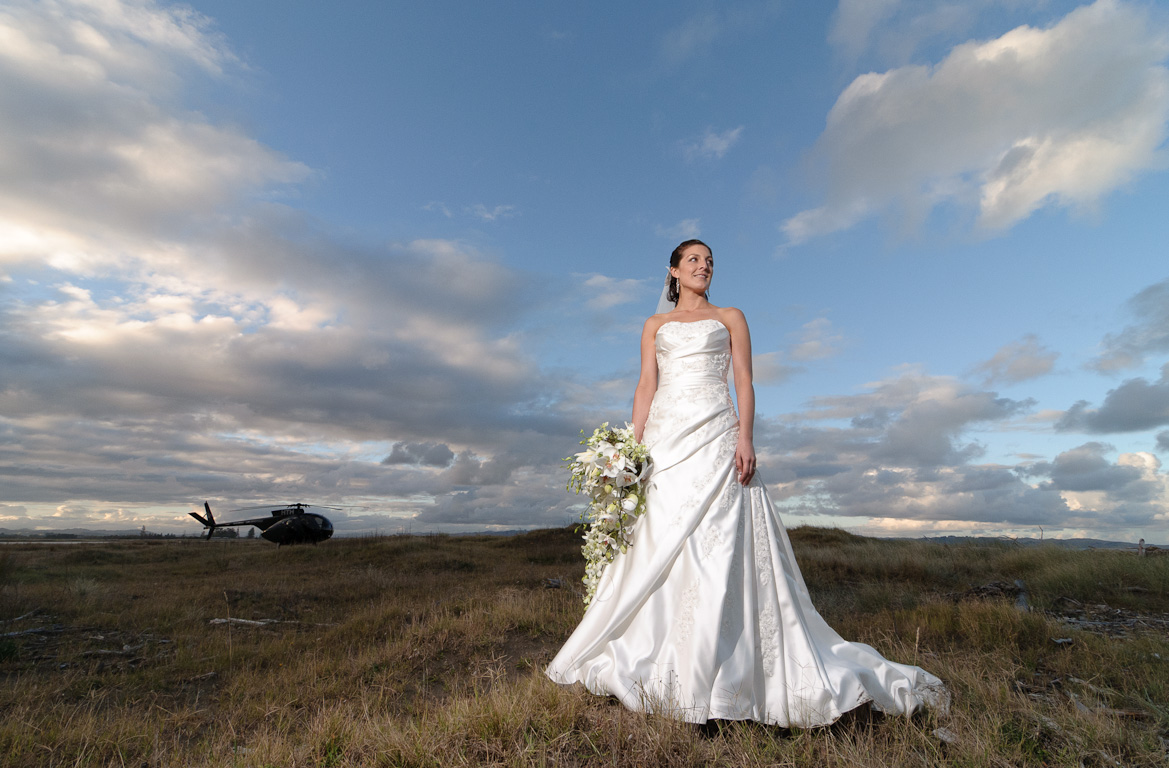
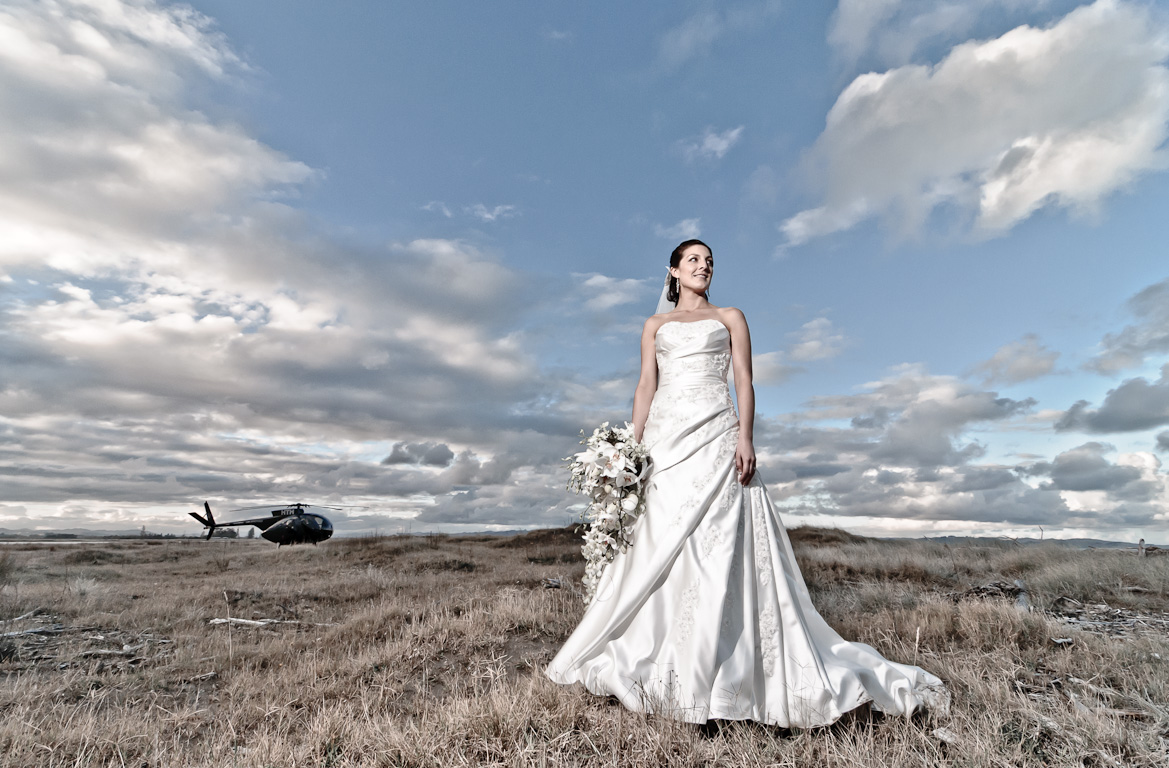
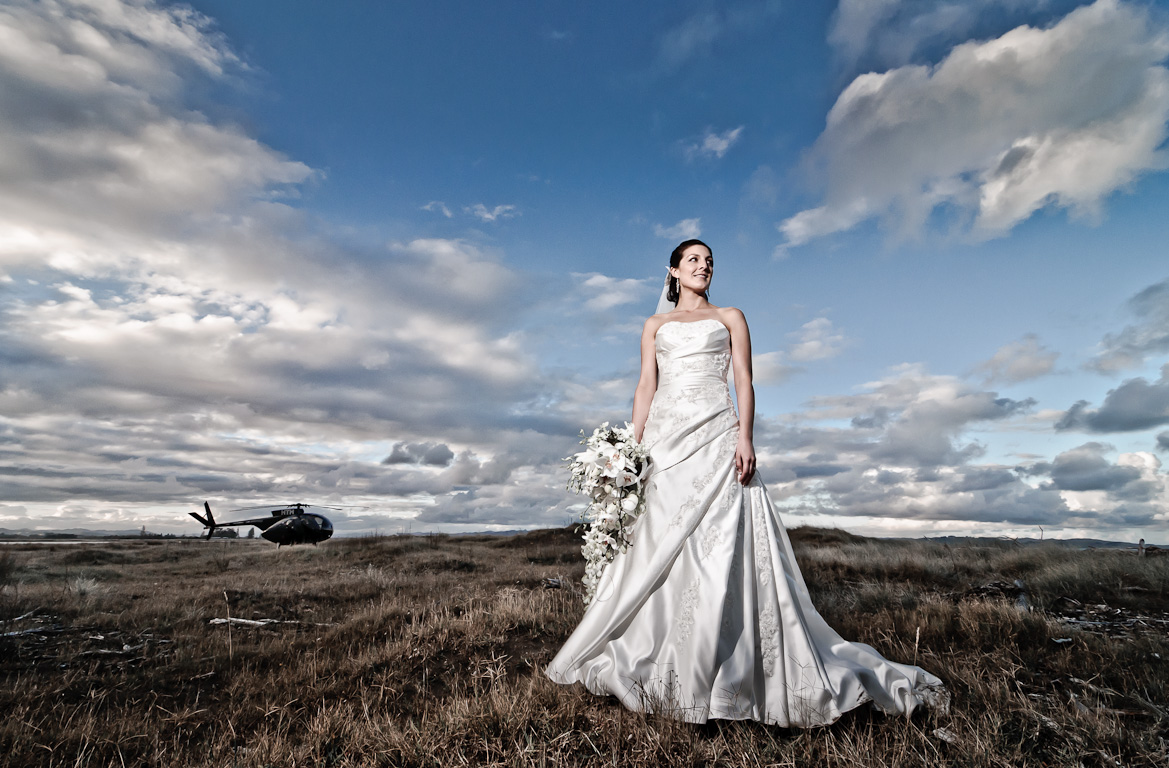
This is one of several images shot at a fall wedding in Eastland, a beautiful region in the North Island of New Zealand. The bride, groom and I were flown to this location for an hour of shooting following the ceremony and prior to the wedding reception. This was one of the last images captured as the light was failing.

The lens was the ultra-wide Tokina AT-X PRO 11-16 f2.8. Because ultra-wide lenses exaggerate the perspective (increasing the apparent distance between near and far objects) it is possible to create quite dramatic landscapes. However, ultra-wides are not particularly easy to use when photographing people. In my experience, anything wider than 16mm (DX) or 24mm (FX) requires the photographer to position the subject rather carefully in the frame. The eye is far less tolerant of perspective distortion when it is applied to the human body. This image was shot at 11mm at which even the slightest change in lens axis alters the composition markedly.
I shot handheld while lying on the ground and pointing the camera slightly upward. This exaggerated the shape of the dress but it also “placed” the horizon where I wanted it (approximately a third from the base of the frame). It of course also enabled me to include more sky in the image.
The bride is also placed roughly one third from the right of the frame.
The Nikon SB-800 flash was used off camera. The groom stood to the bride's right and held the flash quite high. On this occasion I used the Nikon SC-26 cable to connect the body and flash. Had I had more time the shot could have been improved by attaching a diffuser to the flash. This would have softened the shadow edges on the dress.
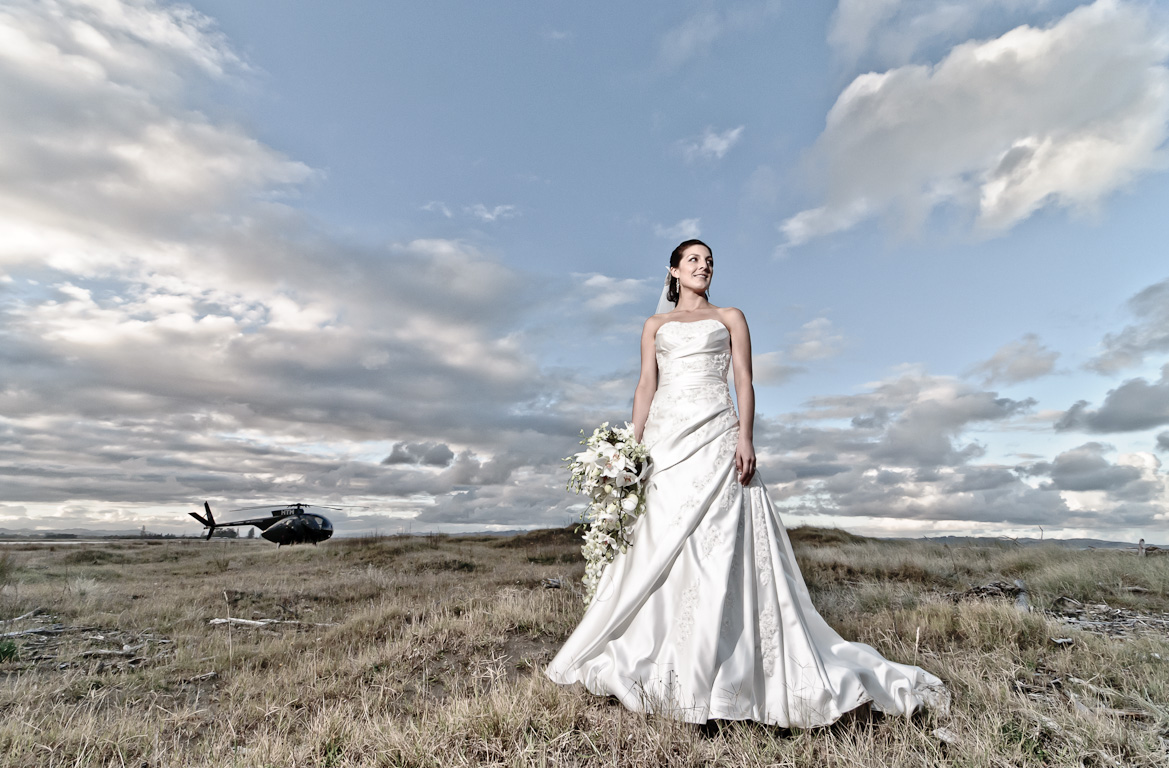
The original image is shown here. To achieve the final result this image was heavily processed in Lightroom 3. The procedure can be divided into three stages: effects, color adjustments, darkening of selected regions.
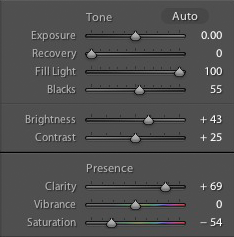
Under most circumstances one would introduce image effects later in the sequence. However, for this image, because the effects are so radical it is best to introduce them at the outset.
First, I pushed the Fill Light to its highest setting. Then, (with the image looking awful), I adjusted the Blacks, Brightness, Clarity and overall Saturation in order to restore the image to something a little closer to reality. The extreme Fill Light setting along with Clarity tends to create a very interesting effect on the details -particular the grass.
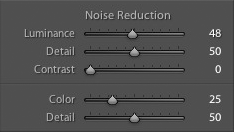
Noise Reduction has also been introduced to create a slightly painted effect.
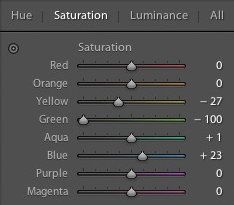
Second, I moved onto color adjustments. Skies are often made more attractive by lowering the luminance and increasing the saturation. It is best to begin with the luminance before touching the saturation. I prefer to use the adjustment tool available within Lightroom's HSL panel.
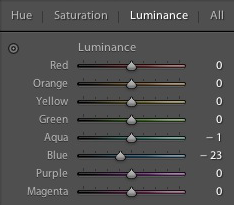
Sometimes it works well to remove certain colors from an image entirely. In this case I removed the green. I also shifted the hue of the yellow grass away from green towards red.
Third, I darkened selected areas of the image. This is most easily done with vignettes and graduated filters. By setting the Lens Vignette midpoint parameter to 0, I created a smooth vignette that draws the viewer's attention toward the centre of the image. This, of course, would not be suitable for an image in which the subject is far from the centre.

I also applied two graduated filters to the image -one from the top down and one from the bottom up. Again it is important that the graduated filter is smooth. A “stepped” look is unattractive.
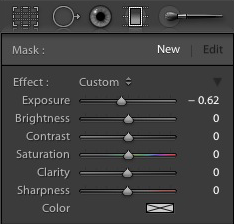
Finally, because the rather radical effects tended to blowout the detail in the upper part of the dress I used the Adjustment Brush to darken the dress very slightly, thus restoring detail.
This is one of six tutorials featured in The Wedding Photographer iPad and iPhone app. A free version is available from the app store.
Author: Perry Trotter
Perry is a New Zealand wedding photographer. You can also find him at Perry Trotter Photography's Facebook page.


8 Comments
UNREAL!! Great indepth tut!! I wish there were more people out there that would reveal their techniques and as importantly, the post edit!
Great work!
That’s a lovely picture, and I’m constantly amazed by what can be done by moving the flash off the camera. I swear by my SC29 cable and SB-600 combo!
Incidentally, with this image I simply increased the contrast a bit..
Peter this shot is AWESOME!!!
Excellent article! I’m always looking for new ways to use Lightroom, and some of these extreme settings give me new things to try.
Perry – thanks for the tutorial. I appreciate seeing the initial image. It shows how you have to be able to see past the image to the print, much like Ansel Adams could see his landscapes. Great vision on that shot.
Thanks for the comments. If you have an iPhone or iPad download The Wedding Photographer Free:
It includes a bunch more before-after comparisons.
Nice. Good to know.
I rented the Nikkon 14-24 a few times to try out wide angle at my weddings. I enjoyed it but the idea sort of slipped away after a while and I went back to my long lenses. I don’t do lots of posing so it was really only helpful during dancing where some distortion was okay. But after reading the article I may get back into the idea. I need something new to work with. Thanks for this!