A few years ago I ran an HDR photography magazine. I regularly tone mapped my images for years, using just about every HDR program out there. Yet, over time I became unhappy with the results. I started demanding more from HDR software. I didn't just want increased dynamic range of light in my images. I wanted, at the same time, the sharpest, cleanest results possible, free from halos, added noise and over-saturation.
It became apparent that I needed to take my post-processing workflow into my own hands, and start manually blending exposures in Photoshop. That was almost 3 years ago, and it was the best decision I ever made.

By working directly with the RAW files in Adobe Camera RAW or Lightroom, and then exposure blending (also known as Digital Blending) in Photoshop, you retain much of the original image quality, and take absolute control over the final product.
With the 5 techniques below, you too can take control over the exposure blending process, and say goodbye to HDR software.
1. Luminosity Masks
We start with the daddy of digital blending – luminosity masks. These incredible tools will do wonders for you imagery – not just in digital blending, but also in gaining fine control over your whole workflow. In the video below you will see a more advanced digital blending workflow that I created, but the first few minutes will show you how powerful luminosity masks are in digital blending.
Feel free to download the Easy Panel panel from my website, which will create luminosity masks for you: The Easy Panel
For a beginner's luminosity mask tutorial, please see the following article: How to Use Luminosity Masks in Photoshop to Transform Your Images
2. Apply Image
For a more automated digital blending technique we can use Apply Image. This will blend our exposures fairly quickly. It isn't as accurate as luminosity masks, but it can still do an amazing job at exposure blending with a huge range of scenes.
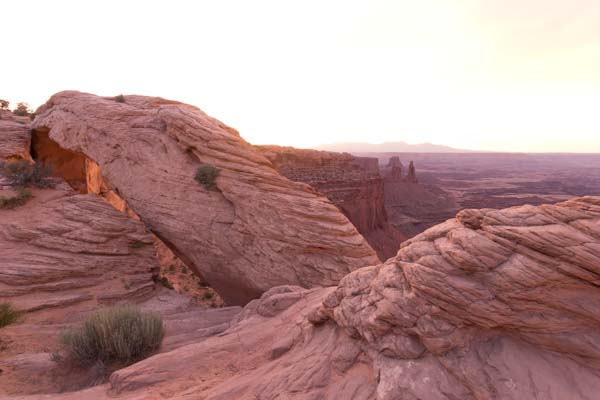
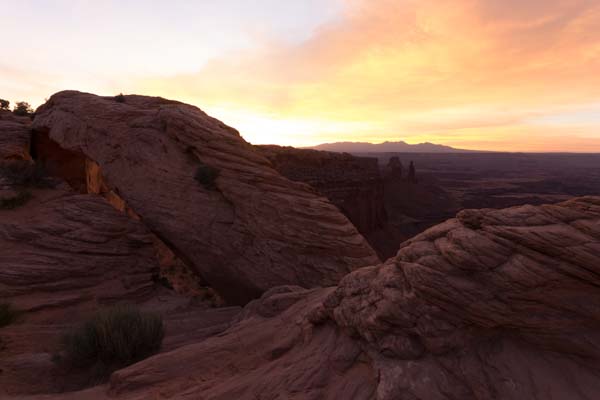
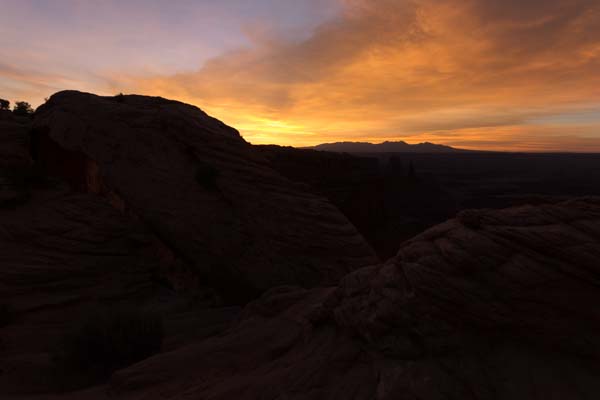
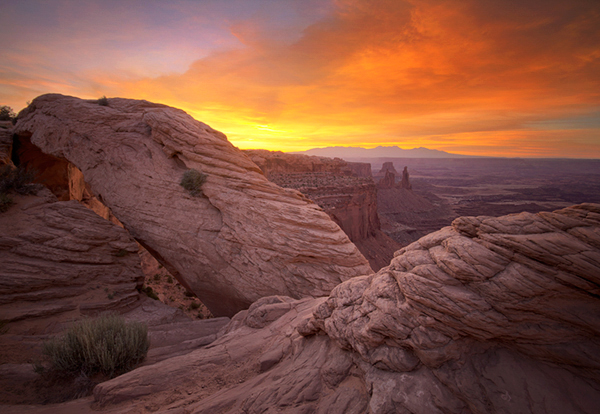
In this example we will work with three exposures (normally exposed, over exposed, under exposed) to create the final blended image below.
Over Exposed
Here is a visual representation of the workflow
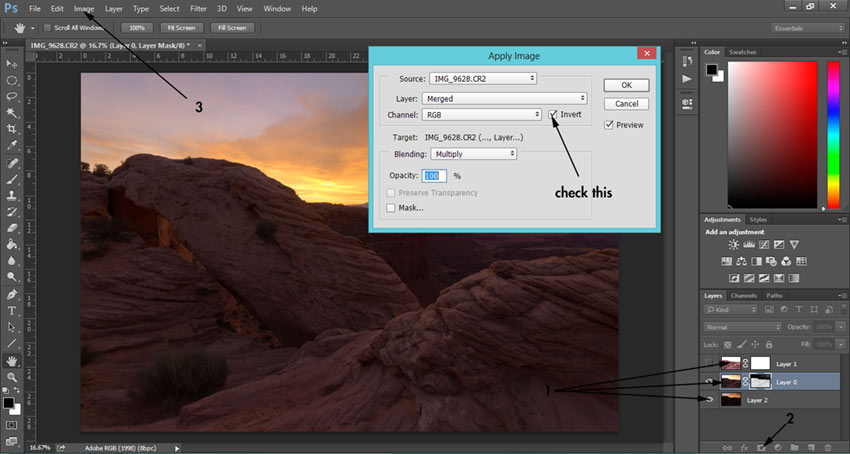
1. Layer your exposures in Photoshop. In this workflow I placed the darkest exposure at the bottom, the brightest exposure at the top, and the base exposure in the middle. However, this is completely dependent on you and the images you are working with.
2. Press the Eye icon next to the brightest exposure to make it invisible, and create a layer mask on this layer. You can do that by going down to the square icon at the bottom of the Layers panel, which says ‘Add a mask' when you hover your mosue over it. Now add a mask on the medium exposure but don't make the layer invisible.
3. Now, with the mask of the medium exposure selected, go to Image>Apply Image. In the dialogue that appears, make sure your settings are the same as the ones above (don't forget to check ‘Invert'). Looking at the medium exposure you will see that a mask has now been applied. You will also notice that your image has changed. It has now blended the medium exposure with the darker exposure.
4. Next select the mask of the brightest exposure, make this layer visible and do the exact same thing you just did with the medium exposure. You may have to reduce the opacity of this brighter exposure so the blend looks natural.
And that's it! It seems like a long process but it actually only takes about a minute to complete. For an alternative way of using Apply Image, please see this video: Phlearn Apply Image Tutorial
3. Rapid Blend If
This method is very quick. It is a little bit less effective than Apply Image, but still extremely powerful at exposure blending.
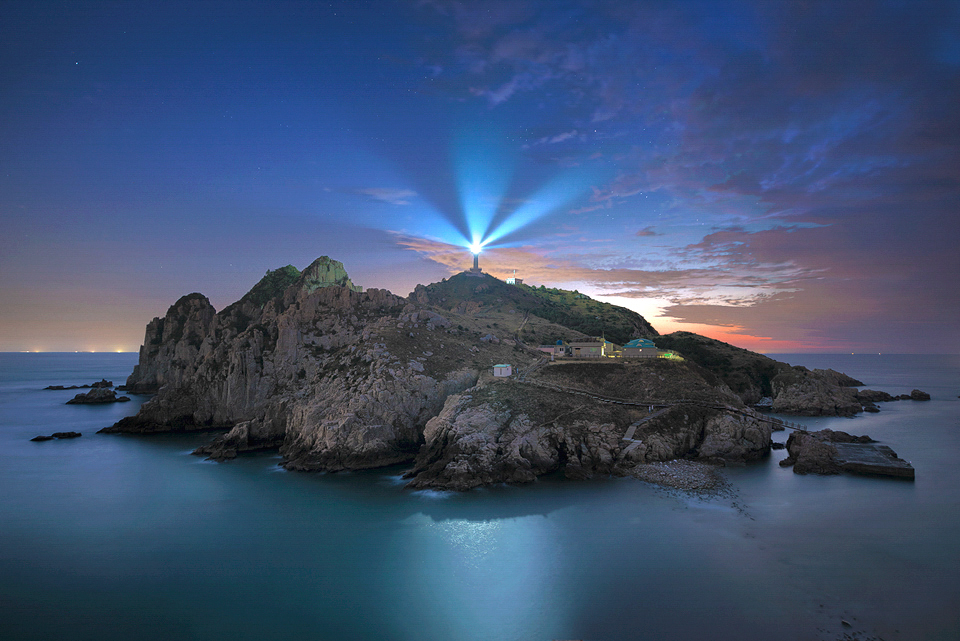
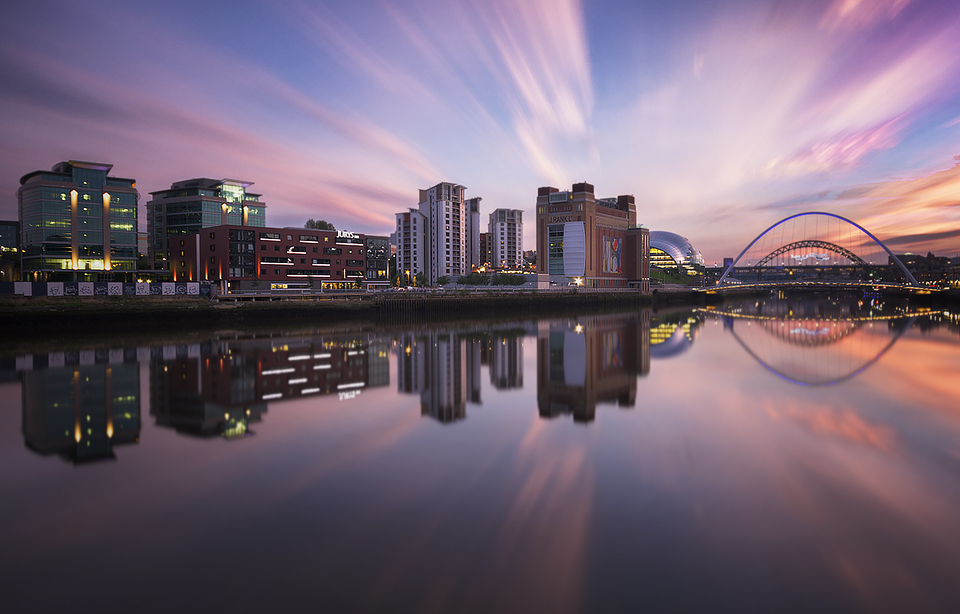
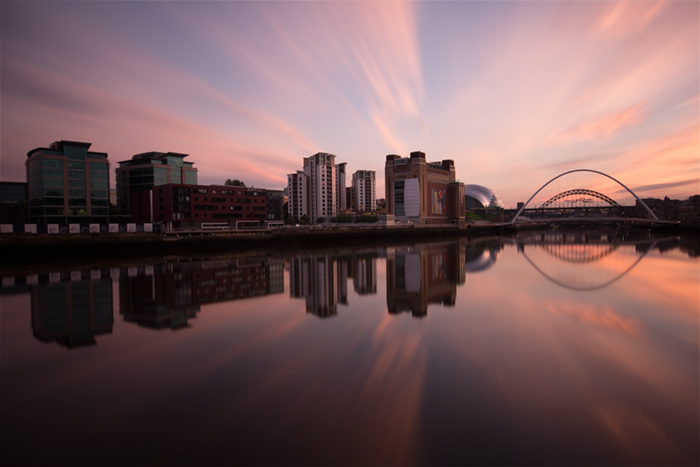
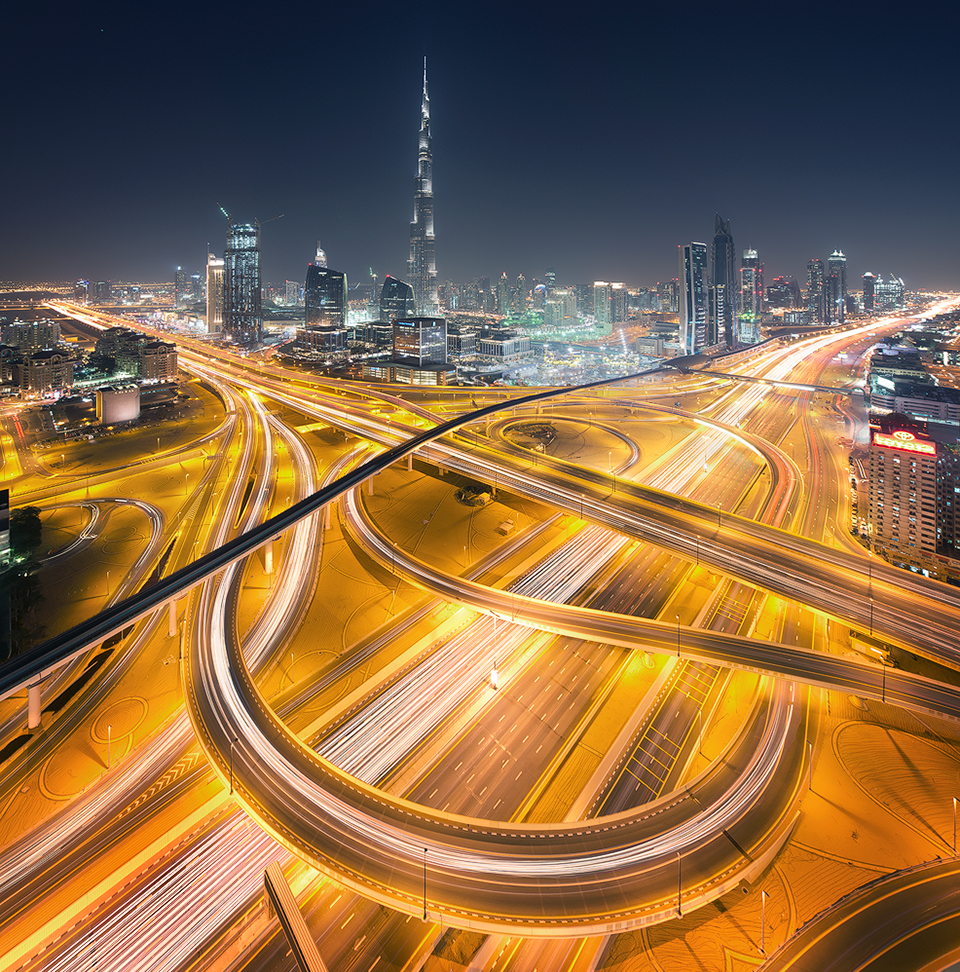
The below image was created using Rapid Blend If
Over Exposed
Here is a visual representation of this workflow
1. Layer your images in Photoshop. Place the base exposure at the bottom. In this example the brightest exposure will be our base exposure.
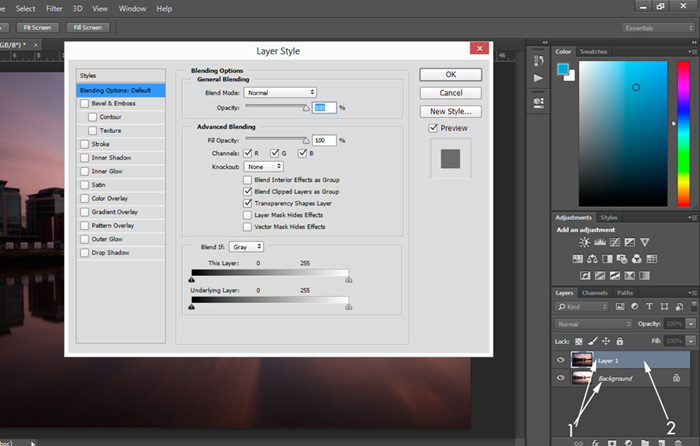
2. Next, double click on the dark exposure. You need to do this to the right of the thumbnail. This will bring up the Layer Style Dialogue.
3. At the bottom of the Layers Style box you will see Underlying Layer. We need to snap the little arrow to the left side of this in half. We do that by holding CTRL+ALT (CMD+Option on a Mac), then left-clicking and sliding this arrow to the right. As it snaps in half, and you drag it to the right, you will see the image under the dialogue change. Slide it all the way to the right to complete the blending process.
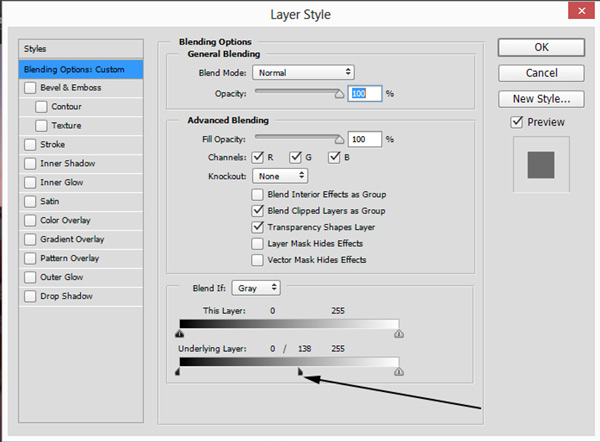
When you've finished, press OK. The exposures will now be blended. If you think the image is now too dark, simply reduce the Opacity of the dark layer until you are happy.
4. Gradient Masks
Gradient masks work in a similar fashion as Graduated Neutral Density filters. They smoothly blend multiple exposures, but are mainly effective with scenes where this a flat horizon. Please see the tutorial below for learning how to use Gradient Masks.
5. Brightness Range Selection – CC Only
This new exposure blending technique has a huge amount of potential. It was developed in CC (Sorry to users of early version of Photoshop. I used this to create 10 incredibly precise masks that work similarly to luminosity masks, that I call Range Masks, and can be downloaded with the Easy Panel (See link in the Luminosity Mask section).
This video will show you how simple and effective Brightness Range Selection can be.
The 5 techniques here are just the tip of the iceberg for Digital Blending. Learning how to use each of them effectively is an exciting journey, well worth the time and effort involved. Your images will never be the same again.


3 Comments
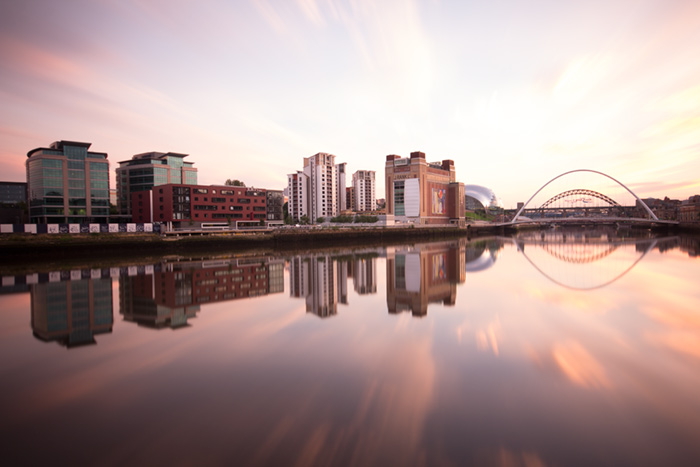
It appears to be a mistake in third point (rapid blend). Source images show no lights are turned on in buildings, but resulting one show a lot of them. Although is a very interesting article and I think it worth to consider using or not HDR software.
Interesting that you’ve received no reply to your comment in the 4.5 months since you left it. The blended photo obviously did not come from the source photos, although the sky appears to be the same.
Look harder.