Anyone that subscribes to the Adobe Photographers package will know about the Lightroom Mobile app. It is a sort of “Mini Me” to the main Adobe Lightroom program.
As such, it allows you to organize, edit, rate, and add metadata to images. These images are not only those on your iPhone but also any in Collections that you have chosen to sync with Adobe Cloud.
However, you don’t have to be an Adobe subscriber to get Lightroom Mobile; it is available as a free download. The only main caveat is that you lose the syncing ability. So why would you get Lightroom Mobile if you don’t use Lightroom on your main computer? Well, there’s one very good reason, it has a powerful camera app built in, one that probably surpasses the capabilities of your default camera app. Today we are going to delve a little deeper into that camera app. This article is based on Lightroom Mobile for Apple IOS, but it should be similar to Android.
The Lightroom Mobile Camera Interface
When you first open Lightroom Mobile, you will be in the traditional image management interface. However, at the bottom right is a small blue button with two icons. The left icon lets you add images to Lightroom Mobile from your default phone galleries. The other is the dedicated camera button. Pressing it will take you through to the Lightroom Mobile camera.
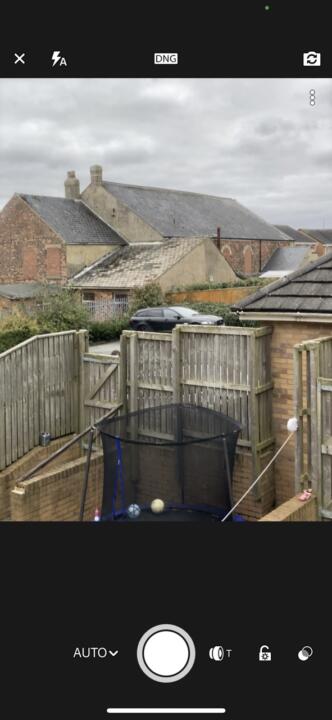
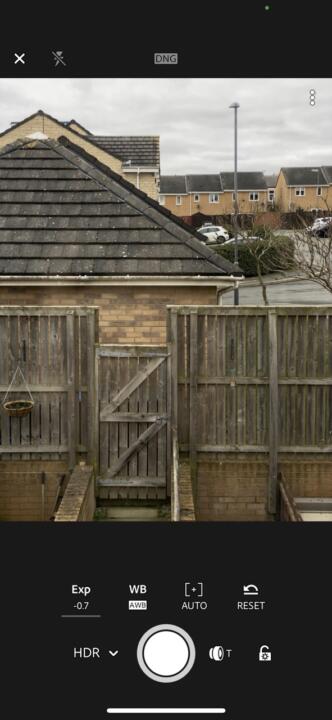
The camera mode is fairly intuitive. At the top, we have the flash icon, the file type, and the front/rear camera switch. Clicking the x in the top left will close the camera and return you to Lightroom Mobile image management.
At the bottom, you will see Auto – we will discuss that in detail in a moment. Next to this, we have the shutter button, lens selection, exposure lock, and, lastly, the live filters.
At the top right, under the camera reverse icon, are three dots. Clicking on these will reveal some further options. These include the image ratio; default is set to 4:3, the self-timer, a range of compositional grid overlays, highlight clipping, and screen options.
You can set these as you like. For example, I like to have a thirds grid set for most shots, and when shooting from a tripod, I tend to use a self-timer to reduce camera shake.
Lightroom Mobile Advanced Shooting
If there is one reason anyone should use the Lightroom Mobile camera app, it’s because it shoots RAW. In particular, it uses Adobe proprietary RAW, known as DNG. This affords us all the benefits of shooting RAW on our larger cameras, more dynamic range, and control over white balance and sharpening.
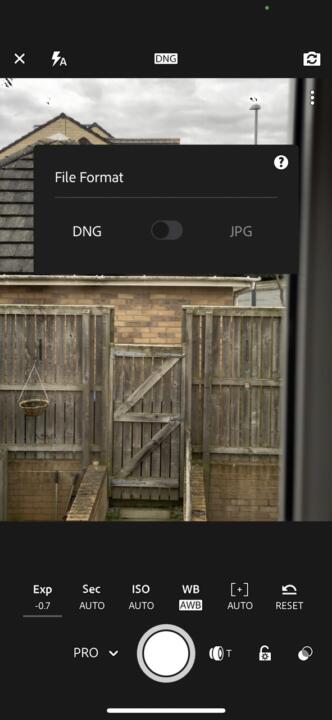
To switch to RAW, we simply touch the file type icon at the top; the default will be JPG, and clicking it will change it to DNG. On my iPhone, there is no option to shoot RAW plus JPEG. It’s also possible that some phones will not offer the option to shoot DNG.
The real fun starts when we touch Auto on the bottom left of the screen. You will find two other options. Professional Mode and High Dynamic Range.
Lightroom Mobile Professional Mode
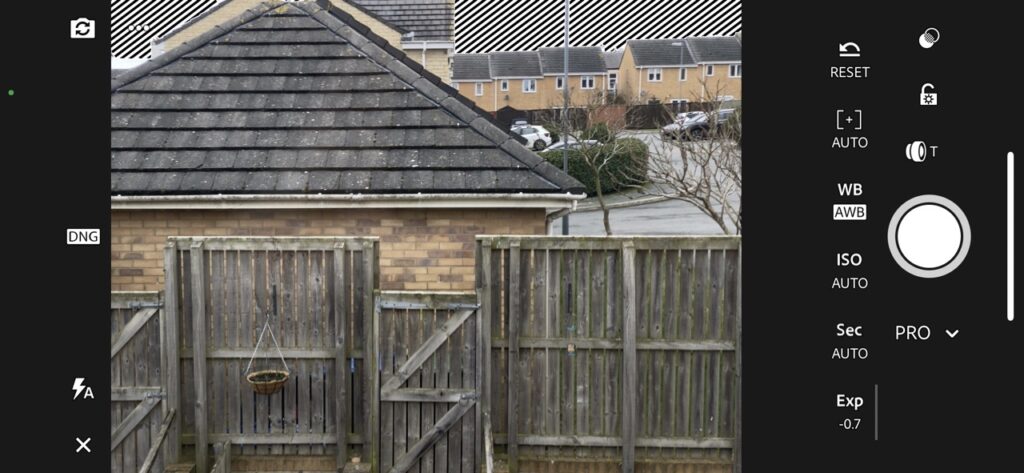
Professional mode combined with DNG makes Lightroom Mobile’s camera app a powerful tool. In Professional Mode, we can effectively put our phone into manual mode.
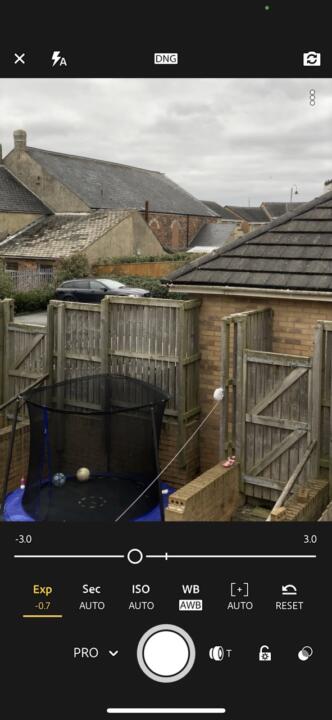
Let’s take a look at the tools we have available.
- Exp is exposure compensation. This will give us a slider that we can use to under or overexpose the image by up to 3 stops.
- Sec allows us to determine our shutter speed. The default is Auto. However, we can manually set a shutter speed from 1 second down to 10000th of a second.
- As its name suggests, ISO allows us to change the camera sensitivity. This ranges from full auto to ISO 25 at the low and ISO 2000 at the high end.
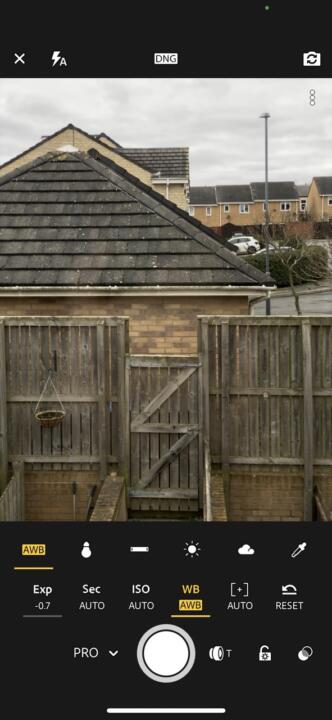
- WB allows us to set an auto white balance or choose from several presets. Lightroom Mobile also includes a handy white balance picker which allows you to select a point on the screen from which to set your white balance.
- Auto is a focus mode. The default is the automatic focus, but you can manually change the focus using a slider. There is a peaking display that shows you what elements of the image are in focus.
- Reset will set all the tools back to their default (auto) settings.
Shooting With Lightroom Mobile
Should you decide to shoot in Professional Mode, you have full control over the exposure and focus. Tapping the lens selector will alternate between the standard lens and the telephoto. On my iPhone 11 Pro, there is no option to use the Ultra Wide lens in professional mode. This may be different on other phones.
Touching the screen will bring up a square box. This is where the camera will be focussing in AutoFocus mode. Dragging a finger left or right will apply exposure compensation to the image, making it lighter or darker. Pressing the lock icon will lock both exposure and focus.
Let’s take a brief look at HDR mode. In this mode, we get Exposure Compensation, White Balance, and Autofocus. When we press the shutter, Lightroom Mobile will take a series of images under/normal and overexposed. It will then merge them and save them in the image management part of the app under All Photos.
Summary
Lightroom Mobile lacks some of the tools that the default apps have. Video, slo-mo and panoramic modes are all notable for their absence. However, it’s as a dedicated photography app that Lightroom Mobile shines. The ability to shoot RAW is a big bonus when shooting from the small sensors of smartphones. Add in the manual exposure and focusing tools, the ability to change ISO and white balance, and Lightroom Mobile starts to become a powerful app for smartphone photographer.




1 Comment
Is there a way to “lock” camera settings so that they are the same the next time you open the camera mode?
Thanks,
Ken