I believe it's always useful to see how various shots are edited in Adobe Lightroom – this can help you become a much more skillful photographer.
Lightroom is an extraordinarily powerful program. As well as being possibly the best image management app on the market, over recent years it has become a superb RAW editor as well.
All that power, however, comes at a cost. Lightroom can be very difficult to master, especially for a beginner in photography.
I am a keen advocate of a real-life type of tutorial and as such, today I would like to demonstrate how I edited a seascape picture using Lightroom.
The Unedited Image
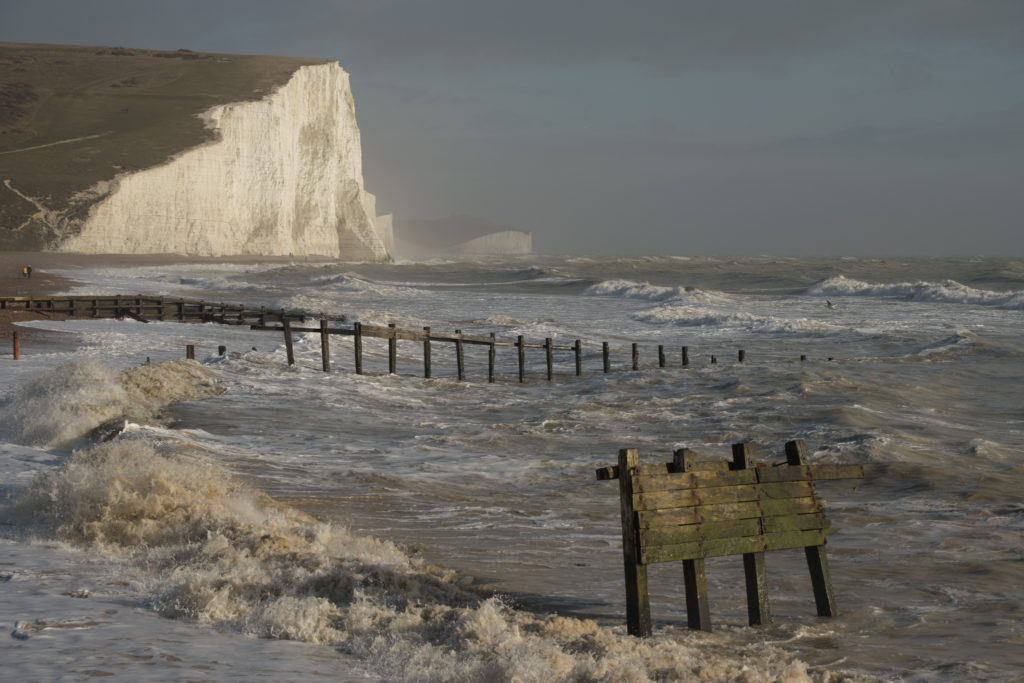
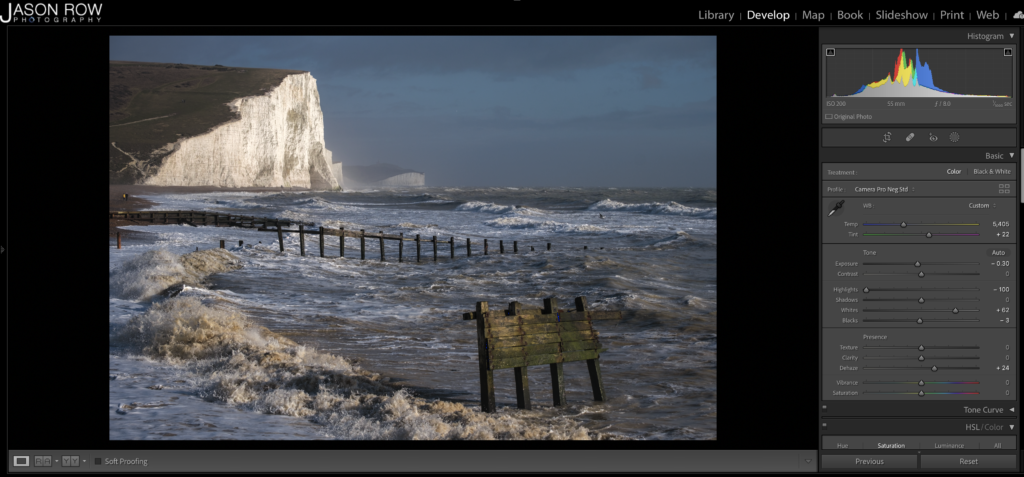
This is the image that we are going to work with. It was taken at Cuckmere Haven on the South coast of England. I had waited the best part of six hours in my car for the light to become right.
It was shot in RAW, using a Fuji X-T4 with a 55-200mm lens at 55mm. As you can see, there is plenty of information in the image to work with, but it lacks drama. Let’s see if we can change that.
Know What You Want To Achieve
The first key to processing any image is understanding what you want to end up with. With this image I want to enhance the stormy feel, make the white cliffs stand out a little more, and add some drama and clarity to the sea. The image has been deliberately shot with a high shutter speed to suggest the power of the storm and I want to enhance the waves crashing ashore.
As we can see from the histogram, the image is well exposed with a decent tonal range that we can expand. So let’s get into the editing.
The Basic Edit
When working on an image, you always do the basic edits first. Basic edits are to get the exposure, color, and contrast where we want them. First up is the exposure. Although the exposure looks spot on, we can move the exposure slider to the left a little in order to darken the overall image. This gives it a more moody feel.
Next, we move the black slider left to the edge of the histogram and the white slider right to the edge of the histogram. We will also move the highlights slider pretty much all the way to the left. This will help add a little definition to the cliffs and sky. Clicking on the little triangles top left and right of the histogram will reveal if we have blown the highlights or crushed the blacks.
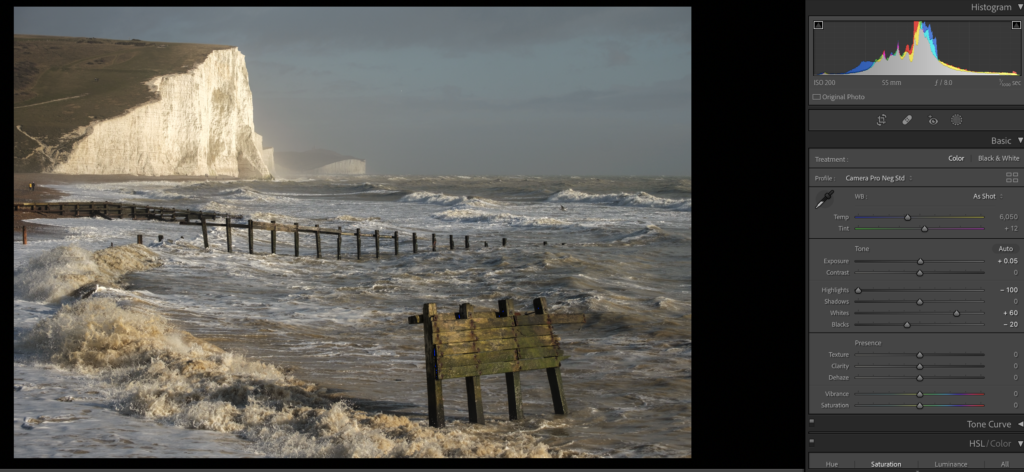
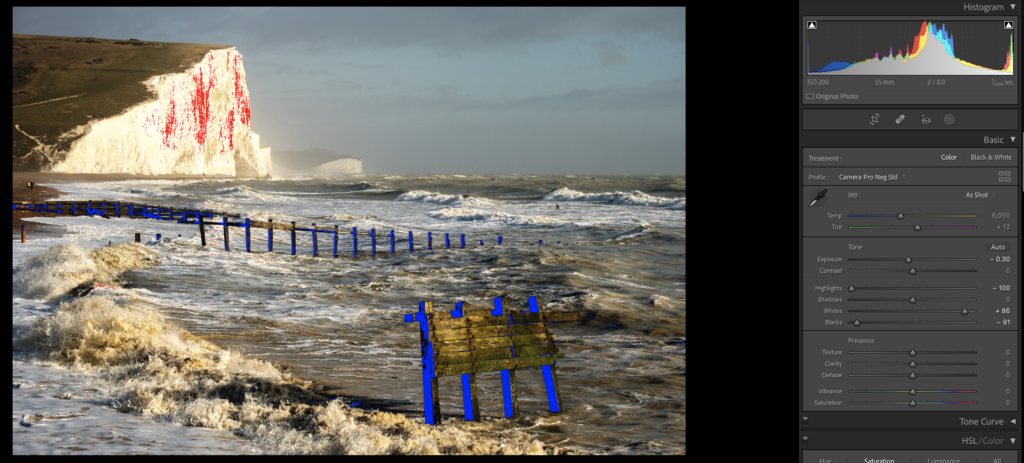
Next, we want to work on the color balance a little. Because the image is a RAW, we can do this after the fact. I want to have a slightly cold feel to the image so I move the temperature slider to 5400k. This slight change makes a big difference to the mood. However it feels like there is a slight green cast to the image, so I add a little magenta in the tint. Plus 22 magenta, looks just right.
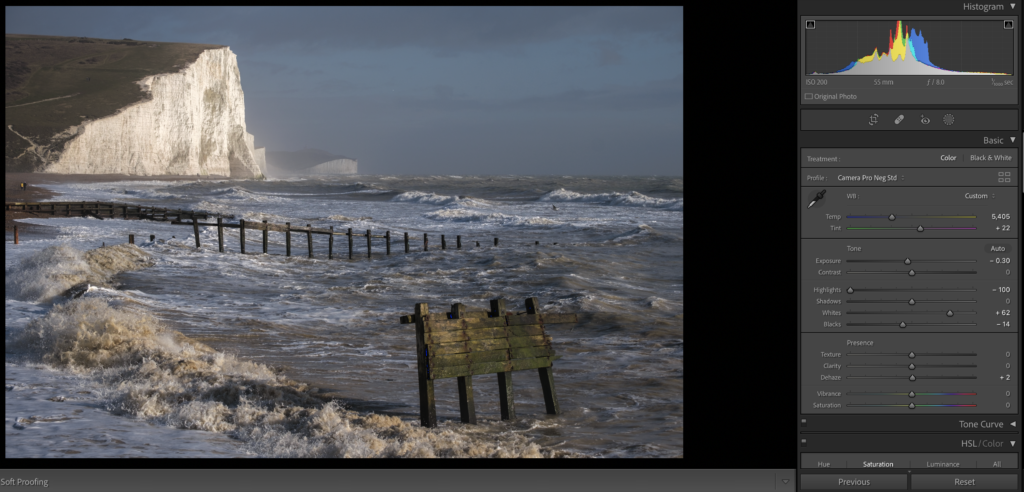
Lastly, for the basic edits, we are going to add a little dehaze. Dehaze is a tool that is very easy to overuse! However, in this image, we do have some misty areas in the background and the image will overall benefit from a little dehaze. In this case, we slide to the right around plus 20. Keeping an eye on the histogram we see that the blacks have crushed very slightly. To correct this, I have back off the blacks a little.
Playing With Masks
Now we have the overall image corrected, it’s time to work on specific parts of the shot. We will start with the sky. In a fairly recent update, Adobe added a sky selection tool to Lightroom. It’s pretty effective most of the time and this is what we will use. It is found with masking tools underneath the histogram. Clicking on the circular icon will reveal a number of options. We are going to click on the sky. Lightroom will spend a few moments calculating, then return with the sky selected. It has done a pretty good job but as you see below, it has selected some of the hills and cliffs in the background.
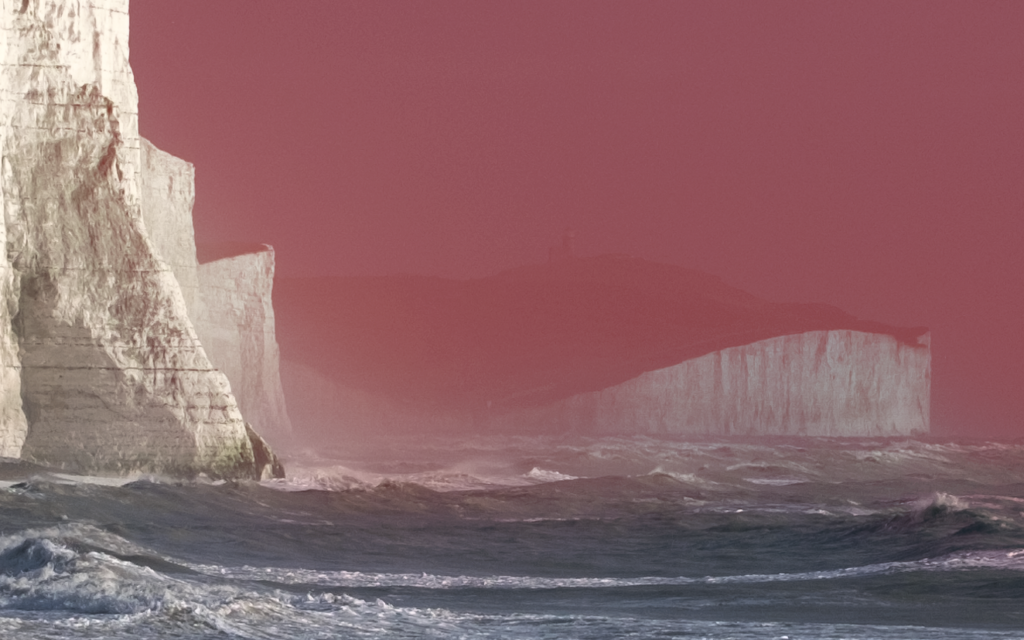
We are going to paint out that part of the mask. To do this click on mask 1 and then sky. Now click on the subtract button and select brush. From the brush menu, select a reasonable size for the brush and then bump up the feather a little. This gives us a wide blend to work with. We can now paint the cliffs and hills back in.
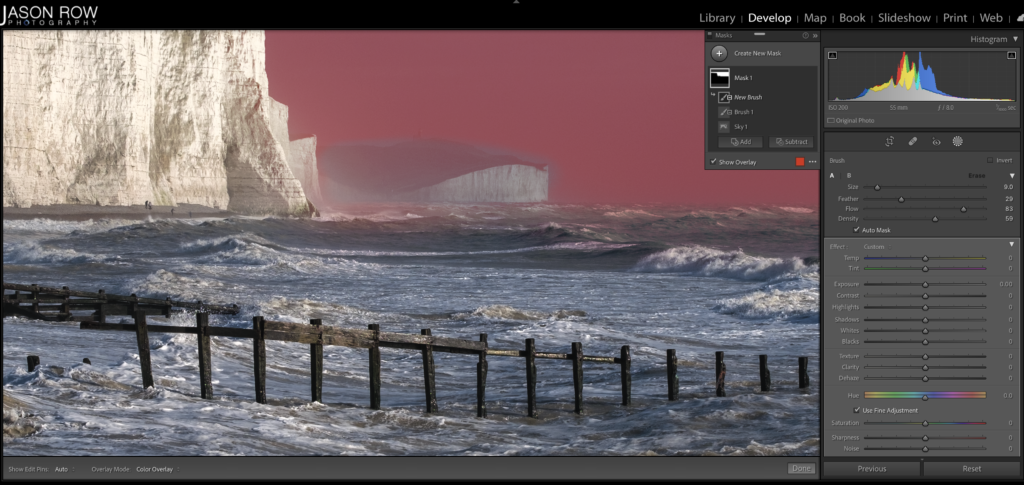
To add drama to the sky, I slide the blacks back a little. I have also added about plus 25 of dehaze to punch the contrast and about plus 15 clarity to add a little definition.
Enhancing The Sea
To make the sea punch a little, we are going to use the Graduated mask. Again from the mask tool, select ”create new mask” and then click linear gradient. I draw a mask up from the bottom to nearly the top of the image. This should give us leeway to work on the sea in the bottom half.
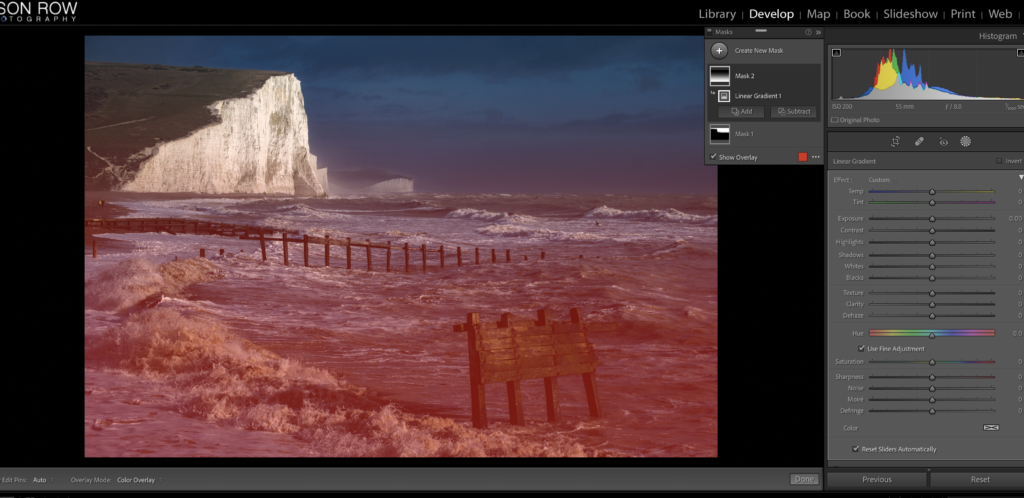
For the sea, I bring the white slider right a little to enhance the foam in the wave. Then I add plus 20 clarity to give the spray some definition. I also add plus 35 saturation to enhance the blueness of the sea.
The Cliffs
The last part of the jigsaw is to enhance the cliffs. To do this, I will draw a radial gradient around the cliff area, again using the create new mask button. I pull the highlights left to around -50 to decrease the exposure of the cliffs. Then I add about plus 50 clarity. The overall effect is slight but makes the cliffs more prominent in the image.
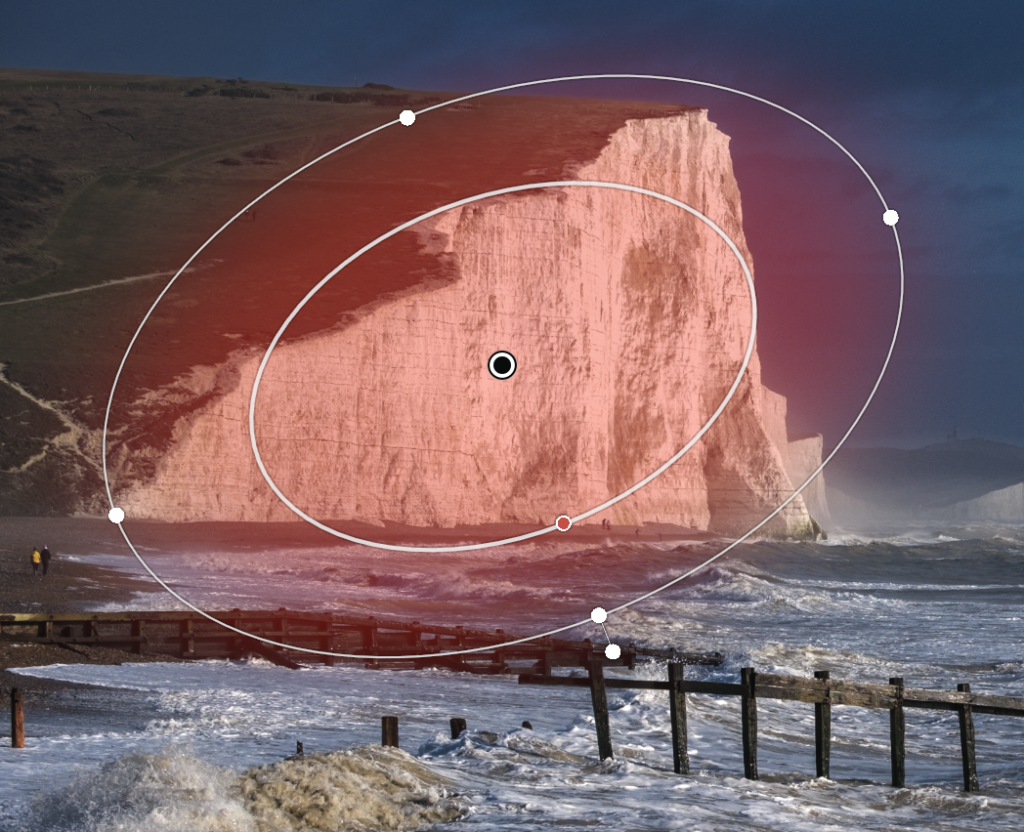
With the masking complete, I click the ”done” button at the bottom of the editing screen.
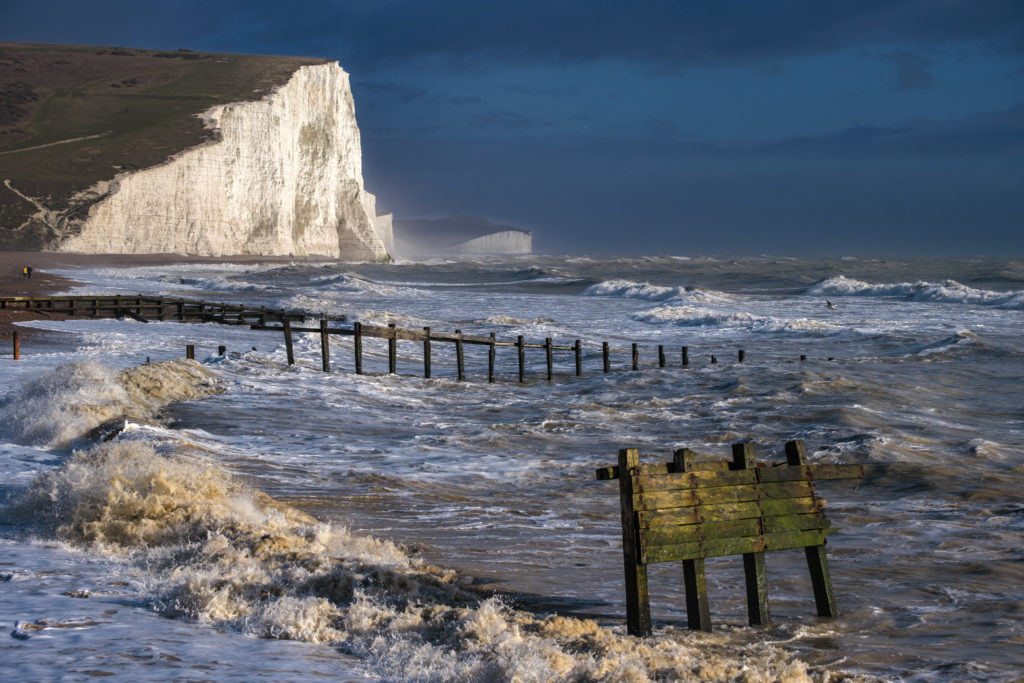
The final touch is to add a tickle of vibrancy to the image, just plus 10 should do. As you can see from the comparison below, there is quite a difference in the look of the image. With practice, you can edit an image like this in around 10-15 minutes.
If you are more of a visual sort of person, I have also done a video on how to edit this image.
Lightroom is an incredibly powerful tool and there are often many ways to achieve similar results. The above has been my standard workflow for most images but depending on the type of image and style that I want to achieve, there are also many other options open to me. If you would like to see more Lightroom editing articles like this one, let me know in the comments below.



3 Comments
Yes, please do more of these LE edit articles and videos. Thank you!
Brilliant!
I loved your input on both these areas, they both gave me a whole new way how I will of go
about enhancing my images in Lightroom.