No matter if you’re shooting landscapes or portraits, it seems that almost all outdoor photographs suffer from the same disease when they come out of the camera.
The most common issues you’ll face almost every time you shoot something outdoors are overly bright skies, foregrounds that are too dark and a general lack of contrast and vibrancy.
While these things seem like serious issues, they can be fixed in Lightroom quite easily. It’s actually surprising how much creative editing can be done in Lightroom without having to use Photoshop.
The following five tips can surely speed up and enhance your editing workflow when it comes to outdoors photographs:
- Check the highlights and shadows
- Remove the Noise
- Use White Balance, Colour And Hue Properly
- Increase The Contrast And Clarity
- Decrease The Luminance Of The Blues
1. Check the highlights and shadows
Issues with highlights and shadows are among the most common ones in outdoors photography because we can’t control the natural light.
Because of this, every photographer should develop the ability to quickly recognize overexposed and underexposed parts of the image and fix them.
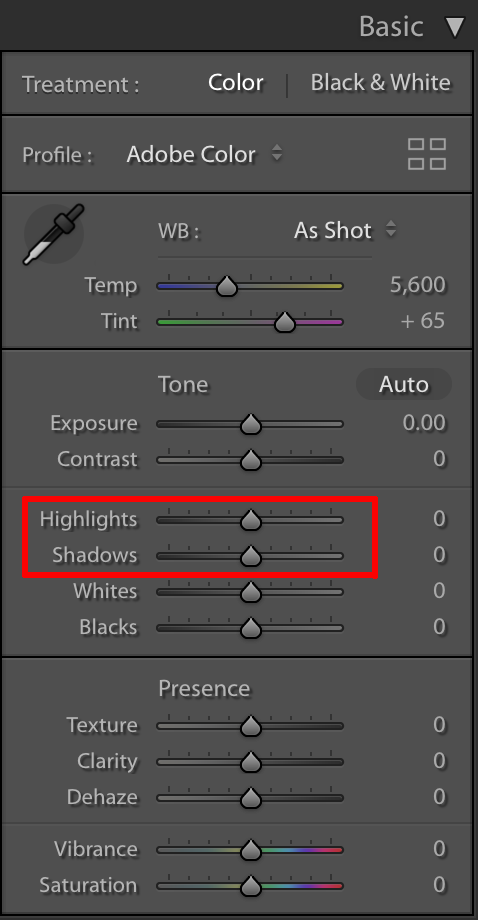
An easy way to do this is to take a quick look at the histogram. For instance, if your histogram in the Develop module in Lightroom is smashing up against the right wall, your highlights are overblown. On the other hand, if your histogram pushes to the far left, you probably need to bring up the shadows.
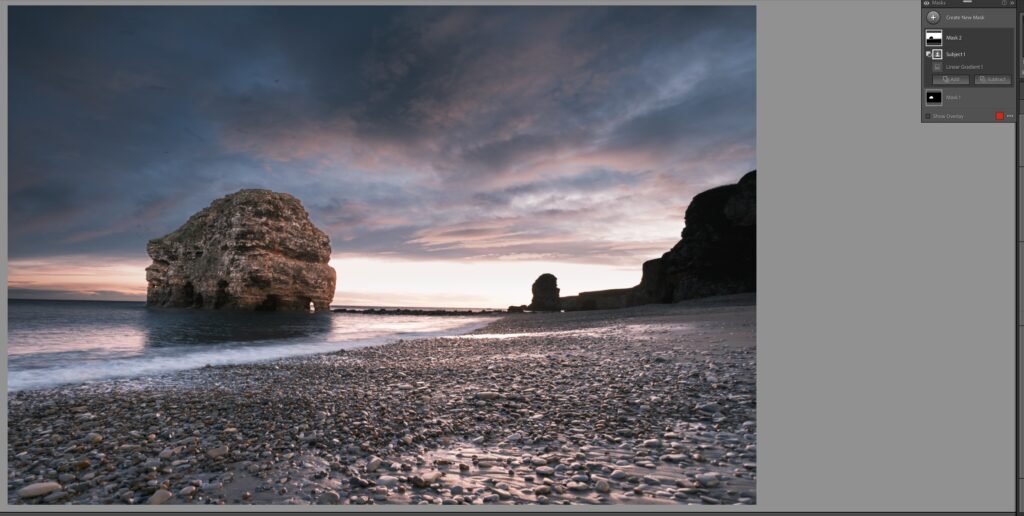
You should also know that decreasing the highlights can help you add more detail to the sky – this is quite important in landscapes!
Decreasing Highlights:
You should also know that decreasing the highlights can help you add more detail and textures to the sky – this is quite important in landscapes! Doing this will only affect the brighter areas of the skies and not the darker ones.
Increasing the Shadows:
Dragging the shadows slider to the right (increasing the shadows) will brighten up darker areas in the image. This is mostly important in situations where you photograph a scene and the foreground or other shadow regions appear completely dark. Doing this will not affect the brighter areas like the sky in your image.
2. Remove the Noise
If you happen to shoot models or landscapes in low light, chances are you’ll have to deal with noise, especially if you’re not using any additional lights.
Depending on your camera’s ISO capabilities and the settings you used, there might be some noise in the image. The amount of noise you want to keep in your image is totally a personal preference, but it’s something to consider when editing your portraits.
If you want to drop the noise, you just need to head to the detail tab in Lightroom and look for the luminance slider under the noise header. Preserving some noise in outdoors portraits can look appealing because some slight grain can give a certain vintage vibe.
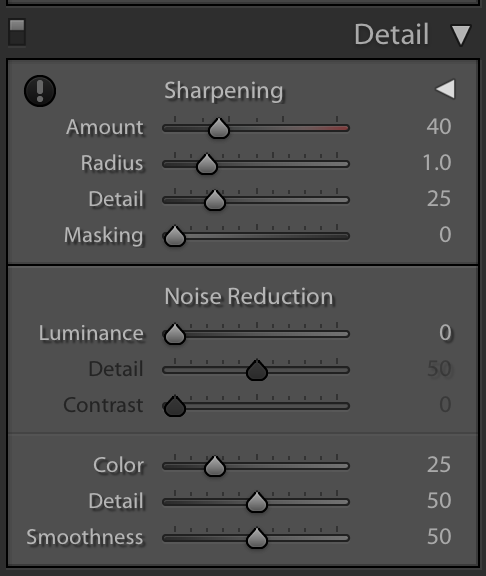
Preserving some noise in outdoors portraits can look appealing because some slight grain can give a certain vintage vibe.
3. Use White Balance, Colour And Hue Properly
One question you should always ask yourself when shooting people or landscapes is ’what feeling do I want this photo to convey?’
Despite the fact that you’re shooting outdoors and using natural light, you can still alter the colours to depict exactly what you envisioned.
If you want to achieve a warm and cosy vibe, you should definitely stick to warmer colour hues. In case you want something intense or gloomy, you might need to consider cooler colours. You can also create an interesting vintage vibe if you experiment with split toning options in Lightroom.
In case you like the original colours and you just want to enhance them a little bit, you can simply pull the vibrance slider to the right. This slider is designed to focus on colours that are less saturated and it lets you increase the overall saturation of your colours without overdoing any of them.
Adjusting the White Balance:
If your photo lacks the original colours of the scene, for example, colours of a warm sunset, adjust the white balance by increasing the temperature to get the desired effect. On the other hand, if your photo looks warmer than you envisioned, reduce the temperature to get the cooler colours back.

Adjusting the Colours and Hues:
Sometimes you may want to selectively adjust certain colours in your image. In that case, use the Hue and Saturation sections of the HSL panel in Lightroom to get the right colours. The “Hue” section lets you drag the sliders for specific colours to get the right colour that you are looking for and the “Saturation” section lets you increase or decrease the saturation for individual colours.
Make use of the Vibrance Slider to Add a Pop to the Colours:
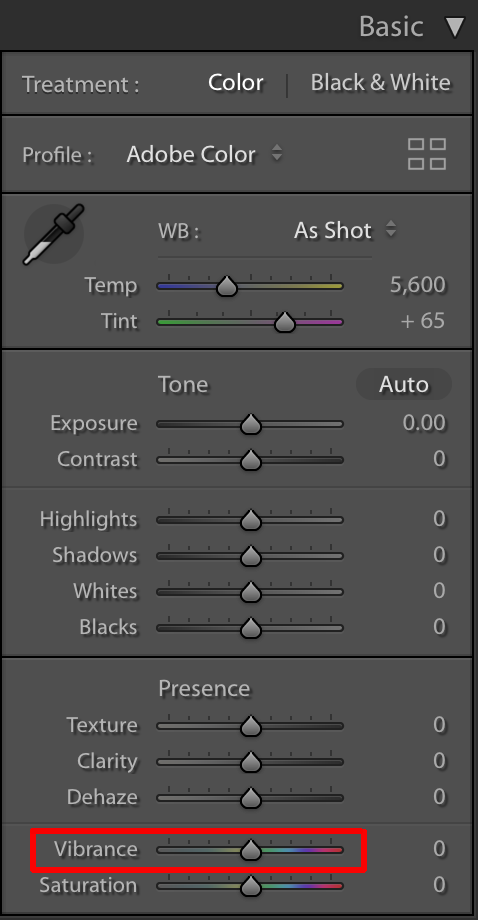
In case you like the original colours and you just want to enhance them a little bit, you can simply pull the vibrance slider to the right. This slider is designed to focus on colours that are less saturated and it lets you increase the overall saturation of your colours without overdoing any of them.
4. Increase The Contrast And Clarity
Lack of contrast and too much contrast are common issues in outdoor photography and they occur whenever lighting conditions are less than ideal.
Increasing the Contrast:
If you want to increase the contrast in your photo, you should simply pull the contrast slider to the right a little bit. You shouldn’t go too far, because it will make your image look unnatural or you will lose a lot of detail.
Note:
If increasing the contrast in your image does not help much, drag the “Blacks” slider to the left to add some more contrast to the image. This will also help with making the blacks look real black.

Increasing the Clarity:
Another thing you can do to make your image pop is to increase the clarity in Lightroom. You can pull the clarity slider to the right to add some edge contrast to your photo and make it appear less soft. A small to moderate increase in clarity usually makes the photo look sharper and clearer.
5. Decrease The Luminance Of The Blues
You have surely noticed that many outdoors photos taken on a bright sunny day have overly bright skies. This issue usually ruins the entire photo, no matter how good it is in terms of composition.
There are two ways to deal with this – you can start using polarizing filters or you can learn some useful tricks in Lightroom. In the best case scenario, you can combine these two strategies for optimal results.
In order to fix bright skies in Lightroom, you should go to the blue slider (under the colour header) and make sure the luminance tab is selected just above the colours.
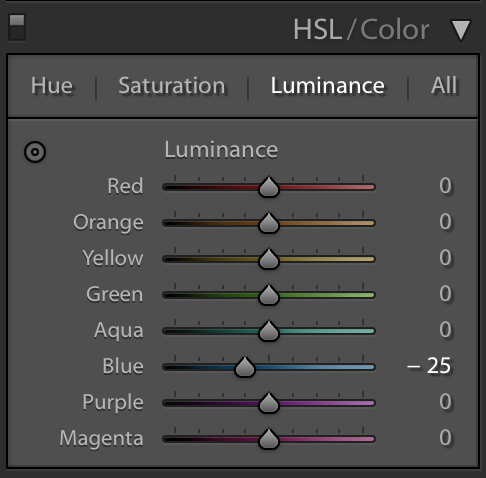
When you decrease the luminance of the blues in your picture, this will make the colour of your sky a deeper, richer blue. Simple as that!
You should see a vast improvement in your outdoors photos after applying these 5 simple tips. In case you’d like to learn more about editing landscapes and outdoor portraits, you can check out the following links!




1 Comment
Perfect. 💯 Helpful