We all know how immensely powerful Photoshop is. From a simple contrast tweak to advance photo composites, we can do it all within the confines of this amazing software. Sometimes the array of options and techniques can seem bewildering and today we are going do a step by step walk through of four useful techniques that you might want to use in your Photoshop workflow.
Sharpen with High Pass Filter:
This technique is an excellent way to get very sharp images for print or web use. It allows us to easily see when and where an image is starting to degrade and to correct for that. With your image open in Photoshop:
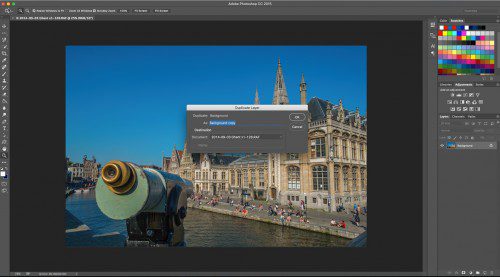
- Duplicate the layer by going to the menu and selecting Layer – Duplicate Layer
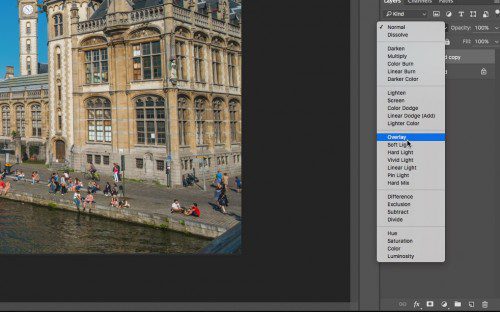
- From the Layer Palette on the right of the screen change the Blend Mode to Overlay
- Zoom 100% into the image in an area that will be affected by sharpening
- Make sure the new, duplicate layer is selected in the palette
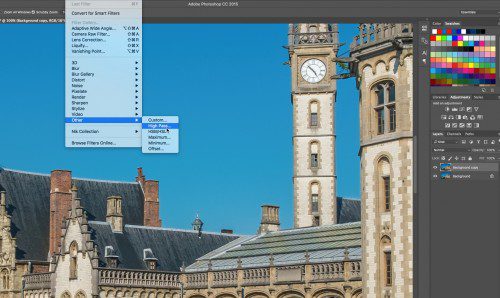
- From the menu select Filter – Other – High Pass
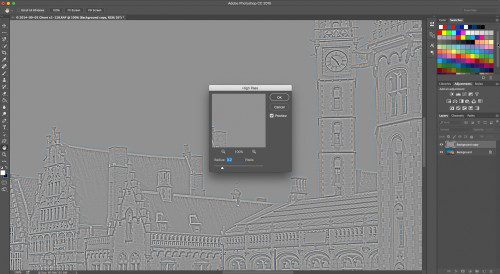
- Slowly increase the Radius setting watching for Jpeg halos. When happy click OK
- To back the effect off a little slide the Opacity slider to the left a little.
Boost Contrast With Adjustment Curves:
Many of us use the Levels tool, but there is a more powerful and controllable tool, Curves. Like Levels, rather than use the tool straight out of the box, we should use it as part of an Adjustment layer. This protects our original work and allows us to correct mistakes without damaging the image. With our shot open in Photoshop:
- In the menu go to Layer – New Adjustment Layer – Curves
- Give the new layer a suitable name
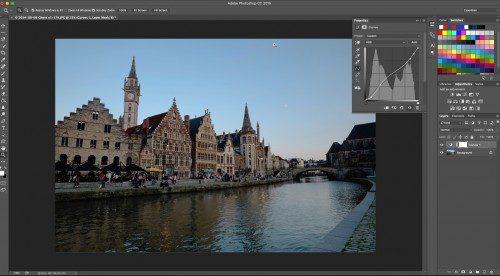
- Drag the lower left point of the histogram graph in towards the where the histogram first starts to rise from the bottom. This is darkening our shadow areas.
- Drag just inside the upper right point of the histogram down. This will bring the highlights down to a better level.
- Now we adjust the mid-tones. To raise or lower the brightness of the darker mid-tones we select a point on the histogram line that is inside the left third of the graph. Sliding up will lighten the darker mid-tones, sliding down will darken them.
- Repeat for the mid mid-tones in the centre of the histogram and for the lighter mid-tones in the right third
- Adjust this curve until you are happy with the overall contrast of the image taking care to not introduce noise into the shadows or to clip the highlights.
- You can back the effect of by selecting the Adjustment Layer in the Layers Palette and reducing the Opacity.
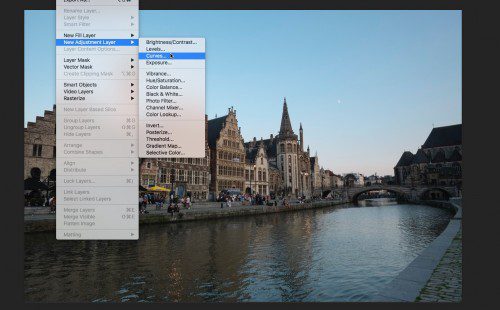
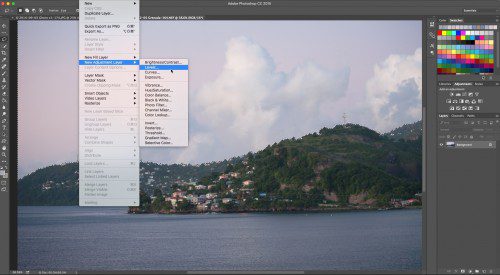
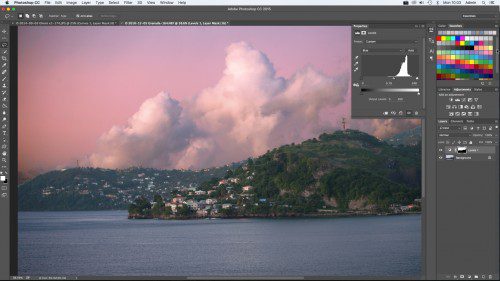
Using Layer Masks: Layer masks are a powerful way to make adjustments to specific areas of your image without effecting the other parts. In this example we are going to give the sky a more sunset feel. With your image open in Photoshop:
- Using the most suitable selection tool, select the area that you wish to work on. Feather that selection required.
- Create an levels adjustment layer from the menu Layer – New Adjustment Layer – Levels. This will create a new layer just for the selection we have made and automatically masks the area we don’t want to affect. We are going to use levels the increase the contrast and change the color of our sky. Choose the Adjustment Layer that suits your intended look.
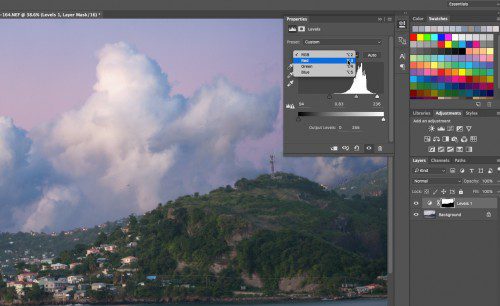
- Using the level sliders increase the contrast of the sky. This histogram is a good indication of the exposure levels as it is only showing the exposure of the selected region
- Use the individual Red/Green/Blue Levels sliders to adjust the colouring of the sky. In this case I have added a little red to the sky highlights and reduced blue in the sky’s darker regions.
Converting to Black and White with Channel Mixer:
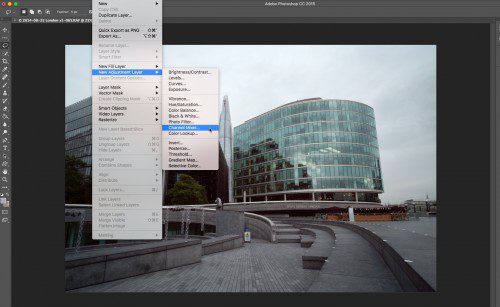
There are many ways to convert images to black and white in Photoshop. Amongst the best of them is the Channel Mixer technique as it gives us control over the color channels within image, much like using a filter for black and white. With your image open in Photoshop:
- From the menu go to Layer – New Adjustment Layer – Channel Mixer
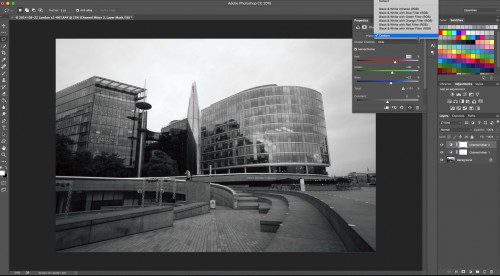
- Check the monochrome box.
- We can now choose to use a preset black and white filter from the presets box or create our own look
- We can manually adjust the look of our image by using the RGB sliders. In this case I have darkened the formerly blue sky by sliding the blue slider to the left.
- By carefully using the RGB sliders we can change the density of various tones within the image, increasing or decreasing the overall contrast to suit.
These are just four of the many Photoshop techniques available. They are however a diverse and very useful set that will allow you to add punch and sharpness to your images.


3 Comments
Why do people still use USM when it was designed for scanned images and smart sharpen was designed for digital photographs? Smart Sharpen also allows more control than USM.
Totally agree. High Pass increases the amount of noise in the image and therefore is not good for print or web. Smart Sharpen is superior and has noise reduction and is recommended by Adobe as the way to go.
Tim:
I want to refer to you and to many of those questioning the still use of USM instead of Smart Sharpen the following excerp from book “Image sharpening” by Fraser and Schewe, page 146:
“The persistence of the Shadow and Highlight settings when the filter (Smart Sharpen) has been switched back to Basic mode has undoubtedly caused a great deal of head-scatching, and is at best a questionable design decision. And while the Shadow and Highlight tabs attempt to address a real issue -reducing the intensity of the highlight and shadow contours- they simply don’t offer the degree of control we need. As a result, we still rely on the USM filter for the majority of our sharpening tasks.”