We all love to save a little time, but when it comes to Photoshop, some things are trickier than the others. Getting the right color look to an image can be quite a painstaking exercise, a lot of minute adjustments to colors, hues and saturation. However, there is one tool, not often talked about, that can allow you to make very subtle changes to the overall color look of an image with the use of a few sliders. It’s called Selective Color.
Let's get one thing cleared up – its not the tool to create those often overused images where the subject is in color and the rest of the scene is desaturated. The Selective Color Tool is much more subtle than that and for this tutorial we are going to enhance an image of some bluebells in a field. The goals is to make the grass in the field a more yellow/green to suggest low sun and to punch the color of the bluebells out. Here is our starting image in Photoshop.
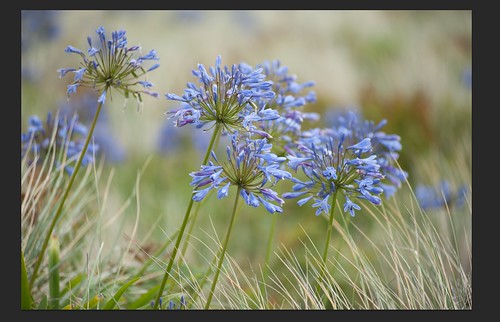
Our starting image
As if often the case in Photoshop, the best way to make images adjustments is through a Adjustment Layer and the Selective Color Tool is part of this. From the Photoshop menu go to Layer – New Adjustment Layer – Selective Color.
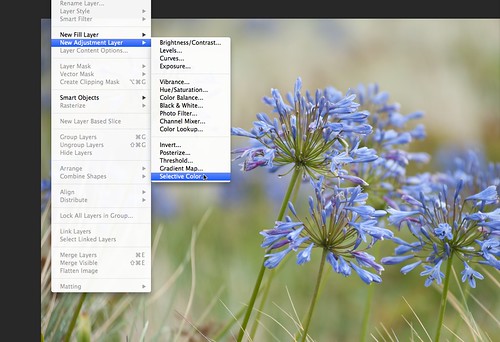
Create a Selective Color Adjustment Layer
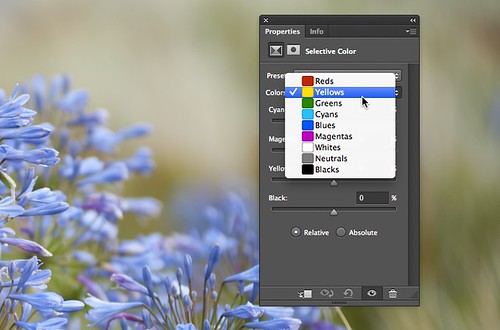
Give your new layer a suitable name and click OK. You will now see the Adjustment Layer appear in the Layers Palette and the Selective Color Palette on screen.

The Adjustment Layer and Selective Color Palette
Click the Colors drop down menu and you will see a list of the primary and secondary colors along with whites, neutrals and blacks. Below this are sliders for the secondary colors plus black. What the Selective Color tool does is it allows us to change the shade of color for a particular color.
In this image, the first thing we are going to do is add yellow to the grass. First from the drop down menu select Yellows. We now move the Yellow slider to the right, enhancing the color within the yellow grass. We also move the Cyan slider to the left, adding some redness to the Yellow. However, some of the background has greener grass so we also want to give that a warmer yellow/red feel. From the drop down box select Green and repeat the exercise using both the Yellows and Cyans sliders.
Changing the Yellows
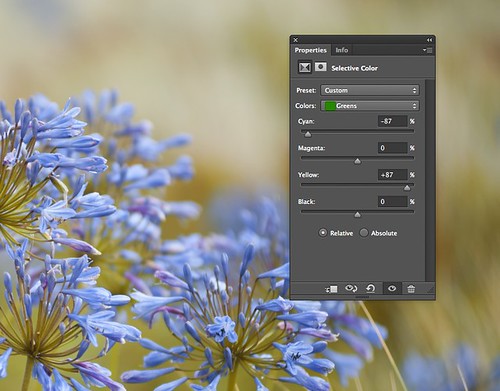
Adjusting the Greens
Next we are going to enhance the blue/purple of the flowers. To do this we select Blues from the drop down menu but we are going to enhance the color by moving the Magenta slider to right. This gives the greatest effect on the color of the flowers however we can further enhance them by adding some red – by moving Cyan slider to the left and Blue, Yellow sliders to the left. One other thing we can do is subtly boost contrast within colors in this case with Blues still selected we move the Black slider to the right.
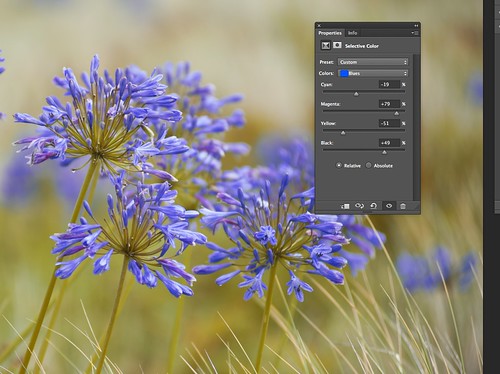
Getting the bluebells to stand out
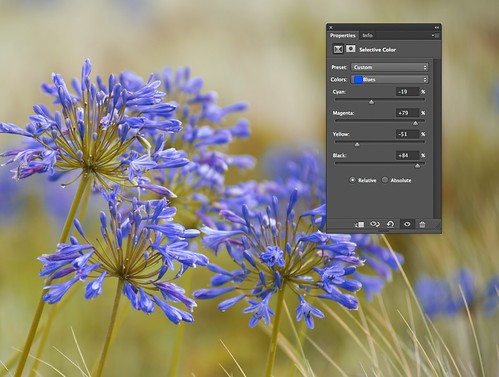
Boosting the blue contrast
The last thing we will do is give the highlights the same yellow/red, sunrise feel as the the grass. To do this we select White from the drop down box then again move the Yellow slider to the right and Cyan slider to the left. The end result is a much warmer yet still natural looking image that appears to have been taken on an early sunny morning rather than a dull afternoon.
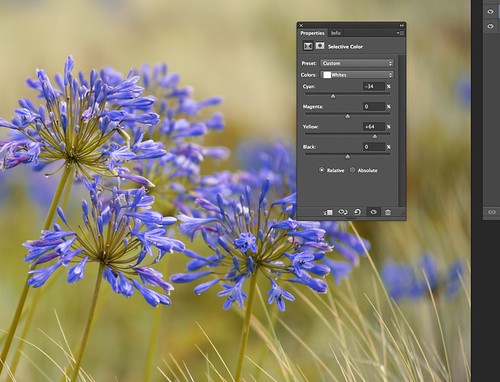
Finally, we warm the highlights
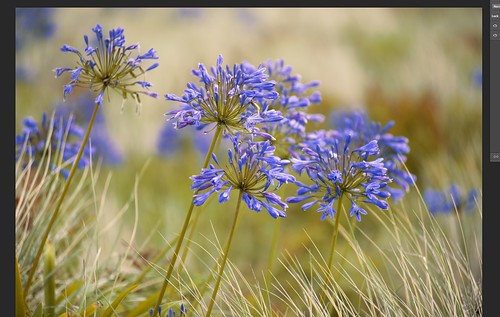
The final result
Selective Color is a great tool for subtle manipulation of color in an image. It is a great way to add moods to your shots, for example, making a stormy scene look dark and blue or as in the example above simulating a summer morning. It is also great for adding subtle color looks in portraits, changing the apparent color of the lighting.
The power of this tool is not in the fact that it can make big sweeping changes to the look an image but that it can make small, very subtle adjustments and give you a huge amount of control over the color of that image. It is well worth giving it a go to see what you can come up with, I hope that you will be pleasantly surprised.


4 Comments
Very useful and straightford way of achieving a better result with a photograph when the light wasn’t quite right, I find. Thanks.
Thanks a lot!
Great info. Useful tip.
Great tip. Thanks!
I’ll be trying this out later