I’ve got news for you. Your flash is smarter than you are. Think about it? How long would it take you to read the ambient light of your scene and then calculate the proper exposure to balance your fill flash with the background light? Your flash does this in the blink of an eye, and it talks to the camera to get additional input.
However, this is no reason to be scared away from using flash in your photography. On the contrary, you should look at this as an example of simple outsourcing. You delegate the job of gathering technical exposure information from your camera and your flash, which leaves you free to make the careful and creative decisions about how you actually want to compose and light your scene.
Using flash and small strobes can make a big difference in your photography, but unless you know how to make efficient use of the technology, you won’t find the success that you desire. You won’t create the kinds of eye catching imagery that your camera, your flash and your creative eye are capable of producing.
Here’s a simple checklist that outlines the basic concerns that are involved with using flash, followed by a standard workflow that can be applied to any situation or subject matter. Follow and learn these steps. Eventually, they’ll become second nature.
Background
How bright or dim to you want to render your overall scene? Do you want a subject that’s brightly lit against a dark background or against a field of white? You control this with your specific camera exposure by metering on your overall scene and setting shutter speed and aperture to give you the desired look. Often times, a flash lit subject in front of an underexposed background can make for a compelling image.

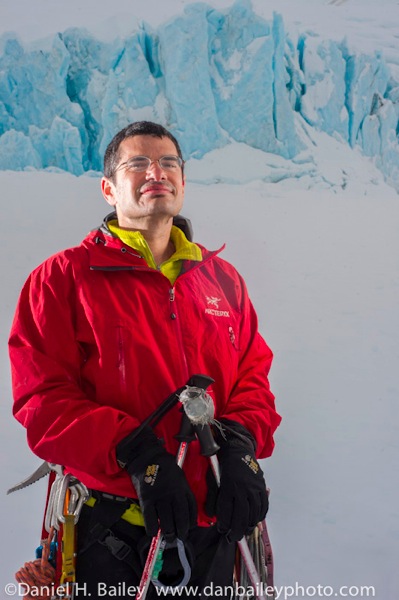
In this image, I underexposed the snowy background a bit to give the shot a more dramatic look.
Amount of light
How much light do you want on your subject? Are you going for a subtle fill to brighten a few slight shadows or are you trying to rescue your subject from deep, dark blackness? Don’t worry about calculating exact ratios, just lay out your essential needs. Think problem and solution here. You control this through your flash exposure.


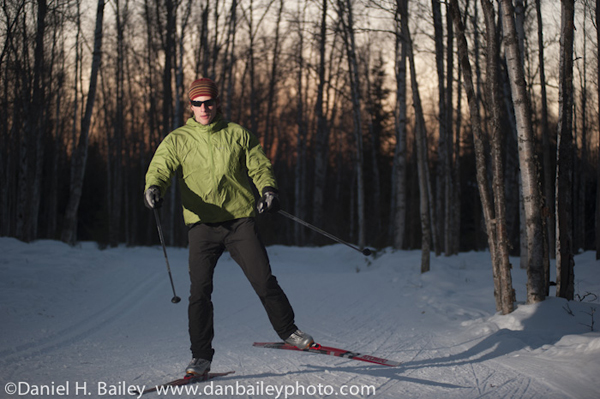
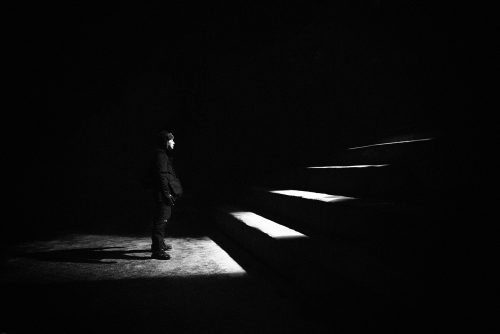
In order to rescue this image, I’ll need to fill the deep shadows on the subject. Contrast that with the image of the biker, which only needs gentle fill to lighten up his eyes and give the image more life.
Direction
Where do you want the light to come from and where do you want it to hit your subject. Are you trying to match the ambient light or do you want it to shine on a specific side that compliments your subject? Placement is often the key to great lighting.

In this portrait I’ve brought the light in from the side to give the shot three dimensional depth.
Quality
Hard or soft light? Close or distant? Small light or big light. This is controlled through the use of light shaping tools and placement.


In the first shot of the female model, I’ve added soft fill light to make for a pleasing portrait. In the second shot, I’ve thrown much harder, more direct light on the subject to match the exciting and dynamic nature of the glacier background.
Coverage
Will you have enough coverage with one flash, and is it zoomed wide enough to throw even light on your subject? Light falls off with distance and width, which can create the “Obvious flash look.” To prevent this, you may need a wider zoom setting on your flash, a second light or a larger diffuser or softbox. Or, you might need to change you composition all together.

You can see in this shot how the light from the flash falls off. Nothing screams “FLASH” like light falloff.
Once you’ve run through your checklist, the next step is figuring out the proper exposure. Although TTL usually does a pretty good job of balancing flash with the ambient light, it’s not perfect. It works with exposure values that are based on reflected light, not on your creative desires.
Realize that you’ll often need to make adjustments to the flash and/or the background in order to the best looking exposure or the one that matches your own personal vision. So, once you’ve completed your checklist, follow this basic flash workflow. As you become more experienced, you’ll develop your own method and learn when to deviate as needed.
1. Lock in Your Camera Exposure
Meter on the background and set your aperture and shutter speed as desired. You can use either Auto or Manual mode, but the advantage of using Manual is that you can dial in your exposure for the ambient or background light and keep it locked in. As long as your background light doesn’t change, your exposure will stay the same, regardless of what your subject is doing.
2. Place the Flash
Stick the flash where you want it to go, and modify it as needed, based on the direction, coverage and quality of light that you’re going for. Going closer gives softer light, farther away gives harder, more direct light.
3. Choose Your Desired Flash Mode
Either choose TTL or Manual. Remember, with TTL, the camera is controlling the amount of light that’s being emitted by the flash, based on the monitor preflashes it sends out to the flashes right before the shutter opens. With Manual flash mode, the flash puts out a fixed amount of light that you control by adjusting the value.
Both modes will give you good results and which one you use may ultimately come down to preference. I probably use TTL about 75-80% of the time, but often to use Manual when I’ve got a little more time to set up the shot and dial in the exposure, or when I know the overall lighting scheme of my scene will not change.
4. Set Your Flash Exposure
With TTL, even though the flash exposure may be “right,” it may not be exactly what you’re going for. Chances are it will still be too bright, so you’ll probably want to dial it down.
-1.7 is Galen Rowell’s magic number for balanced fill flash outside, but you may find that going anywhere from -.3 to -3.0 stops properly compensates for the factors that I just mentioned above. Or, as we’ll explore in the next section, you may need to compensate on the plus side if you’re underexposing the background.
If you decide to use Manual flash mode, then dial down through the different power settings until you get the desired look. Note that no matter what mode you use, in addition to the specific flash setting, the actual amount of light that hits your subject is also affected by distance to the subject, aperture and ISO.
5. Do a Test Shot
Fire away and then study the results. You should be able to quickly determine if you need to move the flash, adjust the exposure on the flash or the camera. Make the necessary adjustments and then do another test shot. Repeat until you get the desired look, then go for the money shot.
Using flash takes lots of experimentation, and but once you have it dialed in, you can shoot away and go for moment.
Like everything else, as you become more proficient, this will all become second nature. You’ll not only become more efficient and confident with lighting different types of scenes, you’ll eventually come up with your own creative placements and lighting schemes.

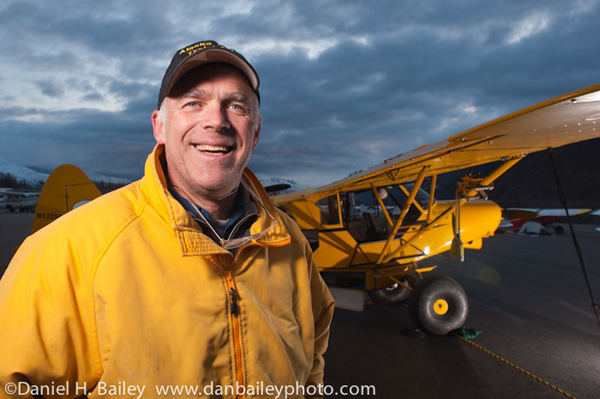
Here’s the first example revisited. Running through my workflow above, I exposed to preserve the ambient light of the clouds and sky, (manual exposure: 1/160 at f/9) placed the flash on a sync cord and held it just out of frame at left and fitted it with a Lumquest Softbox III portable softbox. I chose regular TTL mode, with straight flash exposure- no compensation, and fired away. I also placed a second flash on the ground to light up the airplane. Once I determined that my lighting was right, I focused my energies on my composition and capturing the right moment.
Total elapsed time, about 10 minutes. See, it doesn’t have to be that hard.
This is an excerpt from the ebook “Going Fast With Light,” an 83 page manual about using flash in outdoor photography by professional Alaska based adventure photographer Dan Bailey. Explore the world of outdoor, action and travel photography at his blog.


3 Comments
Useful article. Thank you.
Brilliant explaination of flash use, very simple and easy for a beginner to understand.
The remote control includes 3 different frequencies, and you can operate the car from up to 8 meters.
Be smart and savvy when negotiating the interest rate for new cars and don’t just sign on the bottom line.
It is available in two versions of petrol and diesel and has been a very
reasonable price.