Once upon a time during the film era of photography, photographers had to keep a light meter handy at all times so they could take readings to get proper exposures. Experimenting on-scene was simply out of the question; it was expensive and time-consuming. Being caught without a light meter — or several other pieces of gear that we take for granted in modern times — meant trouble; but just in case that ever happened, photographers devised various principles and guidelines designed to help them navigate their fully manual cameras. Among the most famous of those guidelines is the sunny 16 rule.
This article will cover all you need to know about this rule and how to use it efficiently.
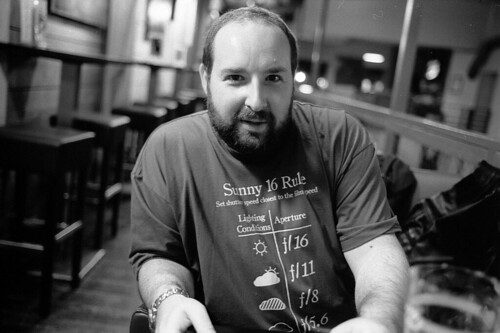
What Is The Sunny 16 Rule?
To put it simply, in photography, the sunny 16 rule (also known as the sunny f/16 rule) is a method of estimating correct daylight exposures without a light meter. The sunny 16 rule can also help you achieve the correct exposure of difficult subjects. You need to know that this rule is based on incident light, rather than reflected light as with most camera light meters, very bright or very dark subjects are compensated for.
The basic rule goes like this – on a sunny day set the aperture to f/16 and shutter speed to the reciprocal of the ISO setting for a subject in direct sunlight.
This is rather simple, straightforward, and easy to memorize and use.
In case you still don't understand how to apply this rule, fear not – we'll give you a couple of examples.
Sunny 16 Rule Examples
These are some basic examples that will help you understand how to use the sunny 16 rule properly. Just follow this setting pattern whenever you're unsure how to use camera settings correctly. In any case, if you don't understand the exposure triangle fully, that's one thing that you need to master.
- On a sunny day and with ISO 100, set the aperture to f/16 and the shutter speed to 1/100 or 1/125 s.
- On a sunny day with ISO 200 and aperture at f/16, set shutter speed to 1/200 or 1/250.
- On a sunny day with ISO 400 and aperture at f/16, set shutter speed to 1/400 or 1/500.
I hope this makes sense to you. The correct exposure isn't that hard to achieve – you just need to know the exact correlation between ISO, aperture, and shutter speed. This is equally important for shooting film and using digital cameras.
Advantages Of Using Sunny 16 Rule
Still not convinced that you should start using the sunny 16 rule in your digital or film photography?
The great thing about this method is that aperture and shutter speed both increase and decrease in incremental steps. This means that every time you increase the shutter speed one stop(from 1/125 to 1/250, for example), the camera is letting in half as much light as before. The same goes for decreasing the shutter speed. It's simple as that. The exposure triangle, after all, isn't rocket science!
Changing the aperture from let's say f/4 to f/5.6 also equates to half the amount of light.
Because of the way that both shutter speed and aperture control light, there’s no problem using the sunny 16 Rule if you want to change one of the settings that the original rule calculated for you.
Step By Step Instructions On Achieving The Perfect Exposure
In manual mode, start by setting the aperture to f/16. Now set your ISO; exactly what you set it to will depend on how sunny it is, but let’s just set it to 100 in this hypothetical scenario. The final setting to deal with is shutter speed. According to the sunny 16 rule, shutter speed is to be set to the reciprocal (or inverse) of whatever ISO is in use. Thus, in this example, the shutter speed would be 1/100.
If you decided to use ISO 400, then you would set your shutter speed to 1/400. ISO can be whatever you need it to be and shutter speed will also change accordingly; the constant in this equation is the aperture. It will always be f/16. Apply the rule correctly and proper exposure will be a constant feature of your outdoor photography.
Additional Tips On Appropriate Settings
You can't always stick to f/16 because lighting conditions change during sunny days too. Your choice of aperture should also depend on the location – this is especially true if you're taking photos on the beach or in a snowy environment.
The famous f/16 is suitable for sunny days without many clouds. Use something like f/11 or f/8 for slightly overcast conditions, f/5.6 for heavily overcast conditions, and resort to f/22 if you're shooting in the sand or snow.
Of course, all these apertures will depend on the type of your subject too – you will use different ones for portraiture and for landscapes.
With the aperture set, next, you’ll select the correct shutter speed. All you need to do is check what ISO you’re using and choose the inverse of that number.
Why Use The Sunny 16 Rule?
The main reason is very obvious – the sunny 16 rule is a quick and easy way to nail the exposure without the use of a light meter.
So why, with all the amazing capabilities of our present-day digital camera technology, would anyone want or need to use such a seemingly archaic, manual rule? There are a number of reasons, actually:
- You can’t always rely on in-camera metering, particularly in tricky lighting conditions. There are times when your camera is going to get it wrong, especially when it comes to very sunny, high dynamic range scenes. Plus, your camera can’t know what effect you’re going for; you’re the creative one, not the camera. You need to tell the camera what to do.
- You still shoot film photography. But if you have no intention of carrying around a light meter with you everywhere, then you will want to learn and use the sunny 16 rule. Film cameras aren't that hard to use, but they do require a slightly different approach and advanced understanding of exposure settings, metering system, film speed and so on.
- You want to retain all the decision-making responsibilities. As alluded to above, the sunny 16 rule takes the job of metering away from the camera and places it squarely with the photographer. Good or bad, you will take responsibility for the end result; it is akin to setting a custom white balance or using manual mode instead of automatic.
- It’s a good backup plan. If you are the type that always has a light meter with you, there’s always a chance it could malfunction or die on you. Knowing the sunny 16 rule will be the next best thing.
- It makes you think. There’s nothing wrong with using in-camera metering, assuming it’s giving you accurate results but, again, your camera can’t read your creative mind. Learning to assess the quality and quantity of light for yourself will only make you a better photographer.
More Rules
Not to be outdone by sunny days, there are other outdoor lighting scenarios that also have had rules assigned to them. There’s the sunset f/4 rule, the heavy overcast f/5.6 rule, the overcast f/8 rule, the slightly overcast f/11 rule, and the snowy/sandy f/22 rule. Yeah, those are real. No, they’re nowhere near as catchy as “sunny 16,” but they do work and once you learn them you can customize them to suit your needs.
The sunny 16 rule isn’t the quintessential rule of all photography; you shouldn’t think of it that way. This isn’t an effort to get you to disregard the histogram if you’re using a digital camera. In fact, knowing how to read and interpret a histogram may be a greater asset to you than memorizing any given set of rules. And don’t obsess over the rather dry idea of “proper exposure.” Go with whatever exposure falls in line with your creative and aesthetic sensibilities. The camera's light meter, exposure settings, histograms, and rules are just tools to help you realize your goal. Use them to your advantage.
Conclusion
I hope that you now understand how to use the sunny 16 rule to your advantage. Film photographers might find this rule particularly useful, but don't ignore it altogether if you shoot only digital. Using this rule is a perfect way to brush up on your knowledge of camera settings, exposure settings, and the exposure triangle.
I admit, it may come as a surprise that such aged photography advice is still around, but this rule has held on for so long simply because it works. The sunny 16 rule is a quick and easy method of achieving correct exposure when shooting outdoors without using a camera's meter.
It is true that there’s a little math involved, but hey, don't be frightened by it!


13 Comments
The f/16 Rule (Sunny 16) is a God send. I’m a retired US Navy Photographer. I remember on my very first big assignment I had to shoot. An aircraft mishap on an aircraft carrier. I forgot to pack my Gossen Luna Pro, and the camera didn’t have a light meter. Standing on top of a jet, with tons of people watching me, I had to think fast. The f/16 rule popped into my head. I shot about 10 rolls of film without a light meter and had perfect exposures. It does work. Still use the f/16 rule to this day just as a check against the camera’s light meter. If I disagree with the camera, I’ll kick it into manual.
Great story! That’s all the proof anyone should need.
One thing that I did not see mentioned in the article. Once you figure out your base exposure using the f/16 Rule (Sunny 16), then you can dial in any shutter speed or f/stop you desire using the rule of equivalent exposure. Actually, with digital cameras today, you can also dial in a specific ISO using equivalent exposure as well.
great and practical rule. Needed such a basic guideline. i am going to try manual mode and do my own settings. many thanks.
That’s really great info. Easy to apply and quick to get the work done.
Great stuff. I love tips like this.
Lightstalking is fabulous and has magnificent content.
Thank you!
Isn’t there a story about Ansel Adams happening on a scene with the sun setting and moon in the background? He had just enough time to get out his stuff, make an estimation using a “moony” rule and grab a shot. Then the sun had moved enough not to reflect off something that made the image. I think I read it in one of his books. I want to look for it now.
Yes you are right, The image you are referring to is called Moonrise, Hernandez. It was shot in October 31st 1941. The sunset was reflecting off tombstones and the whitewashed walls of the adobe styled chapel in the midground…Not bad for a photo taken on Haloween
https://www.afterimagegallery.com/adamslargemoonrise.jpg
Although, I’m digital now, I’ve long used film and it’s related techniques, including the f16 rule, the f22 rule, the overcast rule, etc. After my meter stop functioning, once, I even employed the 18% reflective “grass” rule. After setting your camera, take a reading from “green” grass
(in sunlight, or, diffused outdoor light,) for a more accurate, 18%, exposure setting. Also, for more accurate skin value readings, it might help to read the “back’ of your hand for dark skin subjects, and, the “palm” of your hand for light complexed skin. This works particularly well if the photographer is dark skinned, because, the back of the hand is usually 1&1/2 to 2 stops less reflective than the palm.
having started with digital cameras and moving from auto to aperture mode these rules help me in the quest to go full manual mode all the time!
I have been shooting in manual mode for a long time now but have never before heard of the sunny 16 rule. I shall put it into practice and see if my images improve. I shall also use the other similar rules; sunshine in Skye at this time of the year can be temperamental.
I thought the constant would be film speed/asa? At least that is the way I’m doing. Since one cannot simply change the asa of a film, you change the aperture and shutter speed proportionally? Am I doing it wrong? I’m new to film photography BTW.
@gui I just got a chance to read this (I just came across a tricky scene and wanted a cruch) but you are kind of right and wrong. In the film days the constant would have been film, but now with digital understanding the exposure triangle means that you get a lot more flexibility. You can start with the rule and adjust your aperture to 5.6 on a kit lens but still need more light which means slower shutter but then you think I’ll get a blurred photo so you just adjust ISO instead. so rather than going to 1/25 from 100 you could go to ISO 400 from 100. Yeah you’ll get some grain but you’ll also get a proper shot.