I’ve always been one of those people that believes we should move away from using the term “correct exposure.” Not that it doesn’t have its place; obviously, when you’re starting out in photography you have to get a grasp of how the so-called exposure triangle works, and you do that — in part — by studying some pretty standard examples: this one’s too bright, this one’s too dark, this one’s just right.
Useful enough, if a bit generic.
But once you begin to develop your own photographic style, you might find that a strict, object definition of what exposure is, what exposure should be, doesn’t really work for you. This is when you discover the beautiful subjectivity and adaptability of the concept of exposure.
There is no one-size-fits-all rule here; you can’t take a baseline exposure of one subject and apply it to everything you shoot. It’s not always about a “right” or “wrong” exposure but, more often, about getting a “good” exposure — one for which the final image is the best representation of your creative vision.
Your camera’s metering system will often do a fine job of helping you out in this regard — but not always. Despite their rapidly advancing intelligence, cameras can be easily dumbfounded by certain lighting situations. Which means you can’t always blindly trust your camera to get it the way you want it. It’s awfully demoralizing to spend a day out shooting, only to get home and realize that nearly everything you shot is anything but a good exposure.
Here are three ways to avoid that.
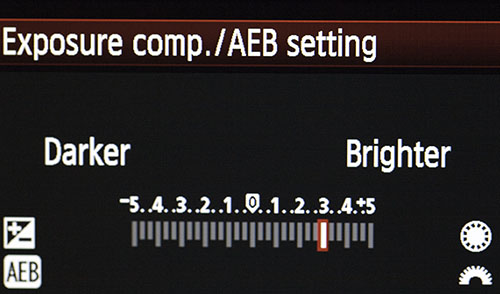
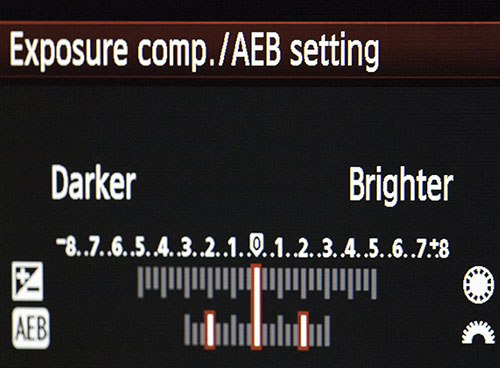
Exposure Compensation – Think of exposure compensation as a sliding scale. The default starting point is 0 and you can adjust it up to 2 or 3 (or more) stops in either direction. Sliding the scale to the left toward the negative (-) end will darken the picture, while moving toward the positive (+) end will brighten the picture. By using exposure compensation, you aren’t setting actual exposure parameters — the camera still does that. You’re simply telling the camera that its settings don’t meet with your approval and you’re going to make an adjustment of your own.
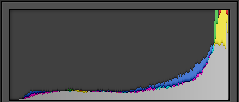
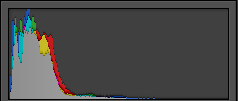
The best way to determine how much (or how little) exposure compensation you need is to use the histogram. The left side of the graph represents shadows, the right side represents highlights, and in the center are the mid-tones. If you see a spike on either side of the histogram that’s usually considered a bad thing, but whether that is true can really depend on what you’re shooting.
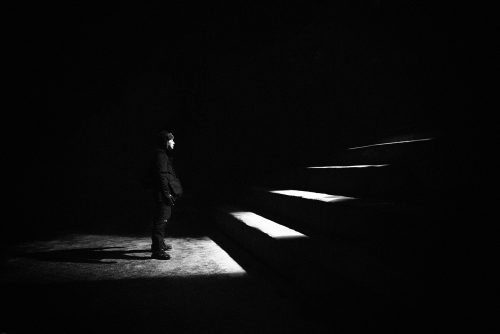
A spike on the left means part of your image is totally black, but this would be expected for a night shot. A spike on the right might mean part of your image is overexposed, but if you’re shooting a high key image this would be correct. Just keep the spike off the extreme edge and everything will be fine.
Once you’ve had a look at the histogram for your initial shot you can decide how to proceed with exposure compensation. Of course, this method requires you to “chimp,” a behavior that some photographers equate with killing puppies. Unless you’re in a fast paced, high pressure environment (like a wedding, for example), don’t worry about that. Just get the shot the way you want it.
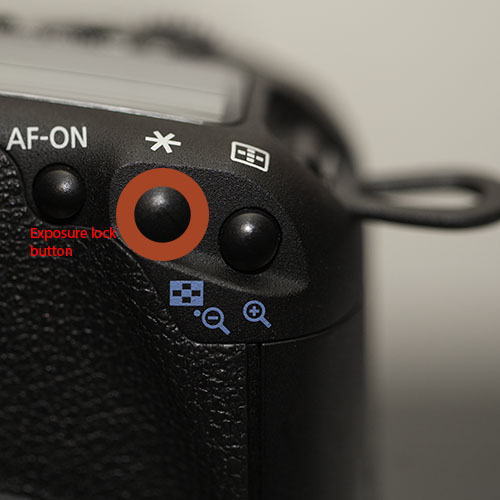
Auto Exposure Lock – This method also requires you to be in a setting where you can be a bit more deliberate about your process. And it’s rather self-explanatory: once exposure is set, you can lock it in and shoot away. Exposure lock is handy for shooting panoramas, for instance, because you need the exposure to be consistent across all the images in your series. It is also the perfect solution for silhouettes. You can meter for the background, lock in exposure, then recompose for the foreground subject.
Virtually all DSLRs feature a dedicated exposure lock button and the feature can be customized to varying degrees — duration, cancelation options, etc. Refer to your manual for the specifics.
Auto Exposure Bracketing – Exposure bracketing is a method whereby you start with a baseline exposure and then take one or more exposures each above and below the point of origin. The initial exposure as determined by the camera will be the 0-point; subsequent exposures will be taken at -1 stop and +1 stop. There may be some variation and differing degrees of flexibility across camera models, but at a minimum you will end up with three shots of three different exposures. One of them is sure to be to your liking.
When working in aperture priority mode, exposure bracketing will yield exposures based on three different shutter speeds. If you intend to combine your images for HDR, this is the route you’ll want to take.
While in shutter priority mode, the camera will give you three shots at three separate apertures. If your concern is getting a fast enough shutter speed to freeze motion, use this method.
Because exposure bracketing can happen by simply holding down the shutter button, this is your best bet when working in a situation where things are moving or changing quickly — when it’s best to keep chimping to a minimum.
So now you see there's no reason not to be getting exactly the exposures you want.





10 Comments
maybe switch to UTF-8 — when you’re using ( ” ‘ ) I use a screen reader so I hear “euro trademark”
Hi Jason,
I’m not quite sure what you mean by “chimping” in the paragraph on exposure compensation. Can you please expand on that ?
Thanks,
Thierry
thanks for the tips, I learn something new from this article
I’d also appreciate a definition of ‘chimping’.
Joe
Chimping is a colloquial term used in digital photography to describe the habit of checking every photo on the camera display (LCD) immediately after capture.
Some photographers use the term in a derogatory sense to describe the actions of amateur photographers, but the act of reviewing images on-camera is not necessarily frowned upon by professional or experienced photographers.[1]
My apologies for not going to Google first.
displays ok on my sgs3.
Needs information on Lighting. How to light up during a shoot
Just a quick comment on white balance. If you really want to lock in several images don’t leave the camera on auto white balance. Set a custom white balance that won’t change during your session.
Chimping is a common term for Checking and Improving by viewing every image on the LCD
Hey great post. I hope it’s ok that I shared it on my Twitter, if not, no problem just tell me and I’ll
remove it. Regardless keep up the good work.