When you start reading about bad weather in photography, the articles or the videos you're watching invariably talk mainly about protecting your gear. And while that is very important because you don't want to ruin thousands of dollars worth of expensive gear, it also misses the main point of photographing in bad weather. And that point is potentially amazing images—you know, the reason we all take photographs.
There's a reason that every time there's a storm, I rush to make sure I have all of my camera gear ready to go, and sometimes I head straight out in the car to one of my favorite camera spots. The images that are potentially taken during these times are some of the most enduring of my collection.
And that is why you should start to get into bad weather photography too. You're almost certainly going to take some extremely good images if you know what you're doing.
But what do I mean by knowing what you're doing? Let's take a look at some of the things that are worthwhile for a photographer to know about the intricacies of taking photographs in bad weather. Not all of them are obvious, but all of them lead to some pretty interesting photographs.
The Appeal of Bad Weather
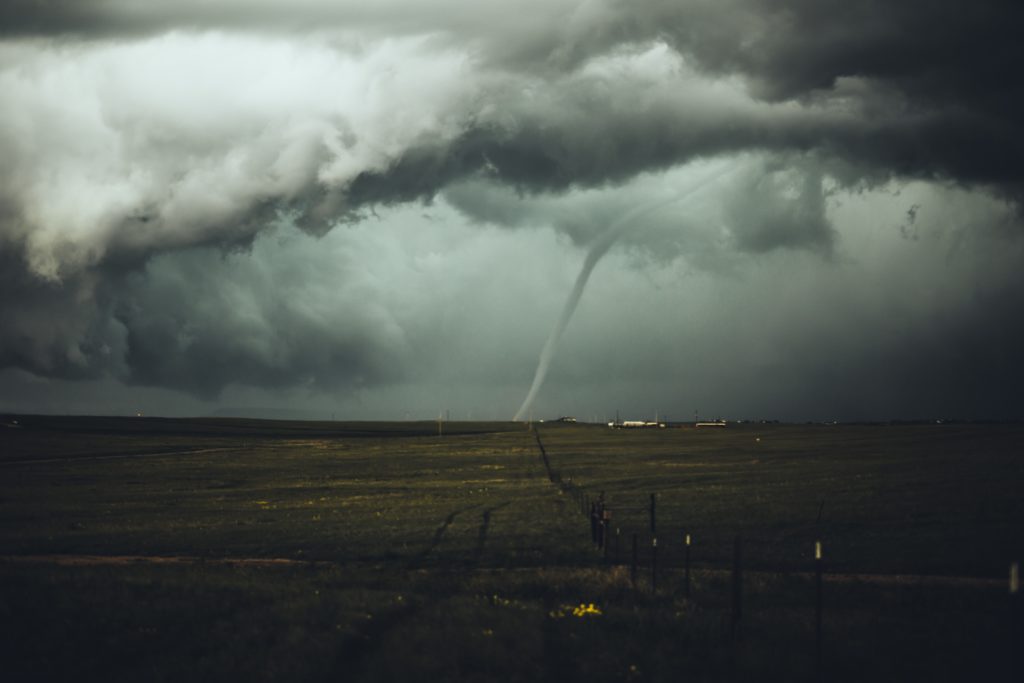
If you are in any way into landscape photography, the chances are you already know the appeal of storms, strange clouds, and interesting weather. The fact is that when conditions like this arise, your images will be extremely dramatic, the lighting will be like nothing you are able to achieve anywhere else, and the potential stories you can tell are extreme. The interest level you are able to convey through images is simply at an all-time high.
And it's not only storms that can produce this. Interesting images in foggy conditions, rainy days, and even snow can lead to striking photographs.
Gear Prep
Let's quickly go over some of the more obvious things you're going to need to do with regard to your gear when you are getting into bad weather photography. Clearly, you can expect moisture, so keeping your gear—and yourself—dry is going to need to be at the forefront of your mind.
Carry a lot of Ziploc bags, as they can be used for lenses, camera gear, and anything else until you need it.

You almost certainly want to use the lens hood that was provided with your lens to keep the elements as far from the front of your lens as possible. You don't want rain on the front element.
I always carry a sturdy umbrella, even when there is a good chance that I won't be able to use it due to the wind. Sometimes it's your only way of stopping the wind and rain, and so it pays to have a good one. If you're unable to use it, you can make do with other ways of keeping your gear dry.
One of the more overlooked ways to keep gear dry is to use your body to shield it—hands, body, face, whatever you can. They all make for fine umbrellas when you're trying to keep a camera dry.
Of course, that brings us to clothing. And with clothing, the bigger the better. You want big jackets, big hats that stay on your head, and anything else that you can use to keep yourself and your gear dry. Quite often, I find myself putting my camera inside my jacket temporarily if a squall of rain comes along.
Honestly, when it comes to keeping your gear dry and out of the elements, your own common sense is probably your best bet. I've found the above things to be useful, but I'm sure you can come up with more and better ideas of your own. The point is that you should try to keep your gear as dry as possible.
Safety Note
I will get slayed if I don't add the very obvious disclaimer that taking photographs in bad weather comes with a set of dangers—from slippery surfaces all the way up to lightning. Use your common sense.
Considerations for Shooting in Snow
If you're lucky enough to have a snowy day and are wondering why your images are turning out slightly gray, it's almost certainly because you're underexposing your shots. This is mostly because of the high reflective value of snow. Most cameras have an exposure compensation function that you need to learn when shooting in snow—so learn it.

The other problem with snow is that you're going to struggle with autofocus a lot of the time due to the camera not being able to find high-contrast elements within a shot. The way to get around this is to either use manual focus or zoom in on the most contrasting element of the scene, such as where a dark tree meets white snow. Your camera will use that contrasting edge to focus.

Another issue you might face is lenses fogging up. This is why it pays to acclimatize your gear to the same or similar temperature as what you are shooting in, as this will prevent the temperature differential that causes it to fog up.
Things to Consider When Shooting in Fog
One of the great things about having a foggy day is that it's a perfect time to get those eerie and mysterious photographs that we all love. Fog allows us as photographers to explore depth in a very structured fashion. Find foreground, mid-ground, and background elements within a foggy scene, and they will generally have excellent separation due to the fog. This gives us the opportunity to capture some interesting compositions.

As with snow, autofocus functions can sometimes have problems with low-contrast foggy scenes. The solution is to find and zoom in on the most contrasting element of a scene to allow the camera to use its autofocus.
Another strong tip for shooting in fog is to look for silhouettes. Foggy conditions give you a dream scenario for finding them, and they make for incredibly strong images.
Techniques for Shooting in Stormy Weather
Stormy weather is probably my favorite scenario for photography, but there are a few things you really need to think of before you go rushing out into the next storm and some of these can even be used on normal overcast days too.
For starters, if you have a favorite landscape composition, it will almost certainly be enhanced by an incoming storm or cloudy weather. You still need to adhere to traditional landscape compositions such as leading lines, the rule of thirds, foreground interest, and the like, but the stormy weather in the background will almost certainly help you enhance all of these.

Look for spotlights and God rays. When you have stormy weather, quite often you have sunlight poking through holes in the clouds in some areas. Often the light coming through these holes will fall strongly on a certain element of the scene. If you are able to capture this on film and make that part of the image your center of interest, you are quite often going to get a very strong composition. The same is true of God rays, but they are not always as easy to capture when it comes to finding a center of interest. Still, they're worth shooting.

Another tip is to look for disturbed water. Storms often throw up big waves and seas, which can be used to help you compose outdoor shots or be the center of interest in your images.

And of course, don't forget the golden hour at sunrise or sunset. If you're lucky enough to get bad weather days at these times, you will have a fantastic opportunity to grab a great shot.
Extend the shutter speed beyond a second for some great long-exposure low light shots. That means aperture around the sweet spot (f/11 to f/16 ish), ISO at 100 and shutter speed longer than 1 second (use a tripod so you can keep it open as long as you need).
Post-Processing for Bad Weather Photos
Post-processing your images is a huge part of getting a strong result from your bad weather shoot.
As bad weather often throws things onto the lens, such as raindrops, the first thing you're going to want to do is use a spot removal tool to remove any blemishes.
As you can imagine, a windy, rainy, and unpleasant day can often lead to a photographer forgetting to straighten their images while they're shooting. So make sure you use the crop tool to ensure a straight horizon and level photographs.
The light panel is also going to be a specific target for your edits. Be sure to experiment with the blacks, whites, shadows, and highlights sliders, as this is where you will be able to turn your raw images into dramatic JPEGs.
Lastly, don't be afraid to edit specific parts of your image using the masking tools available to you. Editing the sky by itself, editing specific parts of the image such as the foreground, or editing the center of interest are all perfectly valid parts of an image to work on. Use the tools available to adjust them to your tastes and preferences.
Don't Be Afraid to Shoot in Bad Weather
A big part of shooting in bad or moody weather is simply making the decision to go outside with your camera gear. You're almost certainly going to find photographic opportunities in extreme conditions. Yes, it can be a little intimidating at first, but embracing experimentation and learning from your mistakes is how you improve as a photographer.

Shooting in bad weather also forces your own creativity, as it is an extreme environment.
The only thing waiting for you in your future if you do this is better photographs and some interesting stories—so get out and shoot.
Final Thoughts
While grabbing your camera gear may not be your first thought when you see a storm or poor weather coming towards you, it's something you should absolutely experiment with as bad weather makes great photos when you know what you're doing. With a bit of preparation for your gear and protection for yourself, it can really lead to some stunning images, as you can see above.
If it's something you're interested in or have done in the past, then please feel free to share your images below in our forum.


