We've been involved in photography (both on the shooting end of things as well as in equipment sales) for more years than we would really care to admit. During that tenure, we've been asked hundreds if not thousands of times -“What went wrong with this picture?”
In camera sales, the conversation usually started out something like this — Customer storms in with their new DSLR hanging around their neck, a fancy 50mm-500mm zoom lens weighs heavy on the front. The customer searches for the individual who sold them that camera and throws an 8″x10″ print down onto the counter in front of them. The customer then pronounces in a shrieking voice— “I can't believe you sold me this Bleepity Bleep Bleep camera! It's a Bleepity Bleep piece of Bleepity Bleep! I spent thousands of dollars on this Bleepity Bleep camera, and the Bleepity bleep images look like Bleepity Bleep!”
With the same assurance that the sun will rise tomorrow, we can tell you that the problem was almost always Photographic Enemy #1 — CAMERA SHAKE.
What really surprised us was the number of photographers (even the ones who carried a business card in their wallet that read, “PRO”), that didn't really understand what the issue was.
So, What Exactly Is Camera Shake?
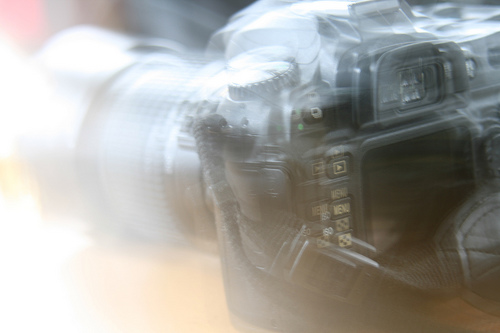
Camera shake is when movement of the camera results in an image that lacks clarity. In other words, it's soft. We refrain from using the term, out of focus, because focus has nothing to do with it, although, many of the photographers who came to us complaining of unsatisfactory photographs, thought, focus was the issue.
What Are the Factors That Lead to Camera Shake?
- Shutter speed
- Camera support
- Shutter release
- Camera type
- Lens focal length
- Mirror slap
- Image stabilization hardware or software
Let's take a look at each of these line items and see how a better understanding them will improve your photographs.
1 – Shutter Speed

This one is a real conundrum because there is no simple answer. Every photographer has their own level of steadiness. It's an experience thing. Maintaining an awareness of your shutter speed is the vital first step, and a lack of awareness probably accounts for most cases of camera shake.
A general rule of thumb for DSLRs is don't handhold your camera at a shutter speed less than the focal length of your lens. (200mm lens – 1/250th sec) If you have stabilization on your equipment that can generally gain you two stops (200mm lens – 1/60th) However, other factors come into play (such as the size and weight of your lens).
For point-and-shoot photographers, don't handhold your camera at less than 1/60th without some kind of support or stabilization. Experience is your friend. Be aware of your shutter speeds and learn your own level of steadiness.
2 – Camera Support
This photographic decision is inherently tied to shutter speed. Can you handhold the camera? Should you put it on a tripod, or possibly a monopod? Do you have one with you? Here are some quick tips on camera support.
When hand-holding a DSLR camera, push your elbows tight against your chest and keep the viewfinder tight to your face.
The ergonomics of an SLR style camera is to use your arms, chest, and face for support of the camera. Use your left hand as a support under the camera and your right to release the shutter. If you're using live view mode, or a point-and-shoot model without a viewfinder, try kneeling so you can support your left elbow on your thigh. This creates a mini monopod.
Bear this in mind – holding a camera steady in live view mode is difficult. Cameras were not originally designed to be held with the arms extended out in front of the face. If you're shooting something important, we suggest always using a tripod when in live view mode, or, find an object to brace the camera against: a tree, a wall, a friend's shoulder, etc.
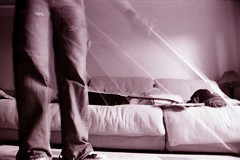
legs and the hose by ribena_wrath, on Flickr
In low light, with a slow shutter speed, this photographer made a wise choice to brace the camera on the floor.
Whenever possible use a tripod, monopod, or chest support bracket.
3 – Shutter Release
This is a BIG problem with many photographers. We get excited when we spot a photo opportunity. We quickly raise the camera to our eye and then we press down on the shutter release like we're tossing a medicine ball!
Don't do that. Some of the sharpest photographs we analyzed were taken by marksmen (you know – people who shoot guns). The reason being, they know how to calm their nerves and release the shutter with a smooth relaxed motion. If you get nothing else from this article, try to remember; draw a breath, hold it, and with slow steady pressure release the shutter button. Don't jam it.
Finally, when using a tripod for extended exposures attach a cable release, or a wireless release, to your camera. If you don't have one set your 10 second timer to release the shutter (this allows you to press the release button and let the camera settle down before the shutter fires).
4 – Focal Length
This one is easy to understand. If you stand outside and view the world through a pair of sunglasses, it's easy to see a sharp steady image. Now, hold a pair of binoculars to your eyes, and it's a bit more difficult as the field of view wavers with your ability to hold steady. Finally, look through a telescope and it's almost impossible to see a steady image unless you're not touching it all. The reason for this is magnification. That's the optical property that makes the image appear closer to you. It magnifies it.
Unfortunately, it also magnifies movement. That's why it's easier to take a sharp picture at a slower shutter speed with a wide angle lens than a telephoto lens. As you up those millimeters, movement becomes more visible; 24mm- not so shakey, 300mm- shakey. Bottom line – the longer your lens, the more you have to be concerned about camera shake.
5 – Camera Type
This can work for you, or against you. A standard DSLR with a small to medium length lens is probably the easiest to hold steady. If you're out snapping away with a tiny lightweight point-and-shoot camera set to 3X zoom. You've got to be aware of the previous factors of shutter speed, support, and release. On the converse side, hand-holding a medium format model (such as a Hasselblad, Mamiya, Bronica, or Pentax) can also present problems, particularly with a longer lens. Generally, it's best to put a medium format camera on a tripod, monopod, or chest bracket.
6 – Mirror Slap
This phenomenon becomes more apparent at extremely slow shutter speeds, or when using the bulb setting on your camera, or when shooting with medium format cameras.
For those of you who aren't familiar with the mechanics of a DSLR, here's how it works; The image is formed through the lens and directed to the eyepiece by an angled mirror located inside the camera. When you press the release to take a picture, the mirror flips up, out of the way, allowing for an exposure onto the sensor or film. When the shutter has completed its cycle, the mirror drops back down. Modern cameras have dampening mechanisms to try and reduce the movement created by the mirror flipping up and down. However, it's still apparent, especially in medium format cameras which have large mirrors. The best way to combat this camera shake problem is to lock the mirror up before releasing the shutter.
7 – Stabilization Hardware or Software
The main thing we would like to pass on to you regarding image stabilization technology is that it is there to help you. But don't rely on it. It's a tool not an answer.
Keep all these factors in mind when you're out there shooting, and we guarantee that you'll see sharper results in your beautiful photographs!
Happy Shooting!
Kent DuFault is a writer and photographer. He currently lives in Argentina and often writes fiction under the pseudonym, Bellakentuky. You can keep up with him here; https://www.facebook.com/bellakentukyauthor?ref=hl https://bellakentuky.com/ https://fujifinepixx100.tumblr.com/ https://twitter.com/Bellakentuky
