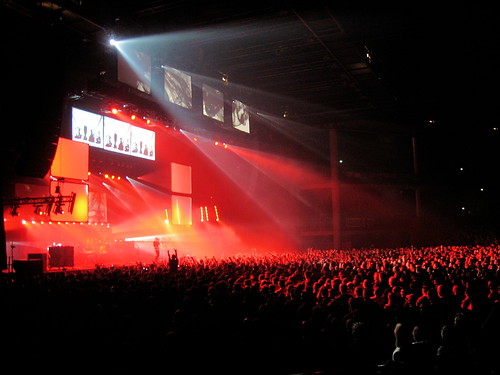
Music evokes many emotions and seeing music preformed live is a passion for many of us. It also happens that we are passionate about photography. Combining the two can be incredibly fun, but often frustrating if you aren't sure how to capture magazine quality photographs. This primer will cover what you need to know before you shoot at a concert, the gear you'll need and how to capture the moments best.
Before The Concert
Before you go to a concert, what is your purpose? Are you a fan who wants to take photos? If so, then you should check with the venue prior to going, many venues today don't allow photography of any sort and will refuse entry to those with cameras, although most all will let you in with a cell phone. If you are interested in getting press entry, usually you'll need to prove you are working for or will be submitting the photos to some form of media. You'll want to contact the venue and possibly the tour manager at least two full weeks in advance, more if you have time.
Gear
Concert photography is one of the toughest subjects to shoot, at least from my experience. Stage lighting shifts rapidly, dust, dirt and fog machines pollute the air and performers move around the stage very fast. In this instance, the better the gear you have, the better the photos you will get. The two pieces of gear that will ensure you a higher success rate is a camera that handles high ISO well and very fast lenses. If you don't own the pieces outright, renting equipment is highly suggested. For concerts my recommendations are:
- DSLR body that does at least 1600 ISO well
- Long zoom that goes to at least 200mm @ f/2.8
- Wide angle lens (optional)
- Fast prime: 50mm f/1.4
- Flash
Arriving At The Concert
If you've made arrangements to acquire a press pass, arrive prior to the start of the event. Usually press passes are picked up at the will call desk. When you get it, ask where you are allowed to go, for how many songs and if you can use a flash or not.
When you get inside the venue, introduce yourself to any bouncers that are around and the tour manager if you can. Confirm what you asked at the front counter, where you can go, how many songs, flash or not, and ensure you can stay for the entire concert. Have business cards.
On the other hand, if you are just a spectator but have made sure they allow cameras, allow yourself a little extra time to get in and have security go through your bag.
Shooting
Closer is almost always better, so get there early and get as close to the stage as you can. Your long telephoto zoom will allow you to do single shots, the wide angle will allow for the entire stage and / or the venue. So how to shoot all this?
There isn't one simple setting on your camera that will always work. To be honest, shooting concert photography will result in a lot of bad shots, so this is a rare time when you'll want to over-shoot. The rapidly changing stage lighting, movement from band members and moving around you will have to do among the crowd will drive your light meter insane!
I've found shooting in aperture priority method to be the most effective for concert photography, and generally shoot wide open. When you shoot, keep an eye on your shutter speed and try to keep it as close to the focal length of your camera as possible. If it's way slower, adjust your ISO to be higher to compensate. Adjusting your ISO and switching between modes is probably something you should practice doing with your eyes closed before going to the concert.
Flash
In my experience, using a flash at a concert event is rarely a good idea. The idea is to capture the show in the natural stage light as it exists. Also, most flash units are only effective for 25-50′ and often illuminate dust and other debris in the air, common for event venues. The only method of using a flash I've found effective is a rear curtain sync utilizing a longer shutter speed. This method requires shutter priority and is most effective between 1/30 and 1 full second.
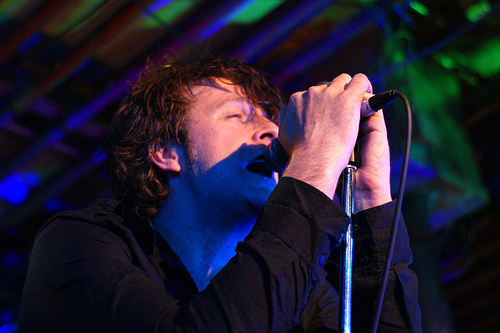
The above photo shows when a flash is appropriate to use, illuminating the face when there is a strong back light and you are very close to the subject.
Be aware how much you use the flash too. Take into account that there is a person you are shooting, firing two dozen shots in rapid succession with your flash is going to make them near blind.
Get Perspective
Front row is great for closeups, but that's not the only place to shoot. If you have access back stage, take some shots from behind the band, looking out at the crowd. While you are in front of the band, turn around and shoot the crowd, get the details. If the venue has a balcony that is accessible, go shoot wide from up above. A flash from that distance won't work and it's likely to be very dark so utilize higher ISO since a hauling a tripod will probably be out of the question.
Don't Fan Out
Be professional, allow others who are there shooting to use the same spot you are in and if and when you get to meet the band, don't fan out on them. Having business cards handy for the tour manager is also a good thing, both your personal ones and any companies you may shoot for. Ask for theirs and if they'd like to see the photos, how to best contact them and when.
Shooting concerts and live music is something I enjoyed a lot when I was younger. It allowed me to get access backstage and where I would have never been allowed as just a spectator. It does however take some time to learn and master properly, so be prepared to practice and shoot a lot. Additionally, I've found the bigger the venue, the better the stage lighting, the better shots you will get. That's not to say you won't get great photos utilizing these techniques in an acoustic set at a coffee house, but you will get far greater results from a big budget tour.
Share your concert photos in the comments below!
![[Paper]tiger Jams {Explored}](https://farm3.static.flickr.com/2462/3669552728_d325453747.jpg)


4 Comments
Shooting in RAW is also definitely a good idea. The extra wide color gamut will save your images in the low light
Post production is definitely a helpful tool for great concert photos. This photo was lightly edited in lightroom and it makes all the difference in the mood and feeling of the image. Genenvieve, Company of Thieves:
I do a lot of photography in small club settings. You are right that big stages offer more lighting opportunities, but they also come with more constraints and (in my case) not the type of music everyone wants to hear.
In such a context, a 200mm lens is often useless and a good kit includes a 50mm (1.4 or 1.8) and an 85mm, with an optional 35mm if you’re really front row. It’s crucially important to be able to go up in ISO in such clubs because the lighting is often low and bland.
Here’s a photo taken with my Lensbaby. It’s tricky to use in concerts because it doesn’t react all that well to high ISO and because of the manual focus, but when it works, it works!
And as Ross says, ALWAYS shoot RAW if you can !
https://farm5.static.flickr.com/4050/4585805359_557291afab.jpg
LOVE the comments this article is generating and all the photos!
Something to take into account that hasn’t been mentioned is LED lighting.. Most venues now use this in abundance (its cheap and controllable relative to old school hot lights) and it can/does cause chaos with your camera sensors. A pure red will give the red sensor a feast and the others nothing at all.. The results are horrible.. and very common. I shoot stage content a lot in my job and there are few and often zero ways to mitigate this issue.. If you are there to capture content for the event or the band themselves then you may have the opportunity to speak to the lighting guys and get them to mix a bit of white into the set.. you don’t need a lot just some.. Adding your own light ( flash) would also help mitigate the issue BUT using flash is a BIG NO.. as it will distract the bands and also the paying gig goers.. More often than not you will have no control over the lighting so just be aware of the issue and avoid scenes that only have one colour. If you are at a gig and the scenes are a constant one colour. Put your camera down, go to the bar and enjoy the music.