According to 19th-century writer Leigh Hunt, fire is “the most tangible of all visible mysteries.” It’s hard to argue with his thinking. It seems we’re all mesmerized by fire, in spite of — or, perhaps in part, because of — its potential for all-consuming destruction. We stare in awe at infernos that engulf buildings and forests; we’re hypnotized by campfires; we use the soft glow of candle light to set a relaxing mood. And as kids, we’re all told repeatedly by parents, teachers, and talking bears to never play with fire. Well, now it’s time to momentarily push those admonitions to the side and, yes, play with fire — you know, for art’s sake.
Safety Concerns
You may be playing with fire, but you still need to play it safe. You already know things can easily and quickly take a turn for the tragic anytime fire is involved — from burned property to burned flesh, or worse. So stay alert, play it conservative, and use good common sense. What does that mean, exactly?
- It’s smart to have a plan of action in place for quickly putting out a fire just in case something goes astray (perhaps keep a small fire extinguisher handy).
- On a related note, don’t work with fire in the vicinity of anything or anyone you wouldn’t want to catch on fire in the first place.
- Keep a safe distance. The bigger the fire, the more space you’ll want to put between you and your subject. This isn’t an issue of personal safety alone, as heat and smoke could also damage your gear.
Now, on to the fun stuff.
Start Simple
The easiest way to get started with fire photography is to use a candle. Yes, it’s a lowly single flame, but it still counts as fire photography. Just think of this as an experimental phase during which you can get comfortable with the basics of photographing flames. You will need:
- A burning candle.
- A dark room.
- A tripod or some other sturdy surface.
Before lighting the candle, focus your camera on the wick. Don’t waste your time trying to focus on the flame itself; you’re not going to get it pinpoint sharp because the points of focus are going to vary as the flame flickers. As long as you use adequate depth of field — at least f/8 — you should find both the candle and the flame are in focus. Considering you’re working in a dark room with a very small point of light, you’ll need to use a slow shutter speed. Start out around 1/6th of second. After your first couple of shots, you will know what settings need to be adjusted and how much.
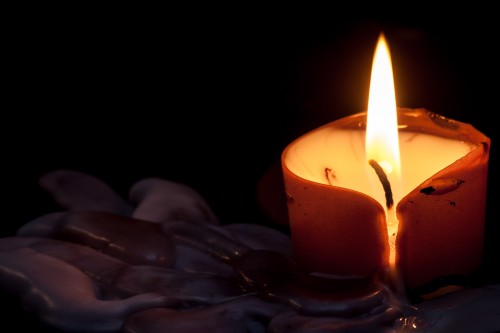
A question commonly asked in frustration by first time candle photographers is, “What am I supposed to do when the flame won’t stay still?” If you see the flame dancing around, that simply means there’s a draft in the room; make sure windows are closed and fans are turned off and that should take care of it. But there’s an alternative way to approach this: let the flame dance away and capture its motion. The basic principles of how light is affected by shutter speed apply perfectly here; a faster shutter speed will freeze the flame (as in the image above), while a slower shutter speed will capture the motion blur of the flame (see the image below).
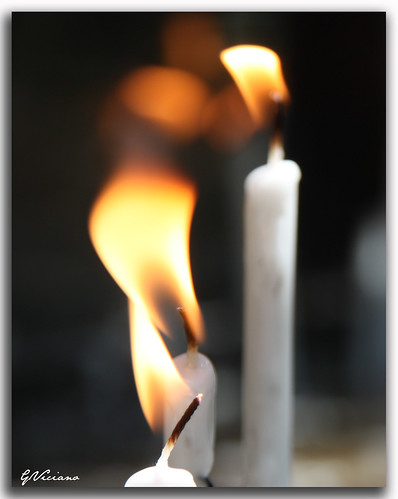
Photo by Guillermo Viciano
Once you understand what role you want your fiery subject to play in your images, really all that’s left to do is make a decision about shutter speed. So, what are the ways fire can be used in photography? You will three main uses for fire as a subject.
Fire as the Principle Subject
This is quite self-explanatory; the flame or flames are front and center. The primary focus of the shot is to show the fire — great or small — with as much detail as possible. The two images above both employ fire as the primary subject, while taking two different approaches to how the fire is portrayed (static vs. motion effects). If you are attempting to freeze the motion of a large fire or intense flames, it will be easy to get shutter speeds of 1/250th and faster (aperture can be widened and ISO increased to help keep shutter speeds adequate for stopping motion)

Photo by Leo Grübler
Alternately, you can use a slow shutter speed to show not just simple motion blur, but also to create an almost abstract rendering of fire that we are otherwise unable to discern with the naked eye. In these cases, you will typically be using a shutter speed of longer than 1 second, so be sure to keep ISO low.
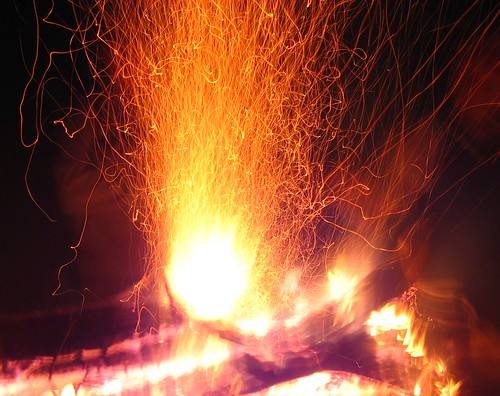
Photo by Kirrus
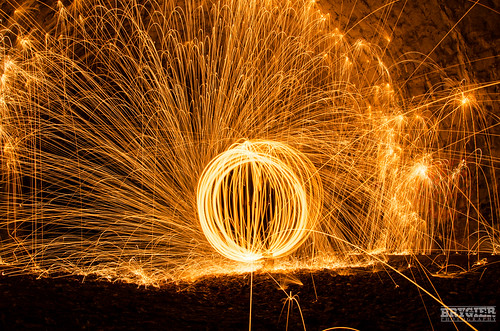
Photo by DB Fotografie

Photo by Adam
Fire as the Main Source of Light
Strobes and sunlight aren’t the only two methods of illuminating a subject in a photograph. Fire can work just as well, sometimes better, as it provides generally warm tones and soft shadows — something like a campfire. When using fire as a light source, the proximity of your subject in relation to the fire will be important in determining how long of a shutter speed you need. In general terms, the closer the subject the faster shutter speed you can use, as more light is falling on the subject. With more distance between the subject and the fire, you will need a longer shutter speed. Also, you want to use a wide-ish aperture so as to capture the subject and not just the fire itself.
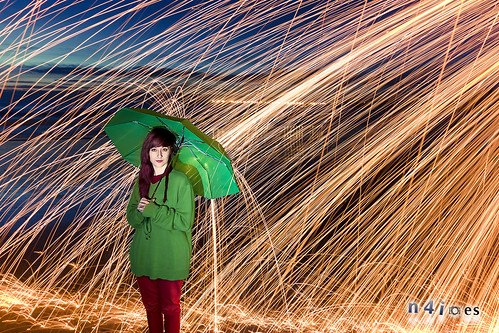
Photo by n4i
Fire as a Supporting Feature
Fire doesn’t have to be the primary point of emphasis to have meaningful impact in an image; fire is perfectly suited to take on a supporting role, to serve as an adornment or accent, or to provide exposition or framing. While the previous two uses for fire revolved, implicitly at least, around nighttime shooting, incorporating fire as a secondary element can justifiably be done any time of day. Shooting fire during daylight adds a bit of a twist since you can’t control the lighting. The best approach to take in such a situation is to expose for the flames and place the fire against a background that keeps it from being washed out by sunlight.
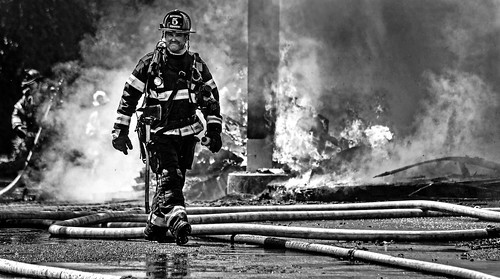
Photo by Robert Couse-Baker
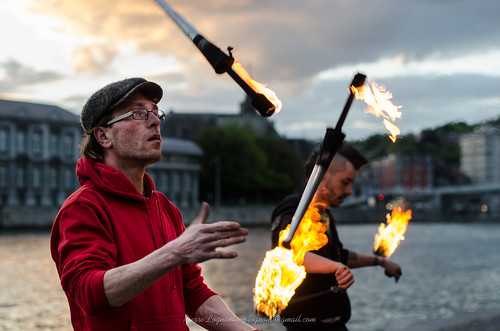
Photo by Pierre Lognoul
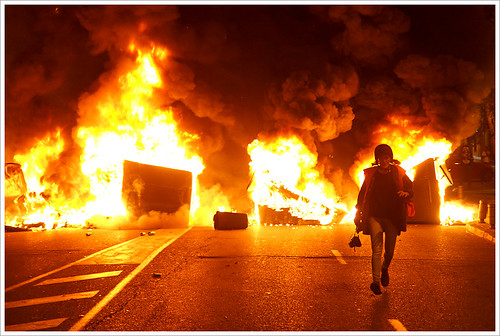
Photo by Montecruz Foto
You can combine these uses of fire in all sorts of creative ways; it will take some practice and the resources to make it happen, but you will likely find it a fun and rewarding challenge. Just be sure to make safety (yours and everyone else's) your number one consideration.