High key portraiture is a subject of constant debate among photographers. The different opinions are mostly on the subject of how bright the picture needs to be in order to fall into the high key category. I won’t get into the debate, of course, but I will try to explain the basics of high key portraiture. Maybe it won’t seem so at the beginning, but you should know that the rules for high key are simple. There are two terms you should remember – bright and precise. How bright? I will leave it to you to decide.
Controlling Light
First thing you need to understand is light. Unlike low key photography, where you will need to explicitly control light leaks and amount of light washing on to the background, in high key photography you are doing quite the opposite. You need as much light as possible on your background since it needs to be blown out. White, as pure as it gets. The goal is to contain the viewers attention to the subject and the subject only, nothing less and nothing more.
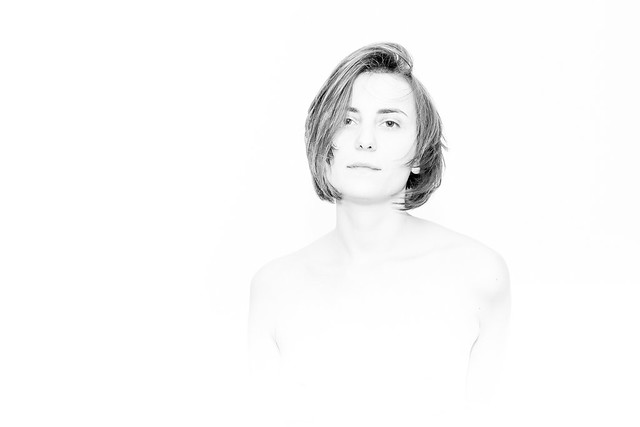
Photo by Roberto Taddeo
High key is often used in stock photography, since designers take advantage of the white background when masking the subject out. For stock photo, however, the subject needs to be properly lit, not overexposed. There are several ways to achieve this. Some of them need ambient light, while others strobes.
Using Ambient Light
With ambient light achieving white background means shooting against direct sunlight. That can cause serious glare and flaring. However most lenses are susceptible to flaring if the light source is small, as the sun or a high powered light is. That means you’ll need to increase the surface area of the light. This can effectively be done by using a sheet, or a curtain to do that for you.
If you are using strobes, decent amount of flash on a white backdrop would do the trick. Not to be overdone, of course.
Lighting the Subject
What to do with lighting the subject? How should you do it? You will be having blown out background, so you’ll need to get creative with the light in order to create enough depth for the subject to look natural and interesting. This can be tricky to achieve because there is so much going on.
If you are doing this on ambient light, you might want to incorporate some flash to make things easy for you. However, if you don’t have access to flash, you’ll need some reflector to bounce back some light in order to create depth.
The tricky part is, because you are practically blowing out the background there is nothing to create nice catchlight for you, therefore you’ll have to do that by yourself. One flash through a softbox or a good sized reflector will do the job for you.
You’ll need decent light from at least one of the sides in order to create depth, and one fill light to counter the first one.
The interesting part is that original rules you usually follow don’t apply here. The histogram will be on the far right, since everything will be pushed into the highlights. There will be quite bright shadows if any. Careful light measurements are a must since you don’t want to guesstimate the proper flash/light powers for every light source.
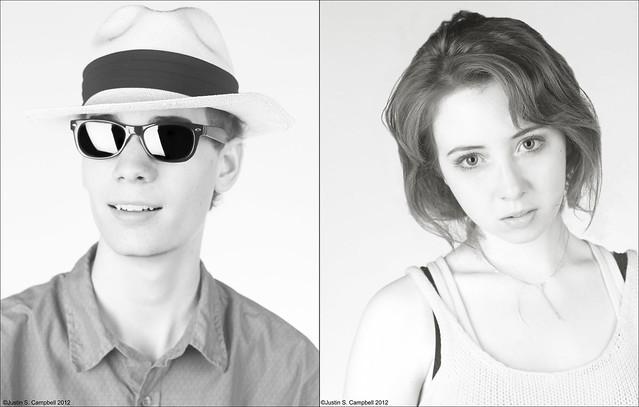
Photo by Gamma-Ray Productions
Take Care of Light Spills
Since you will be working with great amounts of light, you will need to be careful about the amount of light spill you are creating. For example, take the white background, if you are using flash to lighten it up, you shouldn't crank the flash up to full power just for the sake of it. If you do that you risk light from the background spilling over the model and washing it with stray and uncontrolled light. This also applies for every other light source you will be using.
So, to summarize: background needs to be lit just enough in order for it to be perfectly white without it bouncing light back to the subject; the subject needs proper lighting as if it were in normal scenarios, just a bit brighter so it would fit the category.
One more thing to remember: high key portraits are supposed to be elegant, smooth and defining. This means that there should be no deep shadows, light should be soft and nice and everything should be flattering. Imagine as you were to shoot a regular portrait for a model’s portfolio, it works pretty much the same, just you are shifting the light to be one or two EV brighter. Still flattering soft and controlled, just brighter.
What do you think, how bright is bright enough for a high key picture?


1 Comment
thanks for this post! I’m headed to a session now and am planning on creating high key portraits so these tips were very timely for me!