Adjusting several images at once in Lightroom is not only simple, but a huge time saver for batch editing. When you have many photos from a shoot that you want to adjust the same way – such as a wedding or sporting event – these simple steps will help to streamline your workflow.
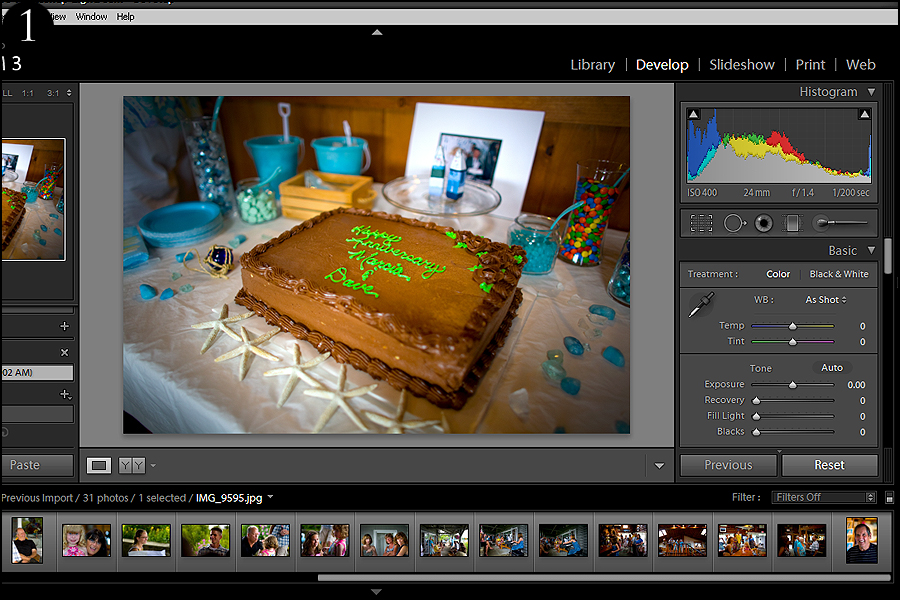
1. Import all your images into Lightroom so that they appear in the film strip below (Figure 1). Make sure your Develop tab is selected.
Note: Click on all images to view at full resolution.
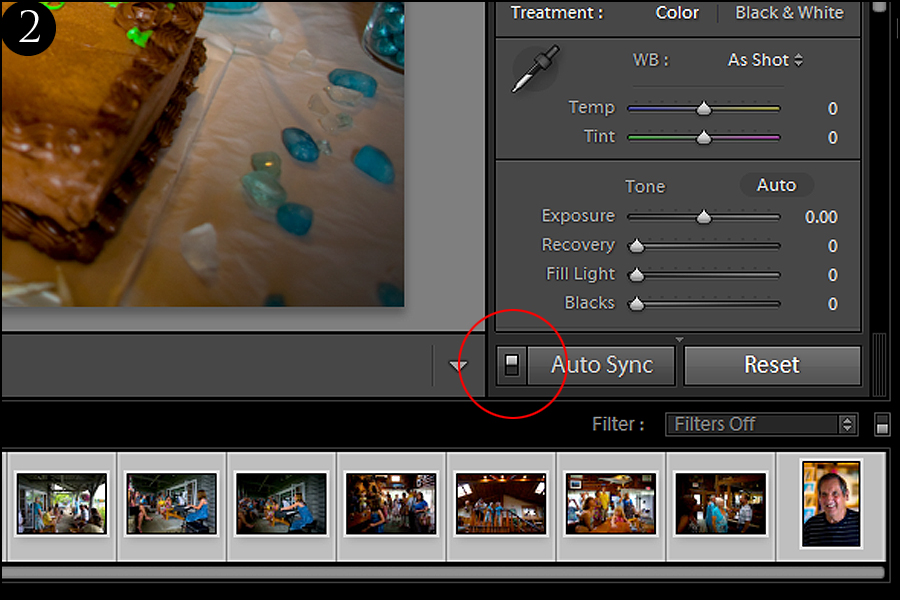
2. Select the first image in your film strip and, while holding down the Shift key, select the last image so that all your photos are selected. Alternatively, you can just hit CTRL+A. Now go over to your Develop palette where you'll see a Sync button and a switch to the left (Figure 2). Flick the switch so that the Sync button now reads Auto Sync.
3. Make any adjustment(s) you want and it will now be applied to all of your images – this is great for batch editing your photos that were taken under the same conditions (such as all shot inside with consistent lighting). For this example, I decided to desaturate all my photographs. Depending on the speed of your computer, it may take a few minutes to apply your chosen effects to all your images.
You can also apply a change you’ve already made on one image to as many images as you select (whether some or all). In the example below, I’ve re-saturated all my images so that I’m back to where I began. Instead of changing all my photos to black and white, I’m now just going to change the first image (Figure 3).
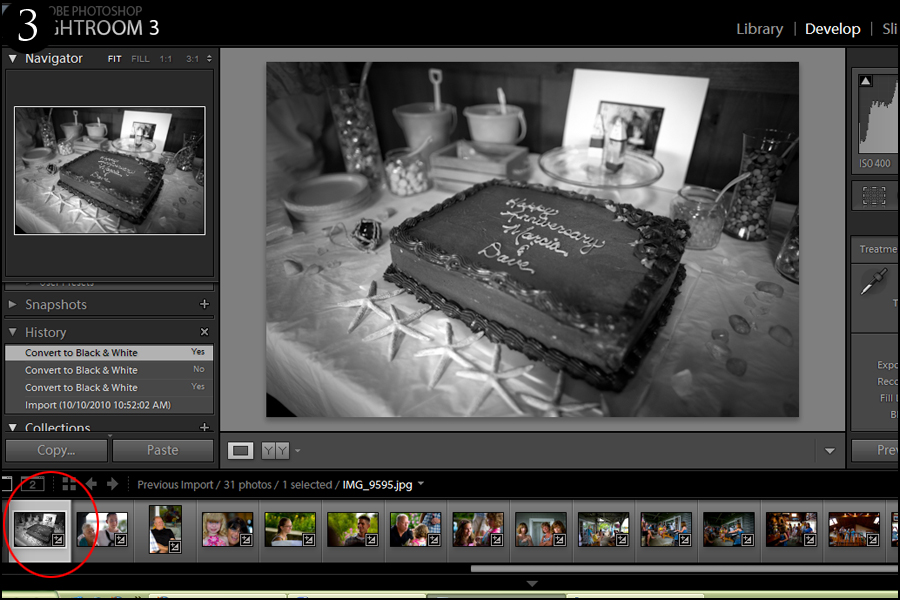
1. Instead of selecting all my images like I did before, I’m only going to choose three other photos to apply the adjustment I’ve already made to my first photo of the cake. Hold down the CTRL key and click on the images you would like to change.
2. Go back to your Develop palette and click the Sync button to sync your images (Figure 4). If Auto Sync is still turned on, flip that switch off.
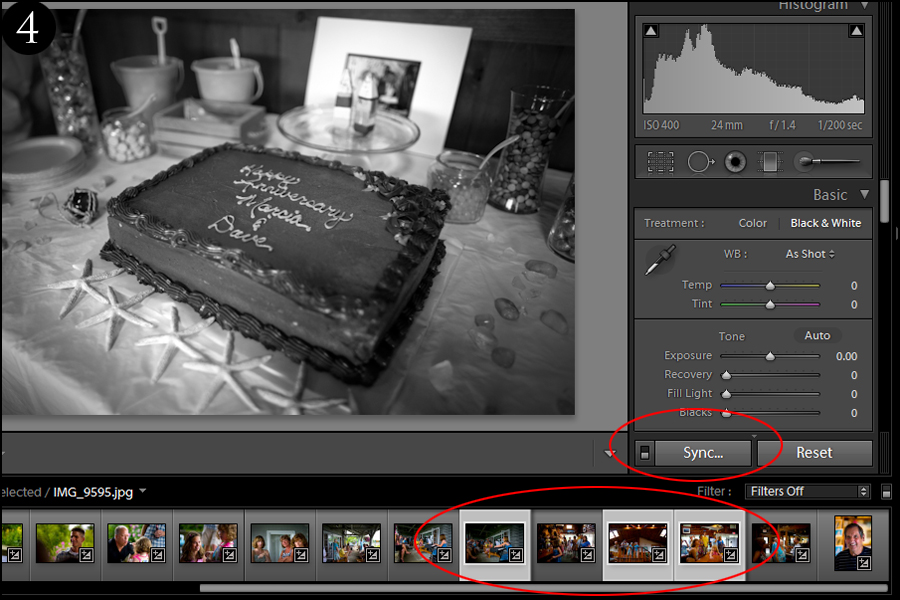
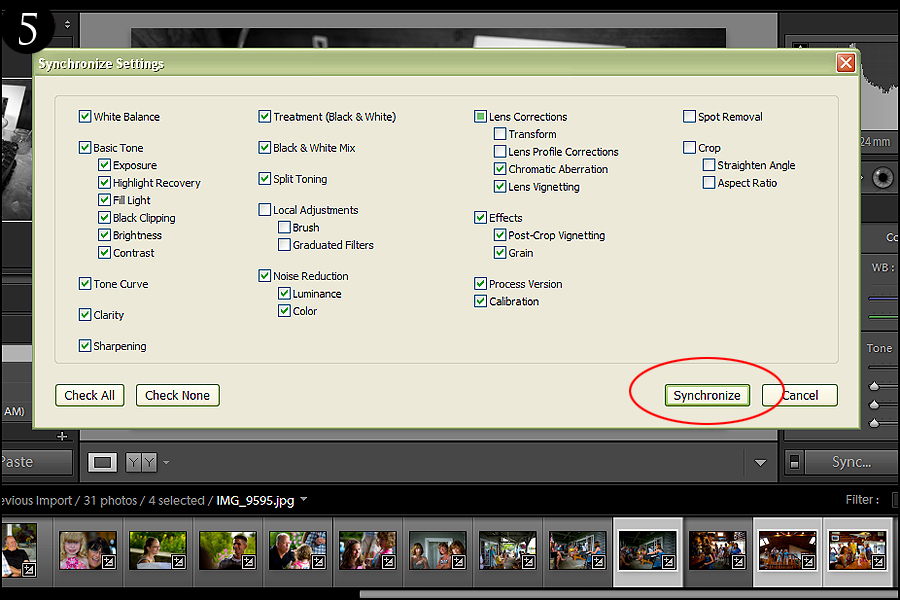
3. Once you hit the Sync button, a menu will come up allowing you to select what adjustments of the first image you would like applied to the ones you just selected (Figure 5). This is another great customization feature since you don’t have to automatically apply every adjustment you made on your first image to others. Once you’ve made your selections, click Synchronize.
One of the greatest benefits of Lightroom is to simplify your workflow, so why not use it to your advantage? Editing multiple files in Lightroom is quick, easy, and will cut a substantial amount of time off of your editing.
Read more great articles by Christopher O’Donnell at his blog or follow him on Facebook. You can also enter his print giveaway contest by signing up for his newsletter.


5 Comments
Thanks for the help. This makes my lifr much easier.
Bill
Thanks!
I made this after reading.
https://www.flickr.com/photos/espressobuzz/8458324773/in/photostream
Thank you for these tips – I’m brand new to Lightroom and am doing a lot of raw editing right now. This makes my life much easier!
Thanks for sharing! This is life changing !
You are talking about copying the same discreet number to multiple pictures. How about applying same adjustment VALUE to all pictures. Example: I want increase brightness by .2 for all pictures. Some may have -.5, other +1.3 brightness. I want all of them changed by +.2 withing their individual brightnesses. Can that be done?
Thanks