The impressionist painters have taught us that it doesn’t take a whole lot of detail to suggest meaning in an image; so it is with photography. Instead of snapping what is literally in front of us, we can capture in a photo the images we have in our minds. With the right content, lighting, and a dash of post work, you can create a dreamy image. Here’s how I made these impressionist style portraits.
How to Choose the Right Content
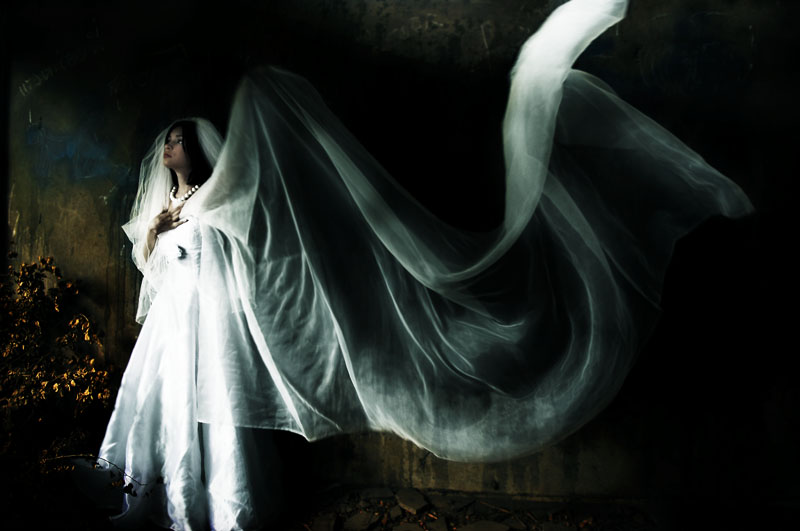
We drove to this abandoned building an hour and a half away, because it had fabulous walls. The walls were grungy and dark with streaks of dried paint or water from a forgotten renovation. The outfit for this set was an old wedding dress and a three-meter long piece of chiffon fabric, straight out of the shop. To get the blur of the fabric, a friend held the fabric out of the camera’s frame, and tossed it lightly upwards. I shot the fabric as it dropped down from the toss in the photograph below.

Lighting and a little Photoshop created this dreamy portrait. Copyright Aloha Lavina.
Mastering the Lighting
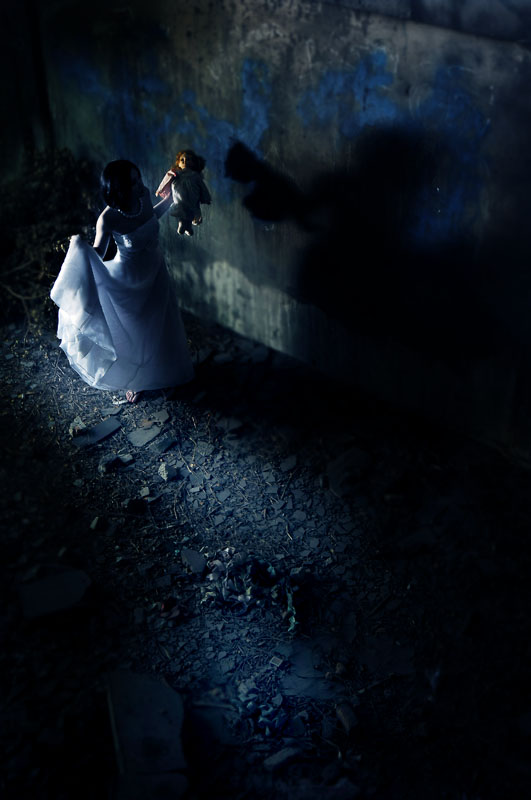
This photo was done with natural light. The wall at camera left was completely broken, letting in sidelight that created mysterious shadows behind the model. There was another broken wall camera right, and that lent the fabric some of the highlights you see in the image. I underexposed a lot, something like three stops, to increase contrast with the white dress and to create the effect of the fabric floating in the dark, in the photo above, and to enhance the pools of light on the path the model is walking in the photo below. I mention this because the surreal darkness in this photo was already created in camera and only enhanced when I worked on it in Photoshop.

Suggestions are rather powerful. Copyright Aloha Lavina.
Getting the Post Processing Right
Here at LightStalking we’ve mentioned how you can’t take a great photo using Photoshop. Photoshop can only help us enhance a photo. We also have to know why we use the tools you do in this part of image preparation; playing around with the software without a purpose is great when we have all the time in the world, but ultimately we have to learn how a post-processing workflow can help save rather than eat up a lot of the time that we could be using to make photos.
The most dramatic change I introduced to this image was to maximize contrast using blending modes and light painting technique. One reason I wanted a lot of contrast is that the dress didn’t have color, and the entire color palette of the image was limited to sienna and white, with a tinge of blue. Another reason why contrast was the key in this photo was the fabric’s effect itself. I wanted to enhance the dreamy quality in the fabric’s motion, and this could be done by increasing the shadows and accentuating the highlights. For these reasons, I only needed to use two tools in Photoshop. One of these tools is the Blending Mode Multiply, and the other is the paintbrush.
First, I duplicated the image. We always want to work on a layer instead of the original image; this way, we don’t destroy the original image. Also, if we make a mistake on the layer, we can start all over on a fresh layer after discarding the mistake.
Second, I went to the Layers tool box and selected “Multiply” as the blending mode. This blending mode makes everything dark. I slid the opacity of the Multiply layer to around 40 percent, and then created a layer mask.
Using the paintbrush tool, I painted in the original brightness of the image in the areas I wanted brighter, using a brush that was very soft and had around 50 percent opacity. There are a few of these “light painting” techniques out there, and this is only one of them. I selected this method for this particular image because it is more like painting and that was the effect I wanted in the end result.
With some imagination, planning, and post-work choices, it’s not difficult to create an impressionistic photograph. If you already know the impression you want to make, you can take the simple steps necessary to produce the complete picture.


1 Comment
Beautful photos.