There are essentially two layers to real estate photography: the exterior and the interior. Both are important, but the exterior of a property holds a special significance because it’s what potential buyers see first. A good first impression increases the chance of hooking a buyer.
If you’re a photographer who has been tasked with shooting real estate exteriors, the tips that follow will help you compose photos that will make an excellent first impression.
1. Find The Best Angle
Real estate photography has something in common with portrait photography — you often see the subject photographed head-on even when this is hardly the ideal angle.
When photographing a property head-on you often end up with far too much concrete in the foreground via the driveway and sidewalk — features that probably aren’t of primary concern to buyers.
Yard space and structural depth are more important and can be highlighted by shooting the property from an angle near the edge of the yard.
2. Hide Distractions
You always want to provide the truest possible representation of a property while also showing it at its best.
This simply means that you should compose your shots in such a way to hide or minimize distractions like garbage bins or even unsightly items that might be spilling over from a neighboring property.
The most effective techniques include filling the frame with just the most relevant sections of real estate and shooting on the side of the property opposite the unsightly elements to keep them out of the frame.
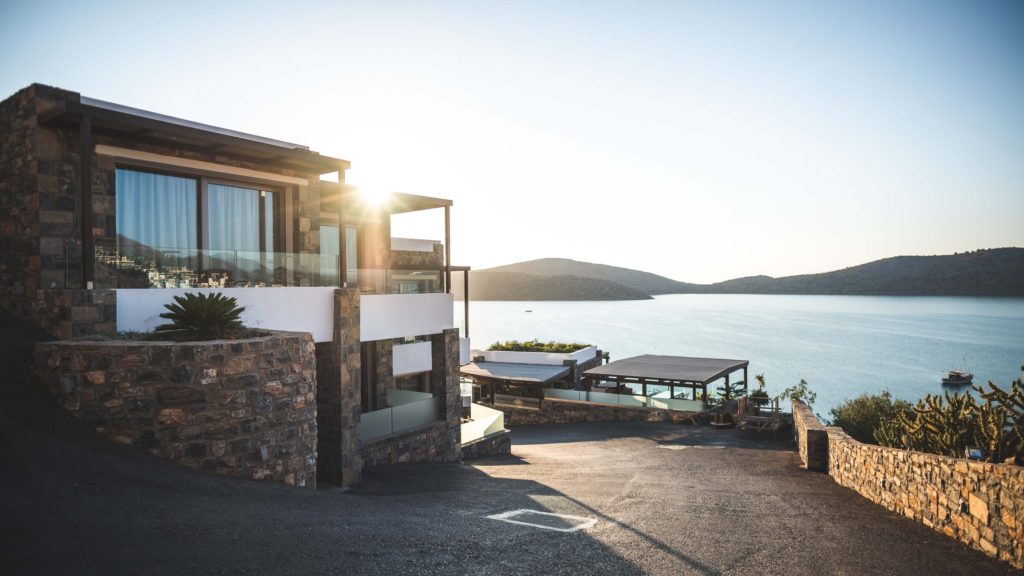
3. Choose The Right Time Of Day
Here again, you can apply some of the same principles as you would with a portrait, especially when it comes to avoiding shadows.
For example, if there are trees around a property they are going to cast long shadows onto a home at certain times of day — a look that doesn’t tend to make a great first impression.
One solution is to photograph the property on a cloudy day if possible. Or wait until early evening when the sun is lower and at an angle to either side of the property.
You will also need to move around the property yourself to test out different angles, as well as possibly returning to the location at different times of the day.
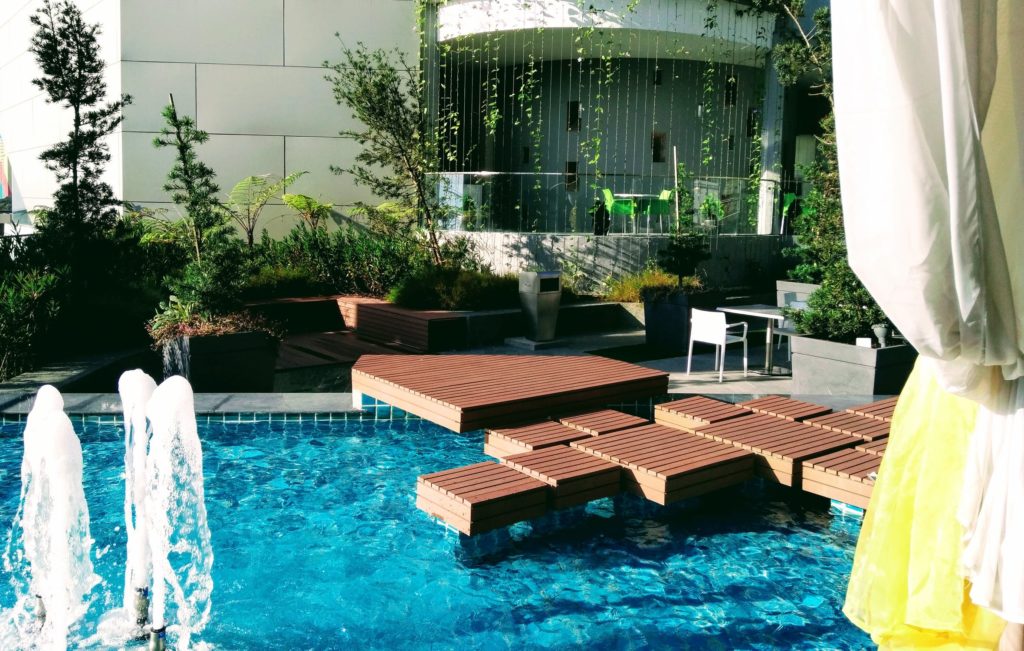
4. Accentuate The Best Features
A wide angle lens is a real estate photographer’s go-to tool, but not everything on a home’s exterior is best presented this way.
Interesting architectural design flourishes, unique building materials and indulgences like a pool, deck or garden should be highlighted. Get in close enough to provide detail, convey proximity and provide a sense of scale for the viewer, but don’t get so close that the visuals lose context.
Final Thoughts
Of course, before you take your first shot you need to make sure the property is clean and tidy.
After that begins the journey to craft a story for viewers — choosing the best angle, time of day and features to highlight, your goal is to create a series of images aimed at convincing the viewer to buy.
Further Reading
- How to Photograph Real Estate for Images That Really Work
- 5 Photography Projects You Can Do When You’re Stuck Indoors
- 5 Free Guides That Will Make You Better at Photographing Architecture


