Learning how to photograph real estate effectively can be a lucrative calling to someone who is looking to earn a few extra bucks on the side with their photography, or establish a full-time photography business of their own. While it is possible to earn an income with quality real estate photography, there's a lot of competition out there.
In order to be successful, you're going to have to be able to take great photos to beat out others in the market

Good morning Ha Long bay by jinkazamah, on Flickr
Equipment for Real Estate Photography
Real estate photography doesn't require a ton of extra gear like some genres of photography, but there are a few essentials you're going to want to invest in. The good news is, you likely already own most of it.
You won't need the latest and “greatest” camera, a decent grade DSLR will take you a long way. You won't always be shooting in poorly lit areas, but at some point it, will most likely be unavoidable. That means using a camera which performs well in low light situations will be of great benefit. But, with how quickly gear is improving in quality, many less expensive crop sensor DSLRs are capable of getting the job done.

Victorian House by David Sawyer, on Flickr
You're also going to want to invest in a decent wide angle lens. I always tell people to make sure they're buying the best quality lens they can afford. And with real estate photography, a wide-angle lens is a must-have to capture tight spaces in a single frame.
If you are shooting on a crop sensor camera, you'll ideally want a lens that can go as wide as about 10mm, or on a full frame camera something around the 16mm range. Because of the high level of distortion, it's best to avoid using a fisheye lens.
A tripod will also be an invaluable resource to help you out when you do come across a low light situation, https://www.lightstalking.com/tripod/ so choose wisely.
You can use a longer shutter speed rather than cranking up the ISO which may introduce noise to your images. If your tripod has a level on it, it can also be useful – to ensure you're shooting level horizons. I like to bring a circular polarizer filter to minimize reflections when shooting windows or shiny surfaces such as a swimming pool.
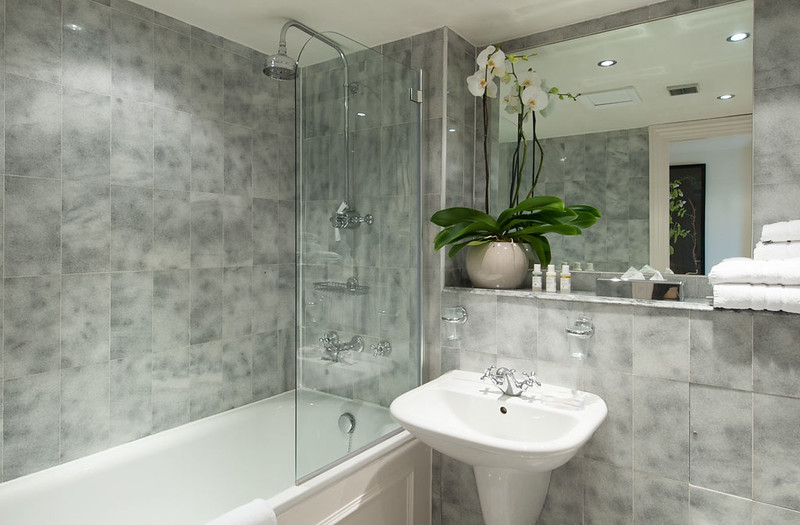
Europa House Apartments Bathroom by Living Rooms London, on Flickr
It's also nice to have a small collection of flashes available to help fill in the shadows on exterior and some interior shots, but this is not required. Bracketing your shots and blending them in post production can help minimize the need for an extensive lighting setup; however, if you're going to go this route, make sure you practice your post production skills and keep a critical eye as you work the last thing you want to end up with is an overworked and over “shopped” image. Truth be known, this is one of the bits of secret sauce for folks who know how to photograph real estate at a professional level.
If you are still coming to terms with flash photography, then do take a look at Kent Dufault's guide on the topic that will help you with interiors as well as other types of artificially lit shots.
Learn how to blend photos so they look natural. Remember, what you lack in gear, you can make up for in technique!
Composition
There are few hard and fast rules of real estate photography that make it a little easier to get good quality usable shots. (That being said, I'm a big fan of experimenting, so don't be afraid to break the rules every now and then.) Here are some general guidelines you can practice with to get you started.
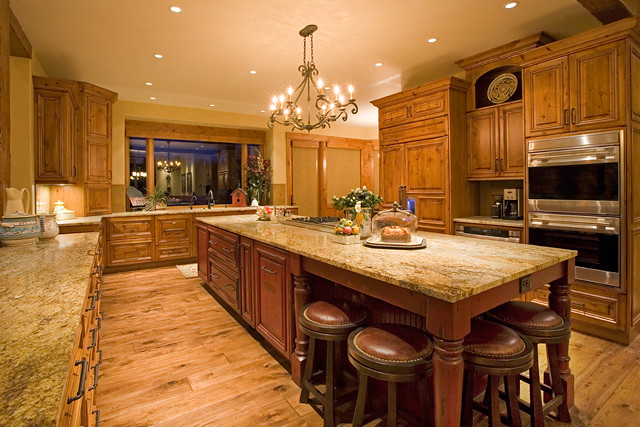 Steve Bennett Builders: Interior photo – professional kitchen and appliances in luxury custom home by Steve Bennett, on Flickr
Room To Breath
When you're shooting with a wide angle lens, you're going to have to correct some of the distortion in post production. There will be a curvature on the image which is simple to fix in most editing programs, but keep in mind you may loose some of the space around the edges of the image to during the correction and/or crop.
Also, when composing your frame, give yourself some breathing room on the borders in case you have to crop the photo a bit – that way you don't risk having to crop of the peak of a roof when you didn't intend to.
Shoot From The Corner of the Room
On interior shots, you're more than likely aiming to make the space look as large as possible. Shooting from the corners of the room are a great way to do just that. This little trick can also work great when shooting certain exterior shots like pool areas, back yards, and landscaping features.

interiors by Tom Merton, on Flickr
The Best Perspective
Fight the temptation to compose and shoot at eye level. For a more polished and clean feel, raise your camera up to your chest and stop there. This will nip converging angles in the bud and make the straight lines of walls, counter tops, etc appear straight rather than traveling at an angle, which is exactly what happens when you shoot with the lens pointed down or even up.
Hold that camera straight and level about 5 feet above the ground for the best results.
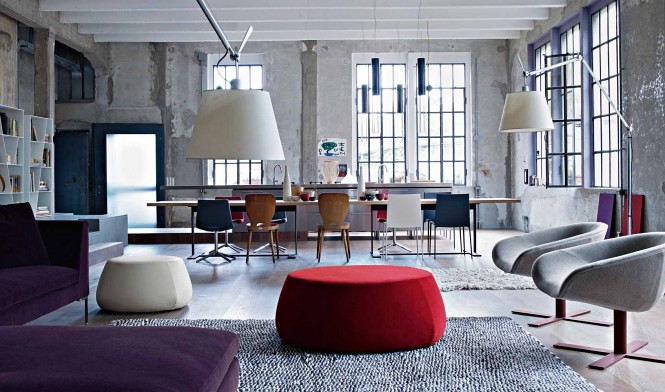 Inspiration by Jurgen Leckie, on Flickr
Shoot At Dusk For Stronger Exteriors
It never hurts to invest a little time in studying the natural and artificial lighting a house gets before the day of the shoot so you know what time is the best time of day to shoot the property. Some properties will lend themselves to being photographed when it's just turning dark outside.
Primarily, exterior shots of houses that have nice exterior lighting installed to highlight the landscaping, trees, and house itself. Swimming pools look wonderful photographed at blue hour when the lights are on.
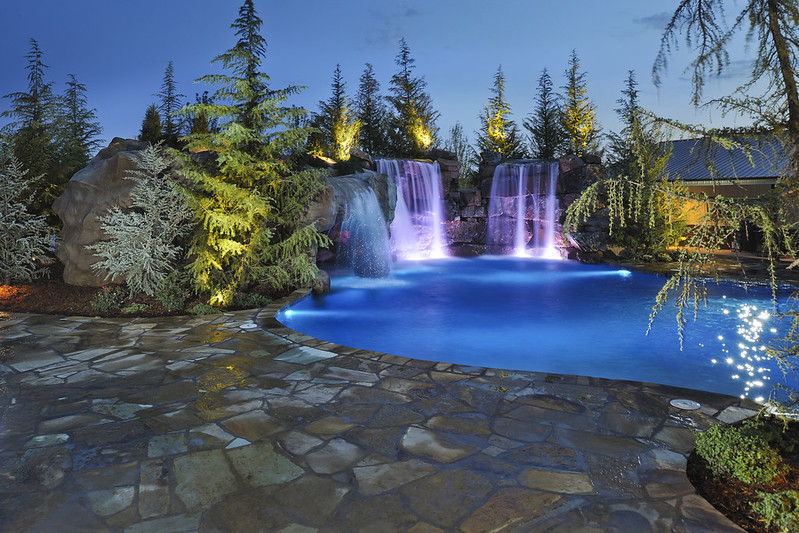 Richland Estate by Caviness Landscape Design, Inc., on Flickr
Working With Clients
If you book your first gig, be sure to communicate clearly with your client so you know exactly which shots they'd like to have taken. The list will almost always include bedrooms, bathrooms, the kitchen and other common areas. It could also include other spaces, so be sure you ask them what they specifically want photographed.
It's okay to politely ask the client to ensure the property has been cleaned and is picture ready for the appointment – in fact, it's recommended. A tidy appearance will make the house look more inviting, making it easier for you to photograph it in a way which makes it easy for a person to envision living in it.
So don't be afraid to request the property be cleaned beforehand – in the long run, it will make everyone happier!
 interiors by Tom Merton, on Flickr
Keeping up with the theme of communication, it's wise to discuss exactly what they expect and exactly what you are offering in terms of quantity of photos, resolution of photos, file types, post-processing, etc. Make sure you're both on the same page before you start.
Get Out There & Shoot
Lastly, take the time to practice as much as possible. You can teach yourself a lot just by practicing in your own home. Once you're ready for a change of scenery, ask your friends and family if they'd mind you practicing your craft by photographing their homes as well.
The wider variety of houses and properties you shoot, the better prepared you're going to be for when you're finally ready to step into the ring as a professional or semi-professional real estate photographer.
And even if you're not planning on making a go of real estate photography, it never hurts to learn a new skill – you never know what you'll be able to take away from it! Learning the basics of how to photograph real estate will stand you in good stead for other shooting including interiors and architecture, so it's never a waste of time to learn.
Further Resources
- Electronic Flash – Parts and Practices Essential Guide by Kent DuFault
- 4 Essential Considerations to Make the Best of Wide Angle Photography by Sheen Watkins
- Advanced Composition by Kent DeFault – Take your composition skills further!


3 Comments
Very good article with useful hints, like the 5 ft shooting height + the corner rule. Did Real Estate Photography for a big company while living in the West Indies (mainly high-end vacation villas). From that experience I’d like to add one more tip: Take your time walking through the rooms of the property to get a feeling for its character. From there try to identify objects which don’t fit / match and remove them before shooting – like cheap plastic coffee makers on marble kitchen counters of high end villas or the dog’s water pot in the hallway!
Very good article. Do change one letter in one word. “…keep in mind you may loose some of the space …”. That should read “…lose…”. Loose is when something is not tight, the sentence refers to losing space not loose space.
Let me add, you’ll want to provide a full range of services clients want and need such as:
Walk thru video
Drone photos and video
The ability to do sky swaps
Virtual twilight images
Green grass
Virtual staging
The more services you can provide the more your potential clients see you as a solutions provider.