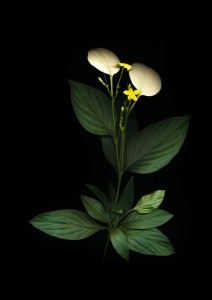
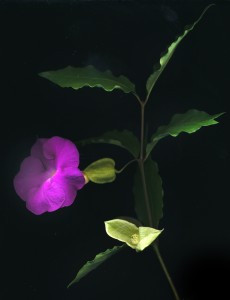
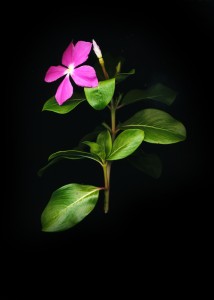
Scanners are usually used commonly to scan photos and documents, nut did you know that you can use your scanner to capture beautiful photos of flowers? Yes, besides the normal use follow the steps below to capture stunning floral images using your scanner.
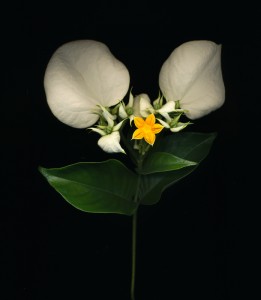
The ability for the scanner to provide a soft and flattering light, a depth of field that is quite surprising and a simple descriptiveness for the subject will allow the beauty of the flower to shine through.
Here's my method for getting the job done.
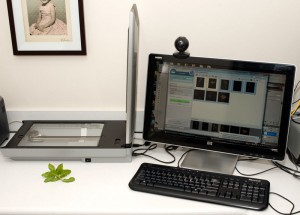
I use a standard A4 scanner; nothing flash. In the scanner software, set the resolution at the highest setting (mine is set at 600 ppi) and scan for colour photo.
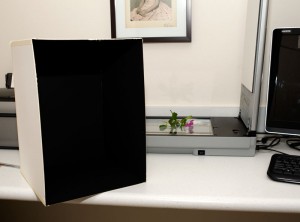
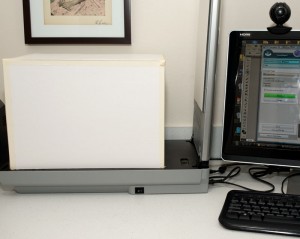
Instead of using the scanner lid, which would flatten everything, I have constructed a box from artists black matt board with the black inside. This will fit neatly over the scanning bed. You can use a white interior if you want a white background for the flowers (or any other colour for that matter).
Place the box over the bed and scan away.
I find the images will need minimal post-processing. Just a little levels adjustment and some dodging and burning. But this isn't to say you can't post-process to your heart's content. After all, it's your photo.
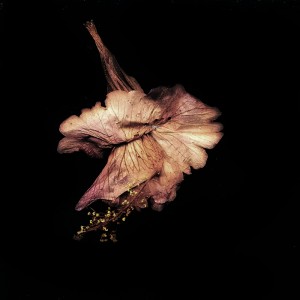
I especially like the effect the scanner gives dead flowers. There's a stillness and serenity not easily achieved otherwise.
And don't stop at flowers. Anything goes. Why, I've even seen the odd anatomical representation emailed around the office from the more adventurous scanners among us.
But please, nothing like that on LightStalking. And don't try it with the cat.
This is a guest tutorial from Light Stalking community member and professional photographer and teacher, Tom Dinning. Check out Tom’s photography website and his blog for some great photos and tutorials.




14 Comments
Mmm, really interesting!
OH I’m going to try it tomorrow…. I wonder if I’ll get the same results, can’t wait. Thank you for the tutorial!
Elizabeth.
I won’t try it with the cat, I promise.
What a creative idea. Could work with food as well.
Interesting, I’ll try this with bugs too
Definitely giving this a try.
Definitely something to experiment on. Hopefully, the hubby won’t object…:)
Great (and well explained) idea I may have never thought of. Thanks so much.
Amazing project- and love results! It really inspired me 🙂
Thank you for sharing!
I’ve given this a go and I’m quite pleased with the results although I have to improve on a couple of things ie: glass of scanner needs to be really spotless, and I must scan at a higher resolutions, I only scanned at 400
I’ve used my scanner for recording tree leaves. I think it’s better than pressing them as the colour is brighter and the images seem almost real.
That is a great concept that is worth a try!
Hey Tom, nice info on your process. However, I think some spammer has hijacked your website.
Mr Tom Dinning,
Hi Tom,
In an attempt to photograph paintings my searches frequently bring up your useful and interesting post, ‘How to Use a Scanner to Capture Beautiful Floral Images’.
I possess a 4×5 studio camera, (Toyo-View with a Schneider Symmar-S lens) that I have largely abandoned. It is not easy to find Dia film and laboratories to develop the film. The camera has a frosted viewing glass to facilitate focusing for shooting. This explains why I am anxious to reactivate photographing paintings by using a flatbed scanner to replace film.
My technical and computer literacy, is strictly limited. I doubt, therefore, that I would have the skills or the ability to undertake such a project myself. Should you be still following this field, Tom and, of course, without imposing on you, if you come across a person skilled in using and creating the scanner-camera backs I would be willing to commission a suitable person to create one for me. Or, hold my hand in an attempt to try it myself. Possibly you could pass them on my name and email.
I have the pleasure to remain,
Yours sincerely,
Matthew Moss