One of the attractions of photography for many is it’s blending of the creative and technical. Photography requires us to use both sides of our minds in order to get the shot. Sometimes, particularly for newcomers to photography, the technical side can be very daunting.
It is often made more so by the many articles and books that remind you of how important the technical side of photography is. Of course understanding the basics of exposure, focus, ISO, colour et al are important, however, they should not be something you get stressed about.
The fact is that modern cameras are incredibly good at automating our shots. As a relative newcomer or inexperienced photographer, we can let the technology take care of complicated aspects of the exposure. This leaves our minds free for creativity.
However, there are a few functions on our cameras that allow us to take a certain amount of control of the automation, handing us back some control but not so much as to take us out of our comfort zones.
Let's take a look at some of them.
Exposure Compensation
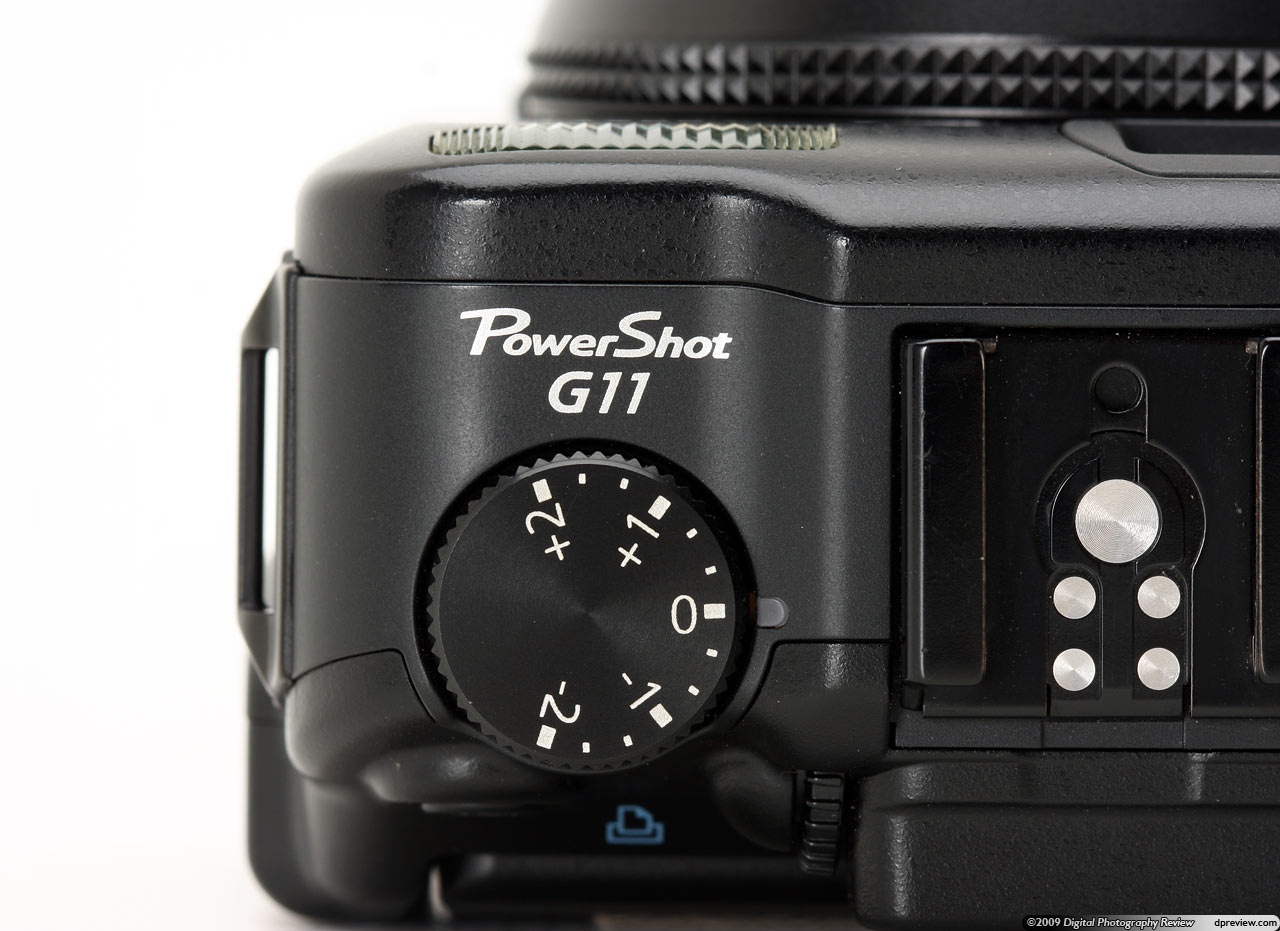
Many inexperienced photographers will use automatic exposure modes such as Program or Aperture Priority. Often these are very good, but sometimes you might look at the LCD on your camera and think, that’s a little too dark or light. This is where mastering the exposure compensation dial comes in.
Most cameras will allow you to add or subtract exposure by turning a dial. The dial is usually marked in 1/3rd of a stop increments. Turning the dial towards the plus side will lighten a dark image whilst turning to minus will darken an image. Its a very useful and easy to use function and will help you understand the complexities of exposure as you shoot.

Autofocus
Most cameras have a default autofocus mode called area or dynamic area mode. In this mode, the camera will work out what it believes is the subject and automatically lock on to it. Its pretty good most of the time but there are times when it might not recognize your intended subject.
There is a mode that allows you to take more control of your autofocus. Its called single point mode and as the name suggests the focus works from a single point in the viewfinder. You can usually define the position of that point but by default, it will be in the centre of the frame.
To use it, you simply position the point over the subject, half press and hold the shutter button then recompose the shot. It's a very quick and simple way to get more accurate autofocus while maintaining control.

White Balance
Another area where auto modes can go wrong is in the white balance of an image. If you have ever looked at images and wondered why they have a strange colour cast, the chances are that the white balance is off.
Auto white balance can be fooled by large blocks of colour or unusual lighting conditions. Fortunately, most cameras come with a number of different white balance presets to overcome these issues. Typically there are presets for sun, shade, flash, tungsten and fluorescent lighting.
For example, a deep overcast day may well have a blue cast if shot on auto white balance. However, if you change the preset to shade or cloudy, it will remove the cast and give you a more natural looking tone.

Auto ISO
In auto exposure modes the ISO is often raised if, for example, the shutter speed is getting too slow for hand holding. While this can be useful, it can also raise the ISO levels to points where you start to get significant noise in the final image.
Most cameras, however, allow you to fine-tune the Auto ISO by setting minimum shutter speeds and maximum ISO levels.
For example, if you are using a standard zoom with image stabilization you may well be able to handhold at much slower shutter speeds than with a non-stabilized lens. In this case, you might set the minimum shutter speed to 1/8th of a second.
Now as the light levels decrease, the camera will not increase ISO until your shutter speed has dropped to 1/8th. You can also define a maximum ISO, at which point your camera will warn you that it needs to lower shutter speed or aperture to maintain the correct exposure.

You should not fear the technical side of photography. Modern cameras are packed with technology that can completely automate the way we take photos.
However, nearly all that automation has a function built in that allows the photographer to take a certain amount of control over it.
We should see the technology as a photographic assistant, one who takes care of all the details but gives us, the photographer, the final say in the matter.
If you have a favourte manual or auto mode, please share your thoughts in the comments


3 Comments
“Many inexperienced photographers will use automatic exposure modes such as … Aperture Priority.” Wow.
In the context of what the article is about, this is a wholly reasonable and logical sentence.
Helpful tip re setting min shutter speed & max ISO. Thx.