Much is made of technique when it comes to long exposure photography — after all, you have to have some idea of what you’re doing and how to do it. But in this particular photographic niche, your gear matters almost as much. It matters not in the sense of being some sort of status symbol or commentary on your skill level as a photographer, but in the sense of allowing you to efficiently and effectively accomplish what you’ve set out to do under cover of dark: create beautiful long exposure images.
As you will see below, the basic list of items required to get the job done isn’t extensive, so if you have been thinking about trying long exposure night photography you don’t have many excuses to keep putting it off.

The Right Camera for the Job
This has absolutely nothing to do with what brand camera you use, nor whether you prefer mirrorless or DSLR. For successful night photography, the “right” camera is one that possess the following features:
- Manual controls – Aperture priority and shutter priority aren’t going to do you much good when shooting in the dark; you will need to set exposure manually. Same goes for focusing — odds are your camera’s AF system will struggle mightily under such such dark conditions. You can save yourself a lot time and hassle by using manual focus.
- Bulb mode – Shutter speed maxes out at 30 or 60 seconds on most cameras. These times may be sufficient depending on what you’re shooting, but in order to achieve very long exposures you will need a camera with bulb mode. That way you can make a 20 minute exposure should you ever want to.
- Raw files – Being able to capture images as raw files will maximize image quality and minimize noise, two extremely important considerations when making long exposures. Additionally, raw files provide considerably more latitude during post processing.

Tripod
Not even the very best in-body image stabilization will facilitate successfully hand-holding your camera when doing long exposures. You need a tripod. Luckily, there are plenty of portable, lightweight, sturdy tripods available at reasonable prices. This is the type of tripod to choose if you plan on doing a lot of walking/hiking as part of your night photography excursions. Keep in mind, though, that tripods do have weight limit specifications, so if your camera/lens combo is especially heavy you’ll need to choose a tripod capable of supporting it with no problem.
Remote Shutter Release
Long exposure photography requires a stable camera — even slight vibrations can cause blurry images. A tripod, of course, is your first line of defense against camera shake, but you can implement a further safeguard by using a remote shutter release which will keep you from having to touch the camera once you’re ready to shoot. In addition to being relatively inexpensive, most remote shutter release models work in bulb mode and allow you to shoot at intervals.
Extra Batteries
It’s good to have an extra battery or two with you no matter when or where you’re shooting, but nighttime photography ups the ante on this requirement. Why? Primarily because longer exposures eat up more of a battery. If you use Live View to compose and focus your shots (something you should definitely use if your camera has it, but it’s not a necessity), that will drain your battery even more. In short, there’s simply no good reason to not have spare batteries on hand.

Flashlight
There’s nothing worse than fumbling around in darkness, especially when you’re trying to get something done…like taking a photo. To avoid wasted time and possible accidents, make sure to keep a small flashlight with you. You can use it when setting up your gear, rummaging through your camera bag, or changing settings on your camera. As a bonus, you might even put a flashlight to more creative use by using it for light painting.

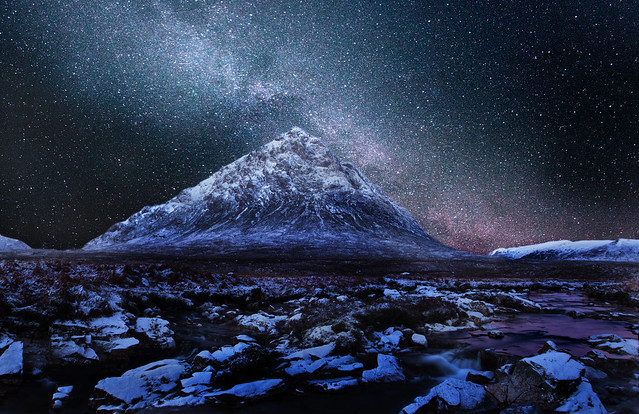
Photo by Oscar de Wit-Snijder
There are certainly other items you could include in your long exposure/night photography kit: a neutral density filter, extra memory cards, gaffer tape, snacks, and something to drink. And, of course, your cellphone, which you will probably have with you in the first place. Your phone can actually serve multiple uses: a timer, a flashlight, a map, etc. While not necessarily vital to night photography, these things might serve to supplement the “requirements” listed above to help make your outing more fun and more successful.


2 Comments
Well written. Just a bit of info from Nikon. Nikon recommends turning off the stabilisation on its VRII lenses when in Bulb mode when you have a very stable tripod. The manufacturer says (sorry from memory) something akin to the point electronic stabilisation generates its own micro-movement for stabilising the lens/camera body as a form of dampening. Hence for bulb length exposures turn off the stabilisation and just rely on your tripod and the other aspects for ensuring stability mentioned in the article.
Thank you for a very interesting and well written article.
Safety: In today’s world safety should always be a priority. Never go out and do night photography on your own – remember that you have expensive equipment that is easily sold on the black market. The bonus of having others with you is that they are able to assist when needed.