Usually, when I am sharpening or reducing noise in a picture, I end up doing it in a separate layer, and then masking the areas to which I don’t want the effect applied.
With the Blend If function you can apply this effect as much as you like to only select portions of the tonal range. It is funny that this function, or tool – call it whatever you like – has been around for a while now, but in the countless sharpening tutorials I’ve encountered, I almost never see photographers/designers making use of it. The traditional technique comes down to masking, selecting and refining masks, and all sorts of hassle.
When you start using Blend If on a regular basis, you’ll actually see the benefits in the amount of time you save by not needing to brush away portions of the image or trying to select then create masks from certain elements you want to avoid. Masking can be inevitable in some cases, but most of the time, masking is easily avoided.
Note that the versatility of this method is so great that you can practically use any sharpening method you like. You can sharpen with Unsharp Mask, High Pass filter, Smart Sharpen, and you can even do it with the Lightroom sharpening (doing it this way will require some multitasking).
Getting Started With Blend If
Okay, now on to my example. Using frequency separation I’ve cleaned up the image roughly, but it is far from a complete product since there is a lot of work to be done to even out the light, but for the purpose of this tutorial, it will do just fine. Now it is time to do the sharpening.
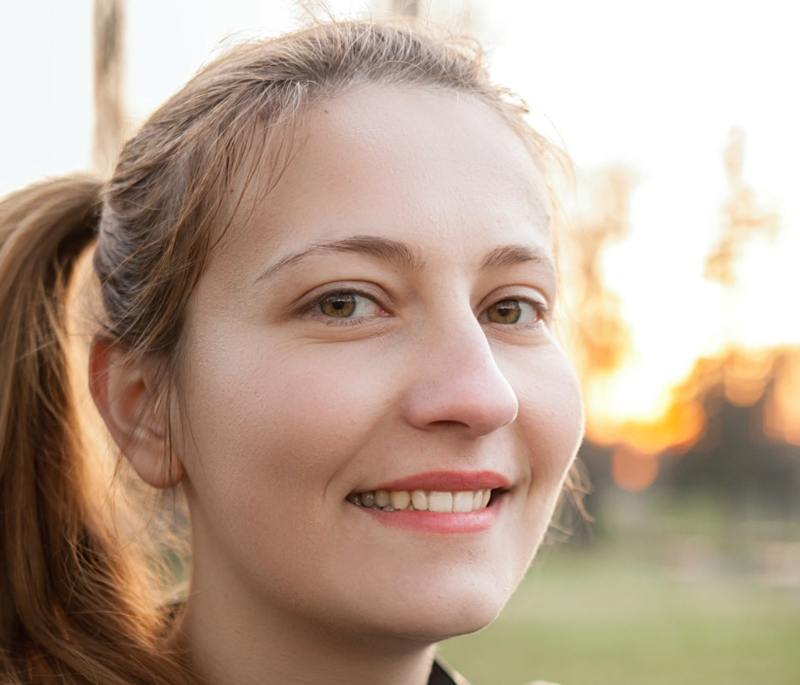
I will be using high pass sharpening here, which will be sharpening just the highlight details while avoiding noise.
Duplicate the layer (CTRL+J) and apply your sharpening method.
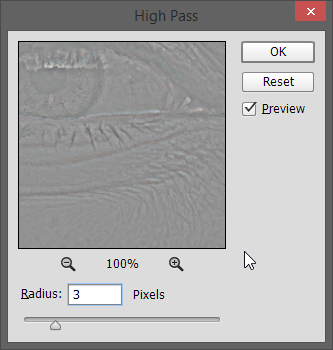
Since I want to keep the fine details, I’ve used a pixel radius of 3.
Next, I will desaturate the layer, this can be done quickly by pressing Ctrl+Shift+U. I do this in order to avoid weird color casts but also to gain as much quality as possible in the sharpening afterwards.
Because I want to avoid the noise, I will reduce the noise levels on the high pass layer. A simple noise reduction process will do. Don’t overdo it however you don’t want the details getting soft and resulting in the opposite effect.
Once that is done, I am going to change the blending mode to Vivid Light (I prefer it over the others since the effect isn’t too strong), but you can use Overlay, Soft Light, Hard Light or Linear Light, depending on your preference and situation.
Blend If
By double clicking on the high pass layer (and away from the layer title) it will open the blending options dialog. On the bottom, you’ll see the blend if section which has one dropdown menu and two sliders. Keep in mind that it doesn’t have to be a high pass layer, this works with any layer type, even if it has some vector shapes you want to blend in with something else.
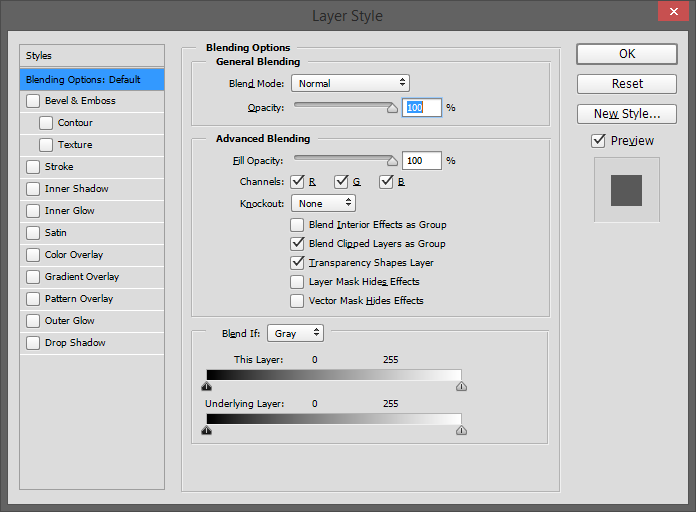
Because I am interested in protecting the bottom layer, I will be working with the Underlying Layer slider.
I will try to keep the sharpening in the shadow areas since they were underexposed and lost some of the details. The highlights look sharp enough.
In order to do so, I will limit the slider to the darker areas. This will depend on the lighting on the picture so it is a matter of taste, move the slider bars towards the tonal range you want sharpened.
Notice that you can create different sharpening strengths and radiuses for different tonal ranges this way to achieve more controlled and accurate sharpening.
Now, in order to avoid harsh transitions, the sliders can be split by Alt+click. In doing this, you can feather the effect for smoother transitions.
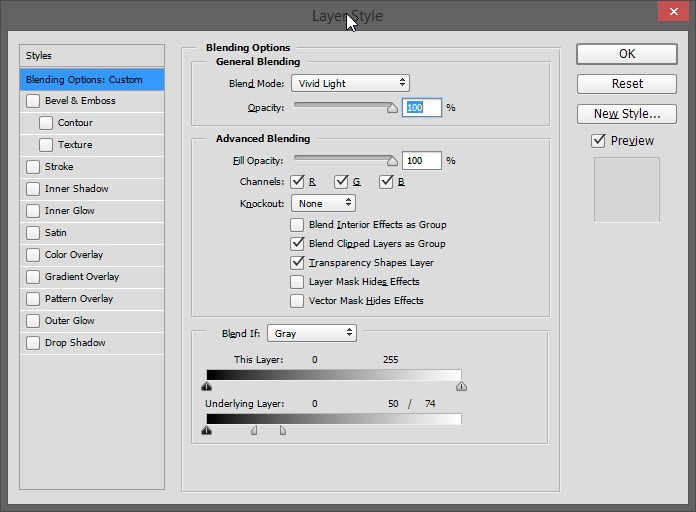
If there are some areas still affected, you can always add a layer mask and brush away the parts you don’t want affected. If you master this process, however, you’ll rarely need the masking.
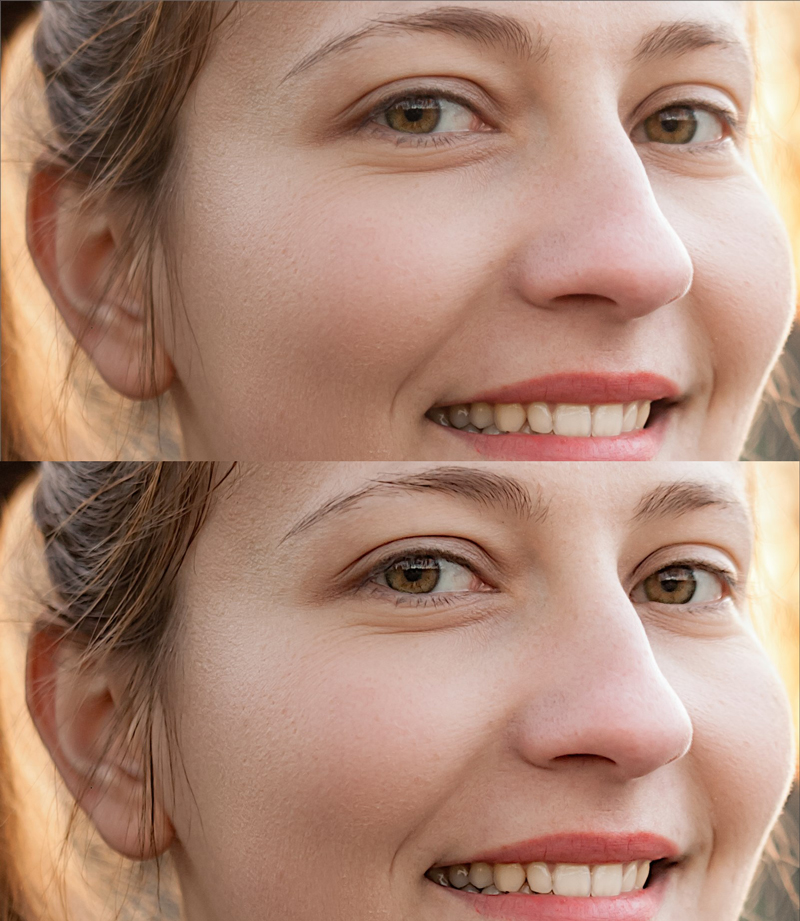
As you can see the sharpening affected the eyelashes, eyebrows and the inside of the eye, while leaving the skin texture almost intact. If I were to sharpen the skin texture but avoid the eyelashes, eyebrows etc., then I would just use the highlight portion of the slider instead of the shadows portion.


4 Comments
This sounds like a wonderfully useful technique/tool—but is it available in Photoshop Elements? I no longer have Photoshop. Thanks!
Nice 4 sure!
What a brilliantly informed article! Thanks for sharing this! It’s good to read such concise tutorials like these.
Great techniques!