As you are probably already aware, noise reduction can be a painstaking process. There are many ways to reduce noise but all of those ways have one thing in common: detail sacrifice. The more noise you have, the less signal there is, and in reducing more noise, you just reveal the lack of signal, add damage on top of that from the process itself, and it is a recipe for turning your image into a total disaster.
However, noise is much more present in the shadow areas than it is in the highlights, and that means you’ll need to apply stronger noise reduction in the shadows and less in the highlights.
For that purpose, I’ll use an image that has a good amount of the shadows recovered, thereby generating tons of noise. However, the highlights are exposed using flash and stage lights, so they should be just fine.
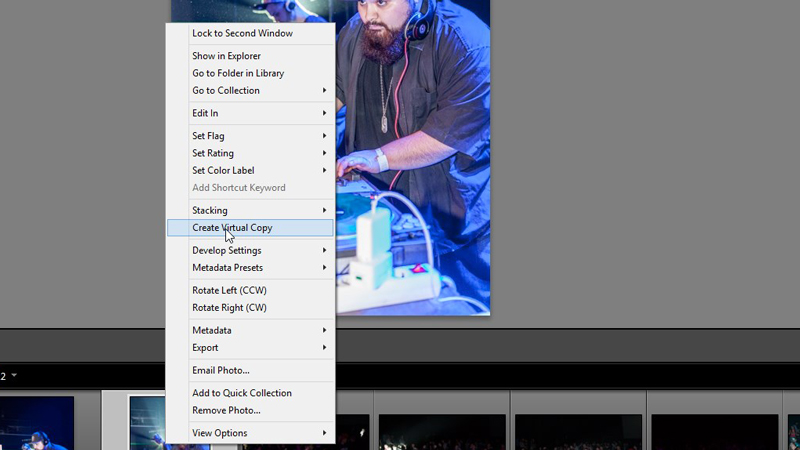
In Lightroom I will edit the photo as much as I like, but I won’t yet apply any noise reduction or sharpening. Once I feel that the image is ready for the noise reduction process, I will create a digital copy of the image, in order to have the same image twice with the same editing settings but with a different level of noise reduction.
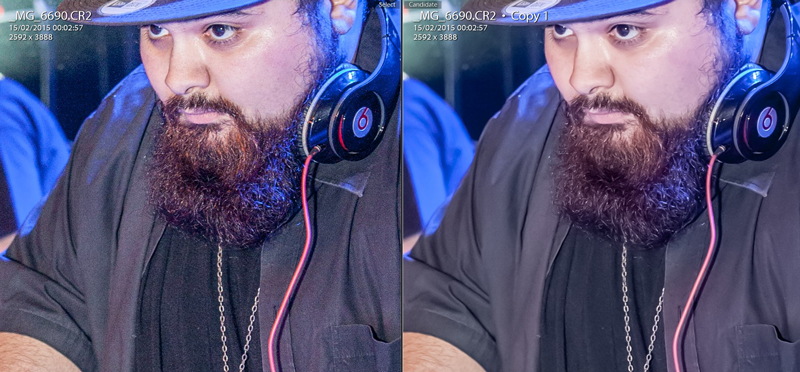
As you might see, one of the images has a very strong noise reduction, practically making all the details mushy, however the shadows are much more smooth.
Having both of the images selected, I am now going to open them both as Layers in Photoshop. This can be done by having both of the images selected, right click on any of the photos while selected, then go to Edit and choose the option to open as Layers in Photoshop.
When in Photoshop, make sure the clean photo is the top layer. Then double click on the Layer, but not over the thumbnail or the name. Now you should be seeing the Layer Style panel.
As you can see here, in the bottom part there is Blend If section, which contains one drop down menu and two sliders. I am going to use the Underlying Layer slider, since that is the part which will do the work I need.
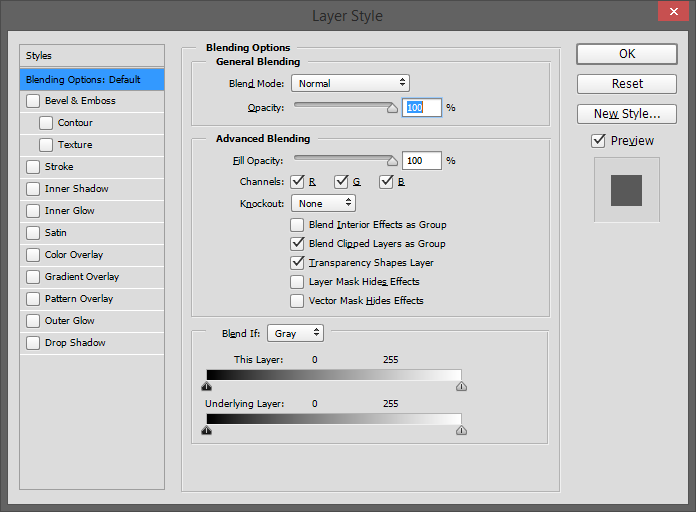
That slider is actually a tonal range slider which will make the layer blend with the layer underneath it only with the tonal range selected. This means that I can limit the layer only in the shadows, which is what I want.
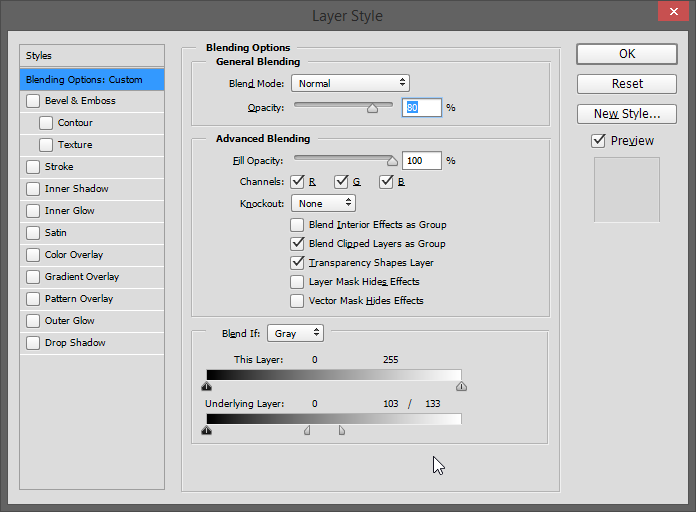
Move the slider which is on the white part towards the left untill you start seeing noise. When you see noise appearing in the dark parts of the image, then stop. In my case it was right in the middle, 128. However, this means that everything above 128 is completely ignored, while everything below is in full-power. I want it to have a smooth transition.
That is done by Alt+Click on the slider which will make it separate into two smaller ones. Take the right one slightly to the right, and the left one slightly to the left. Aim for a difference of around 20-30 units. Some noise must be present in order for the picture to look natural, but not so much that it is distracting. This smooth transition (also known as feathering) will make that happen.
Hit OK and that is that.
Just to keep it real, I will reduce the layer opacity to 80%, but that is due to the fact that there is too much detail lost in the beard, in subject of this particular image.
Now, I could create a layer mask and brush out the beard from the noise reduction and that might work, but the amount of noise is too high, so it will be rather distracting to create another mask.
Keep in mind that you can do this on several layers. For example, create three noise reduction layers for each part of the tonal range with different strengths, then limit them to their tonal ranges, and you will have more dynamic noise reduction with much more of the details preserved.

It is a fairly simple process which will save you some nice detail, and possibly some money, as well, by avoiding third-party plugins that pretty much do the same job.


8 Comments
I never thought of that technique! Nice one and sweet shot also!
Thank you, and you are welcome!
Thank you for a clear demonstration.
Which layer are you referring to when you say ” make sure the clean photo is the top layer.” “Clean” meaning the original image?
No, the cleaned image, where you have reduced the noise extensively. Since that is the one which you blend with the original.
Amazing technique. Thanks a lot for sharing it.
Such a simple method of improving a noisy image. I am sensitive to noise but maybe my camera is not so good. I also crop a lot ( birds) thereby reducing the resolution. Thanks for sharing.
Cool, thanks for sharing.
will this work in Elements ?