Adding a panning effect in Photoshop is a great way to take a stationary subject and give it some movement and fluidity. This not only creates a more interesting photograph to view, but also helps to tell a story in a more visual manner – such as a car that is parked compared to one moving (or at least one that appears to be).
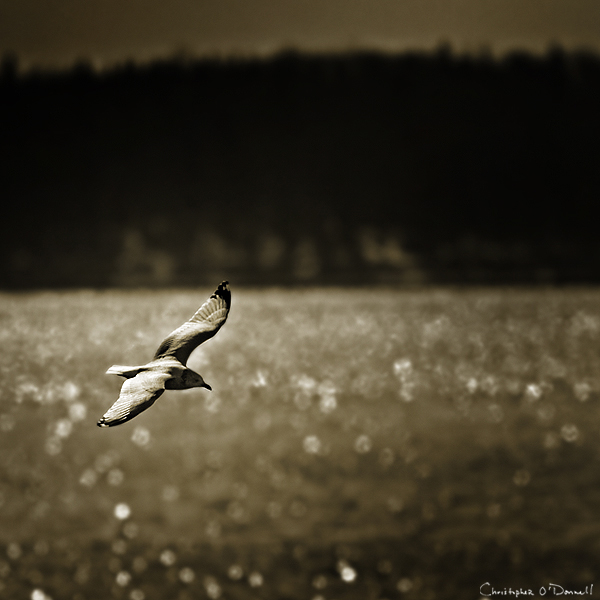
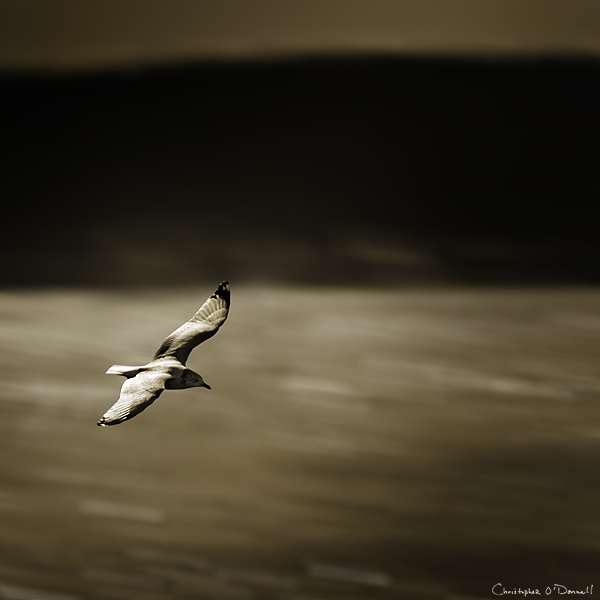
While the best way to capture a panning effect is to do so with your camera for authentic blurring and overlapping of colors and shapes, the Photoshop process can also look genuine with bit of patience. For this exercise, I'm going to add a panning effect to my seagull image below:
1. Open your image and duplicate your base layer so that you always have the original to revert back to if necessary.
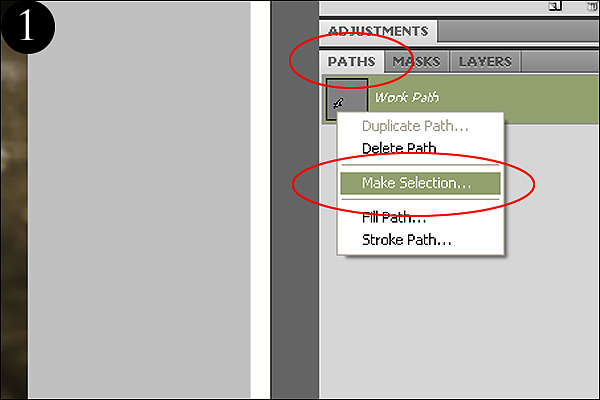
2. With your pen tool, carefully draw around your subject and any other elements you don't want affected by the panning blur. When finished, select the Paths tab on your layers palette and right click to bring up the Make Selection menu (Figure 1).
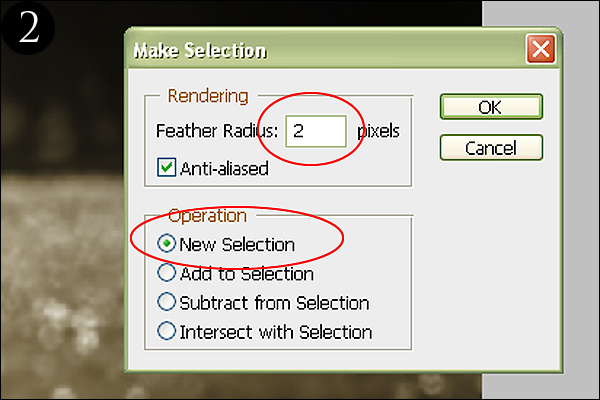
3. Here you can select how much to feather your new selection (make the transition gradual). For panning effects, I’d keep the feathering to a bare minimal (especially along hard edges), otherwise it will look contrived. Select “New Selection” to turn your pen outline into a selection (Figure 2).
If you see that your selection is a bit too loose around your subject, a simple way to shrink the outline by a certain amount of pixels is to click Select > Modify > Contract.
4. Next we’re going to make sure that we only blur the pixels OUTSIDE of our selection path instead of inside as that is where we want to add the panning effect to. Click Select > Inverse to switch the selection around.
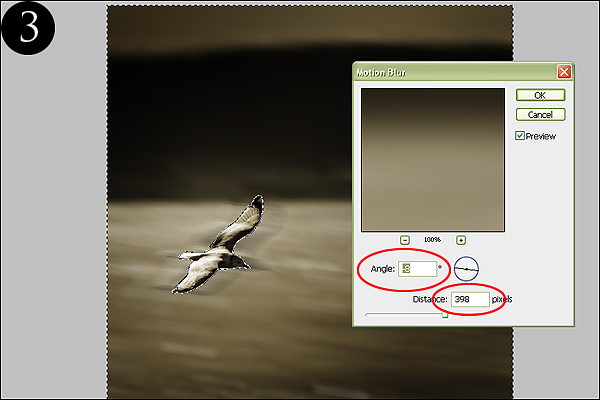
5. Now we’re ready to apply our panning effect. Click Filter > Blur > Motion Blur to bring up that filter menu (Figure 3). Here we can select the angle (the direction you would like your panning to go in) and the strength of your blur (distance). Play around with these sliders to obtain your desired effect. For my image, I wanted some severe blurring at a slight angle so I chose -8 degrees @ 398 pixels.
6. Depending on your subject and the strength of your blurring, you may run into the problem seen above: blurring of the subject in the background giving it an unnatural shadow. To correct this, we’re going to work our Clone stamp. Since you now have a nice, smooth background to work with, the cloning can look quite natural.
Do NOT deselect yet as you only want the clone stamp to affect outside of your selection – this will eliminate the need to work along hard edges and attempt to stay in the lines when cloning. Keep your selection active until you're finished with the steps below.
Go to your layers palette and make sure your top layer is active. Now select your clone stamp and with a very soft brush (0% Hardness) and a size suitable to the area you want to affect, select your clone source (by holding down the ALT key and clicking somewhere on your image) and start brushing around the shadowed area. It might be a good idea to have your clone stamp at a lowered opacity (say around 60%) to make sure that the transition is truly gradual and smooth.
After some clone stamping, here's the final product:
Now you can deselect (CTRL+D) and continue to edit your image.
I’ve tried a few different techniques involving layers to see if I can override the shadow effect we fixed in step 6, but I’ve found no suitable solution other than cloning. Since you’re basically stretching and blurring the existing pixels, it does make sense that you would need to include inside your selection as well…otherwise there would be no pixels to work with, thus giving you a hole in your image. If anyone has found a work-around to using the clone tool, please feel free to share your process below.
Read more great articles by Christopher O’Donnell at his blog or follow him on Facebook.


8 Comments
Great technique .
Hi Gudrun – I like your idea of cloning out the bird before adding the panning…very helpful!
I would select the bird beforehand, put it onto a new layer, then clone in the background (or use content-aware fill if you’re working in CS5) before blurring it. This way you don’t produce the echo of the bird in the first place. A bonus would also be that you could position the bird in a more optimal position afterward if it suited your vision.
Gudrun,
Could you please explain this more? I am not really sure what I am doing. Thanks,
Zach
I’m in agreement with Gudrun.
Agreed! I usually use the technique listed but I like the comment suggestion. Thanks!
Great idea, and very instructive. What version of Photoshop are you working with?
I cut around the object, copy it to a new layer and fill in the ’empty’ space with content aware in CS5…. can take time but it’s worth the effort.
If you choose not to using ctrl + t you can enlarge the object slightly and cover over the stretched pixels….
Adding a layer of noise can add a bit of a better ‘look’ too.
I’ve fine this to a pic up on my site where my panning hasn’t captured the image in camera. Have a look and see if you can see which one…