More megapixels are better, right? Well yes and no, it really depends on what your starting point is and what you plan to do with the final image. A 6mp sensor is probably not going to be great for fine art images. Conversely, a 60mp sensor is a complete overkill for a webpage.
Despite that, there are still a plethora of articles telling you to go full-frame, to get more megapixels, that the sensor you use now is not good enough. It is of course not true. If your camera is less than 10 years old then the chances are it’s perfect for 99% of what you do. However, it is possible you are not getting the very best quality out of that sensor.
Today we are going to look at five ways you can maximize the image recorded to your sensor.
Settings, Settings
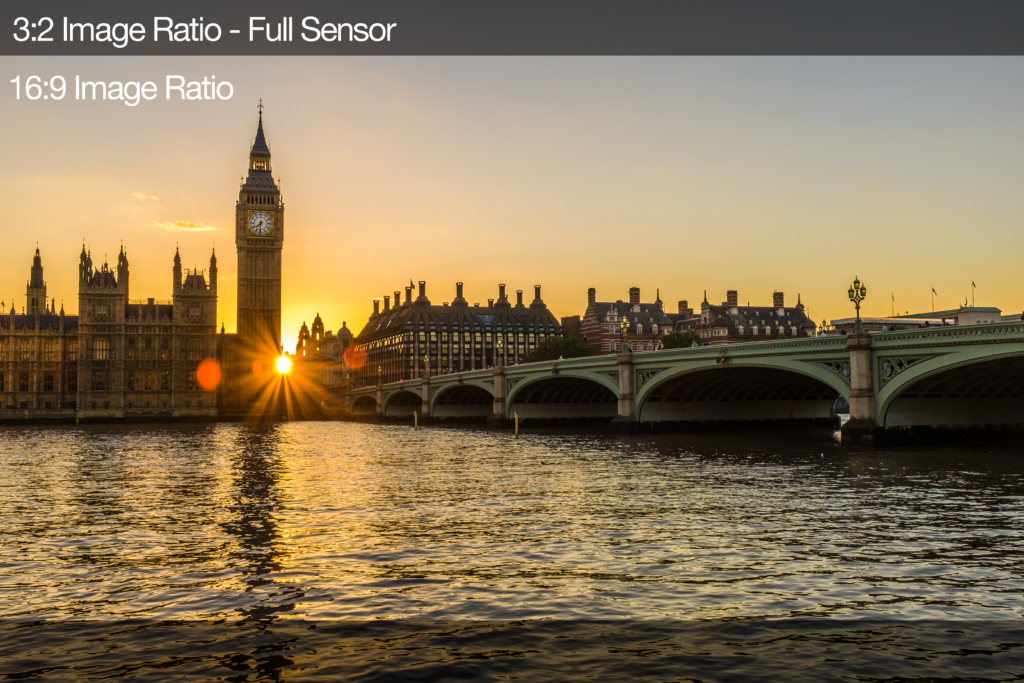
By default, out of the box, your camera will be set for its maximum photo resolution. However, through accident or on purpose, it’s quite possible that’s no longer the case. In image size settings you may see image format or ratio and image resolution. If you have your image format set differently from the sensor format, you are not shooting with all your available megapixels.
For example, if your sensor format is 4×3 and you are shooting your images in 16×9, you are binning a lot of pixels. Set the image format back to 4×3 and crop in post if you need the 16×9 size.
Equally some cameras allow you to drop the resolution and sometimes it’s easy to forget that you have done this. Always shoot at the camera’s maximum resolution.

Go RAW
You probably know this already but if you are really looking to maximize your sensor’s output then you should really be shooting RAW. The reason for this is simple – when you shoot JPEG, the camera makes a lot of adjustments for you. It will bake in the white balance, contrast, saturation, and sharpness. These remove control from you.
Shooting RAW gives you back that control. A RAW file is pretty much a direct readout of data from the sensor with very little extra information added. You can set the white balance in post-production, find the extra dynamic range, adjust contrast to suit, and change saturation all in post-production. In short, you can push the sensor to its limit.
Avoid Diffraction
Diffraction is an obscure problem that can easily affect your image quality. It is very much a sensor problem but the cause of it is aperture. What happens is that when you close down your aperture, the light passing through the lens starts to hit the sensor at more oblique angles.
Without going deep into the science, this angle causes the image to become less sharp. The smaller the aperture the less the sharpness of the image. There is no defined aperture at which diffraction starts to occur. It depends on the lens, aperture, sensor size, and pixel density.
However, as a rule of thumb, it starts to occur at around f/5.6 in m43 sensors, f/8 in APS-C sensors, and f11 in full-frame sensors. That’s not to say that it will very noticeable at these apertures, you might not start to see it until you stop down to very small apertures such as f/16 and f/22.

Shoot To The Right
I wrote about this technique some ten years ago. It is still valid on today’s more modern sensors. Again without going too deep into the science, sensors perform better at the lighter end of the exposure. If you have tried to lift shadows in an underexposed shot you will have noticed how quickly noise starts to appear in those shadows. If we shoot to the right, we are keeping the detail in the shadows and then dialing back the highlights to get the correct exposure.
There are two key elements you must observe when shooting to the right.
- The first is to watch your histogram. You are looking to get the bulk of the exposure to the right-hand side of the graph.
- The second element, related to the first, is not overexposing the image. If you blow the highlights, you will not be able to recover them in post-production.
Used in combination with shooting RAW, shooting to the right is a very powerful way to maximize the quality of your sensor. As a side note, the histogram your camera displays is based on a JPEG file. When you shoot to the right in RAW, you will actually have around one stop more leeway in the highlights than the histogram is suggesting. It’s best to bracket a little to make sure you don’t go too far to the right. Shooting to the right is best suited to higher contrast or high key scenes.


Keep Your Sensor Clean
This might seem obvious but sensors are literally dust magnets. Some of that dust will not be obvious unless you shoot with smaller apertures and push the image in the post. Then it sticks out like a sore thumb. Nearly all cameras come with automatic sensor cleaning that can be set to work when you switch the camera on and when you switch it off. Make sure this is enabled.

Auto-cleaning however will not stop all dust and so you should also be prepared to clean your sensor manually. This is done via a specialist cleaning fluid such as Eclipse and sensor cleaning swabs. Whilst not inherently difficult to do yourself, it’s not for the faint-hearted. If you are not confident in cleaning your own sensor, there are plenty of places that can do it for you, for a fee.
You can mitigate the chances of sensor dust with simple techniques. Turn your camera off when changing a lens. Keep the camera pointing down as you change that lens and don’t change lenses in windy or dusty environments unless you absolutely have to.
So there you have it. Five fairly simple ways to maximize the quality of the image coming from your sensor. Practice some of these on your next shoot and see how much better that sensor output is.


