Gravity is serious business. Accordingly, so is camera stabilization. When you combine the weight of a camera plus a big, heavy lens plus a few very stubborn physics-related variables, camera shake becomes a major hurdle to attaining sharp images. Fortunately, this is a hurdle that can be overcome with relative ease. Surely each of us has had some number of potentially incredible photos ruined by camera shake. Perhaps, a few of those images were salvageable; most probably were not. Given that chance so often leads to undesirable results, it’s best to avoid as much as humanly possible the insertion of luck into the photographic process — at least from a procedural and technical perspective.
When addressing practical solutions to camera shake, the cast of characters should be familiar even to newly minted photographers.
- Image Stabilization – This type of stabilization comes in a few different forms, but is essentially “in-built” stabilization, being housed either in a lens (gyro sensors are used to detect shake along two axes and counteract those movements) or residing within the camera body (the image sensor itself vibrates in such a way to counteract detected camera shake).
- The Reciprocal Rule – This old standby posits that to avoid camera shake, set a shutter speed that is at least equal to the reciprocal of the focal length of the lens being used. In other words, if you are shooting with a 100mm lens, then your shutter speed should be 1/100th second or faster. This rule, as is, applies to only to full-frame/35mm film cameras. To adjust for crop sensor cameras, simply multiply the focal length by the crop factor of the camera (1.5x for most APS-C sensor cameras [Canon currently uses 1.6x], 2x for Micro Four Thirds cameras). Using a camera with a crop factor of 1.5 and the same 100mm lens mentioned above would yield a shutter speed of 1/160th second (closest to 1/150th of a second).
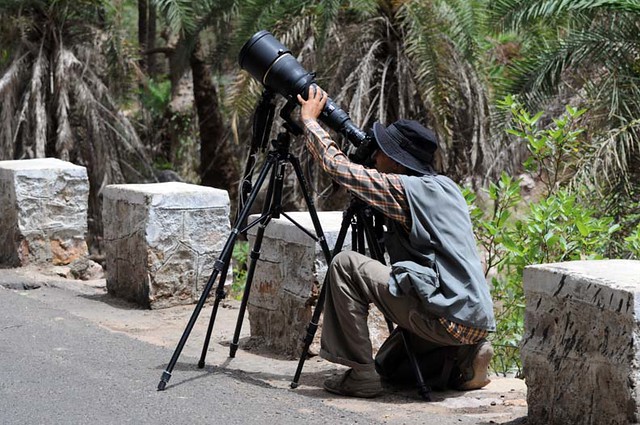
- Tripod – The oldest and perhaps most effective method of camera stabilization, every photographer should own a good, sturdy tripod even if you don’t use it frequently. If you ever intend to make long exposures of any kind, a tripod isn’t optional and the two methods discussed above will be of no use.
As with many things in life, there’s always a “but,” an exception of some note that is worthy of being sorted out. Not all lenses and cameras provide built-in image stabilization (though it is increasingly unlikely to find a digital camera without this feature implemented in some fashion), and there remain photographers who still use film cameras (which don’t have the feature at all) for some or all of their work.
While the reciprocal rule is generally reliable, it isn’t always practical; there are times when the aperture and ISO required to shoot in conduction with a particular shutter speed will fail to produce the overall exposure you want.
Tripods can be heavy, and even when they aren’t, that doesn’t mean you feel like lugging one around with you; furthermore, there are venues that strictly forbid the use of tripods, so whether you’re okay with carrying and setting one up becomes irrelevant in such cases.
This brings us to the monopod.
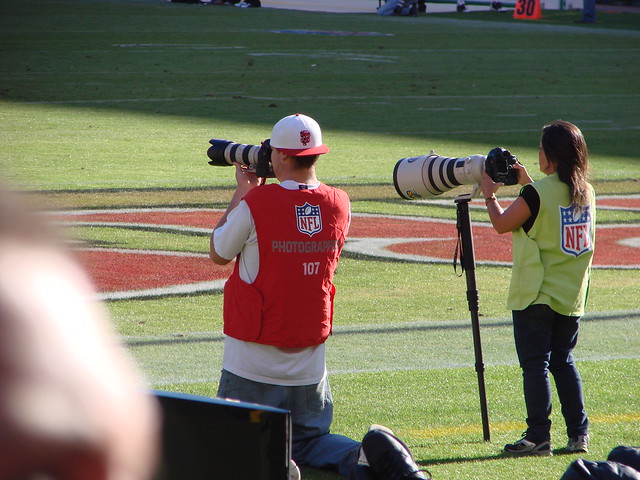
As the name suggests, a monopod is the one-legged cousin of the tripod. Here are some of the important advantages a monopod gives when you’re in need of camera stabilization.
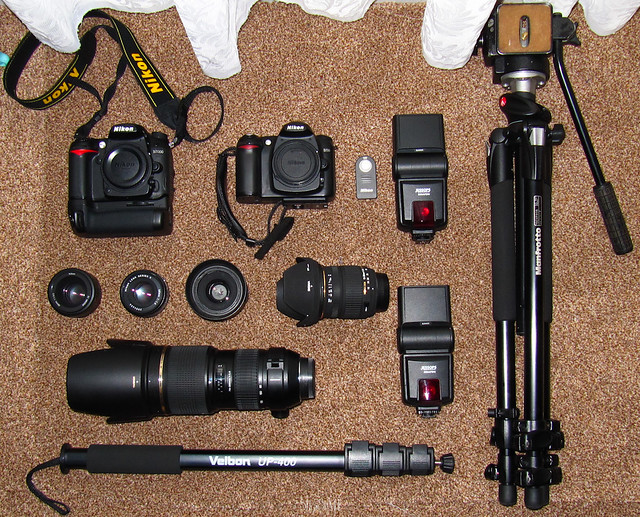
- Smaller Weight and Size than a Tripod – There are some truly unwieldy tripods out in the world taking up space and generally being menacing toward both people and other tripods. If it is your desire to not play into all the tripod nastiness going on, you’ll be happy to know that monopods are typically a fraction of the weight of many tripods. Given the one-legged design of a monopod, you don’t need to worry about it presenting the tripping hazard that a tripod does; other photographers and innocent bystanders are much safer around monopod users. Plus, you can easily pack a monopod away in your camera bag.
- Easy to Set Up – With a monopod, all you need to do is extend the one leg and mount your camera. This sure beats having to extend three legs and having to adjust one or more of those legs when you find yourself on an uneven surface.
- Mobility – Due to their ease of set up and light weight, monopods help outdoor and sports photographers stay mobile.
- Easily Adapted to Big Lenses – Heavy lenses tend to include a tripod collar used to better balance the weight of the lens on a tripod. Good news! That collar isn’t the exclusive domain of tripods; monopods use them just as efficiently, helping you overcome the deleterious effects of gravity and big lenses.
- Low-tech Alternative to Image Stabilization – Not having a camera or lens equipped with image stabilization is by no means a barrier to being able to photograph under certain conditions. How do you suppose all the great photographers of yesteryear got by without the technology we so often take for granted? Well, one way was to use a monopod. Don’t let technology dictate what you can and can’t shoot. There’s nothing wrong with some old school problem solving.
- Cost Effectiveness – Buying a good monopod will cost you less than buying a tripod or image stabilized gear.
- Creative Flexibility – You can use a monopod in ways that you can’t use a tripod. As an example, using a wide angle lens, you can attach your camera to a monopod and use the monopod as something of an arm to capture a bird’s eye view perspective.
Of course, monopods do have drawbacks — one leg isn’t as stable as three, you have to keep your hands on the camera at all times — but they are an important, sometimes overlooked option for achieving camera stabilization. You also have be sure to use good technique in order to maximize a monopod’s effectiveness. Below are a few thoughts on that.
- Add a second point of contact to increase stability. This could be a wall, a fence, a chair, or just about any other stationary structure.
- Engage in a “strategic stance.” If you’re a right handed shooter, place your left foot forward and place the foot of the monopod against your inner right foot, allowing the monopod to lean against the inside of your right leg. This is essentially another method of creating a secondary contact point.
- Form a human tripod. Contrary to what you may see others do — or what you may have done yourself — placing a monopod in a perfectly vertical position isn’t ideal. Instead, use your own to legs (spread about two feet apart) as a starting point, then with the monopod out in front of you, tilt it back toward you as if to form the third leg of a tripod.

These are just some basic ideas to get you started if you’ve never used a monopod, or to help you improve your technique if you haven’t been getting sharp images even while using a monopod. The more time you spend with it, the more proficient you will become, naturally. There are more advanced monopod techniques that you might eventually find a use for. But the underlying point remains unchanged: eliminating camera shake is a major factor in producing sharp images, and a monopod is but one of many tools to help you in this endeavor.


2 Comments
A 100 mm lens on a full frame camera is 100 mm, a 100 mm on a APS camera is still 100 mm ! The distance light has to travel through the lens to the sensor is exactly the same in both cases thus the reciprocal rule holds for both. Because modern sensors have such high resolution – camera shake is more easily seen. So to be on the safe side it is good practice to use as high a shutter speed as possible – consistent with what one is trying to capture. For this old fart image stabilization, whether in lens or camera, is fantastic technology. Stabilization supersedes many of the “old” advise many are still giving.
Here are some other concepts concerning camera shake to think about:
Inertia – despite the current mania for smaller and lighter cameras heavier objects are harder to move from rest than lighter objects so it follows a heavier camera will be slower to shake, conversely once it starts to move it will be harder to slow down. For the 98 lb weaklings out there – try lifting some weights and beef up.
Smaller sensors usually mean shorter focal length lenses therefore as per the reciprocal rule can be safely used hand held at lower shutter speeds.
Mirror-less cameras have fewer moving parts which means less vibration. Cameras with mirrors can be used with the mirror locked in the up position.
Shooting in bursts has advantages – working the averages so that one is more likely to get a usable image. Of course this method has to be used along with the other techniques.
An expensive means of shake reduction would be the use of gyroscopic stabilization but is over kill and rarely used.