Ok, we don't recommend it…but you can clean your camera's sensor at home, so we thought we'd tell you how.
Dust can enter the camera mostly while changing lenses and can deposit in the internal parts of your camera, including the sensor and nothing can be more frustrating for photographers than a dusty sensor. As the dust builds up, it can show up on your images most of the time when shooting at narrow apertures and can lead to extra work of removing these spots while post-processing.
So, what can be done when there is sensor dust? In this article, we will look at what is sensor dust, how to test for sensor dust and then go into the details of how to clean your camera’s sensor at home.
What Is Sensor Dust?
Sensor dust is not dust on the actual sensor itself but on the surface of glass that is in front of the sensor. This glass is usually a filter that is placed in front of the sensor.
Sensor dust is a problem with cameras that have interchangeable lenses. Each time you remove and change a lens, you are exposing your camera’s internal parts to the dust, dirt and other airborne contaminants. Areas that are the main causes of dust are beaches, sandy areas like deserts, other dry muddy areas and windy conditions. Chances are that sand, mud, dirt and/or salt water could get into your camera causing dust to settle in the internal parts including the sensor.
Sensor dust will show up in your images as specks or dots especially when you shoot at narrow apertures. These dust need to be cleaned and most of the time it is recommended to take your camera to a professional who can do this or you, but, your camera’s sensor can be cleaned at home as well if you take extra care in doing it carefully and gently.
You need to first make sure that your sensor needs cleaning, in order to avoid cleaning an already clean sensor. If you have used your camera for quite a while, chances are there is some dust on your sensor.
What Does Sensor Dust Look Like?
When you are shooting at wide open apertures like f/1.4, f/1.8, etc., sensor dust is barely visible in your images unless you zoom them at 100% and check thoroughly, but when shooting at narrow apertures for example, narrower than f/8, sensor dust becomes more prominent in your images. It appears as specks, spots, smudges or even lines on your images when shot at narrow apertures, making it an extra job for you while post-processing, where you will have to remove these dust spots from every frame.

How To Test For Sensor Dust?
Dust that you see through the viewfinder is not sensor dust and this will not show up in your images. This is dust from either your lens or dust from the mirror if you have a DSLR or dust on the viewfinder itself. This dust can be blown off using a manual air blower.

How can you test and find out if there is dust on your camera’s sensor? Follow the steps below:
- Set your lens aperture to a narrow value – something between f/16 and f/22.
- Set your camera to a lower iso, for example, 200, so you do not mistake noise for sensor dust.
- Manually focus at infinity because you need an out of focus image so that the dust specks look visible.
- Adjust exposure based on the above aperture and iso values and take a photograph against a bright area like a white wall or white sheet of paper. Alternatively, you can take a photograph against a plain blue sky as well.
- Preview your image at 100% and check for visible specks or spots.
- Better to view the image on the computer screen so you can easily scan the image for dust spots.
In order to confirm this, you can take a series of images pointing your camera at different areas. This way, if it is dust on the sensor, you will see the specks on the same locations in all the images. This will confirm that it is time to clean your sensor.
Note: If you have Photoshop, open the image in Photoshop and using levels adjustments, you can enhance the image to see the dust spots clearly, just like you see in the image below.
Let Us Now Look At How To Clean The Camera’s Sensor At Home:
While having sensor dust can be very frustrating, the idea of cleaning the camera’s sensor may sound like a complicated process and daunting experience, but, it is a more straightforward process than what most people think it might be. There are a few ways and resources to clean camera’s sensor dust at home and here we have put together some information that we thought might be helpful for you if you are looking to clean your camera’s sensor at home.
P.S: We do not in any way encourage anyone to clean the camera’s sensor dust at home as this is a process that needs to be carried out very gently and carefully. Extreme care needs to be taken during the cleaning process as even the slightest of mistakes can cause serious damage leading to expensive repairs. But, just so you know, cleaning a camera’s sensor is not a terrifying thing and can be done successfully at home if you take proper care in doing it.
Materials Required To Clean Sensor Dust:
- Sensor cleaning Kit – buy the one that is right for your sensor so it helps clean your sensor in one swipe either direction.
- Manual Air Blower
- Torchlight or a headlamp to illuminate the area for cleaning – this is optional
- Sensor Loupe – magnifier with a ring of LED lights
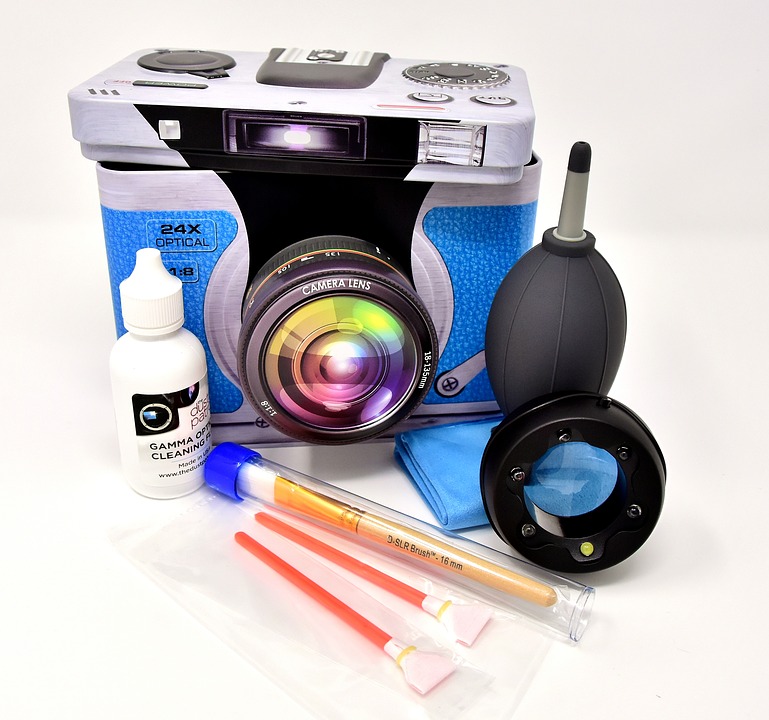
How To Clean Your Camera’s Sensor At Home:
First and foremost, find a location that is free of dust and wind because, in the process of cleaning your sensor, you do not want to deposit more dust on to the sensor – sensors attract dust. Also, make sure you clean the exterior part of your camera before moving on to the interior as you do not want dust from the outer parts of the camera body to get in during the sensor cleaning process. There are three methods in which you can clean your camera’s sensor.
Using The Inbuilt Sensor Cleaning Function:
Most new cameras, both DSLR and mirrorless come with an automatic sensor cleaning function these days. Look for these settings in your Setup or Tools menu and try this initially before you go into the exact cleaning process. Using this option a few times should shake off any light dust that is sticking to your sensor.
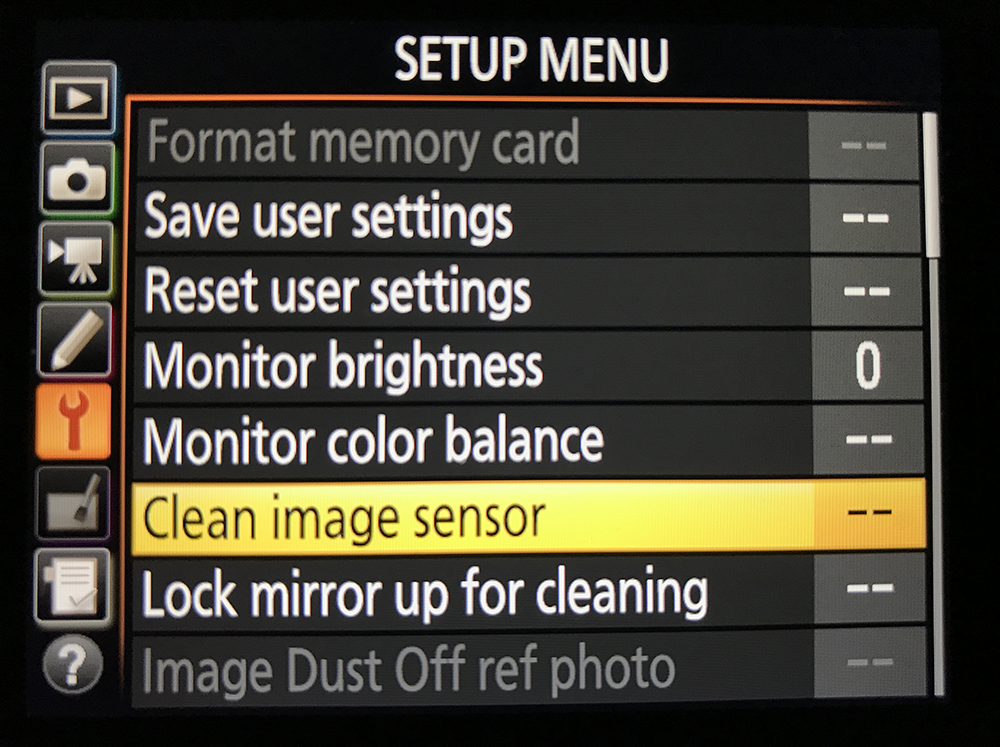
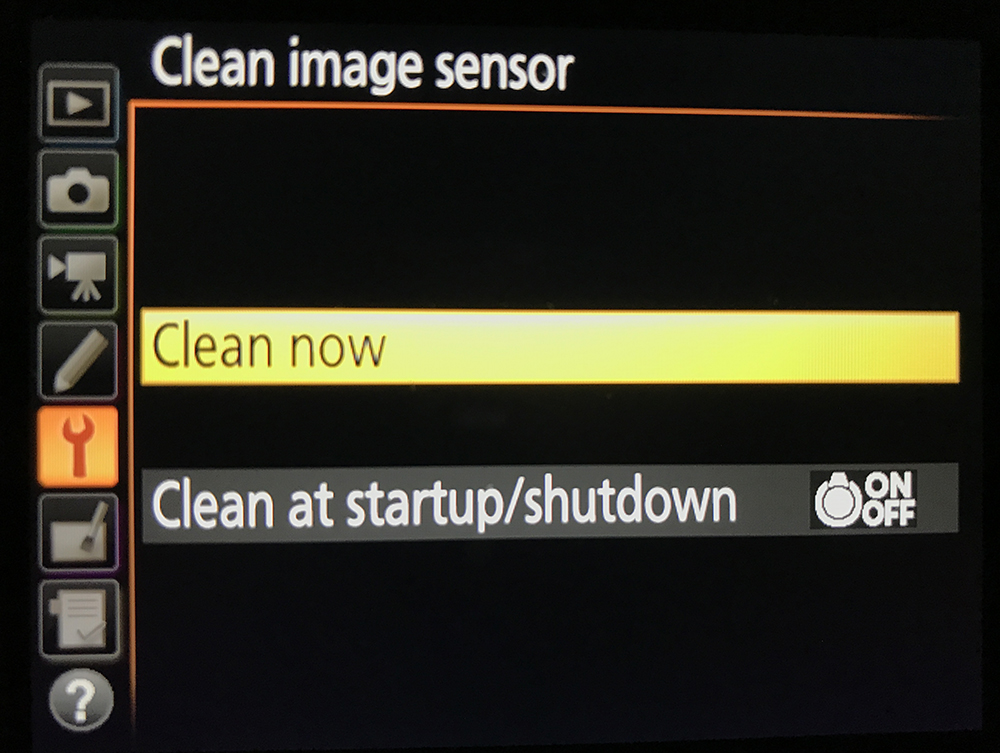
Note: If your camera does not have this option, do not worry, you can manually clean your camera’s sensor at home. These auto clean functions are not so effective as manual cleaning.
Dry Cleaning The Camera’s Sensor:
Using A Manual Air Blower: This is one of the most efficient methods to dry clean your camera’s sensor. Have a fully charged battery in the camera because you do not want the mirror to flip down during the cleaning process as a result of battery drain and cause expensive damage. Even if you are using a mirrorless camera, have the sensor cleaning option on (if you have one) while cleaning, as it is the safest way to do that.
- Remove the lens to gain access to the sensor.
- If it is a DSLR, switch on your camera and look for the menu option to manually clean your camera. Refer to the user manual if you are not familiar with this or are not able to find this. Choosing this option will lock the mirror up, so you can gain access to the sensor for cleaning.
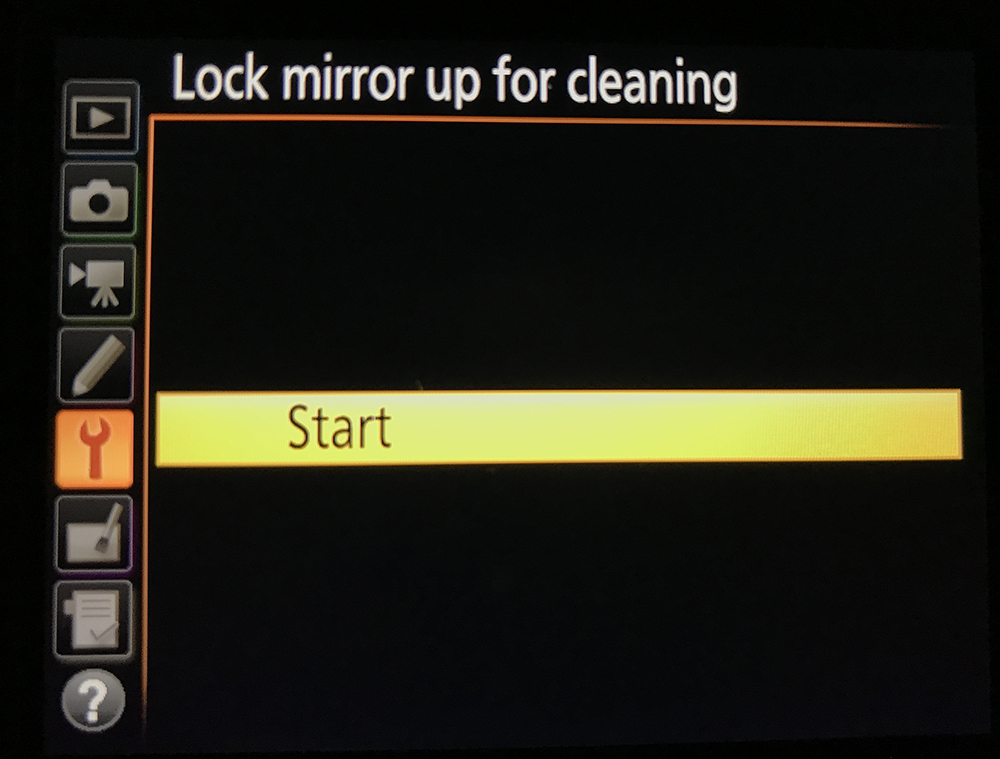
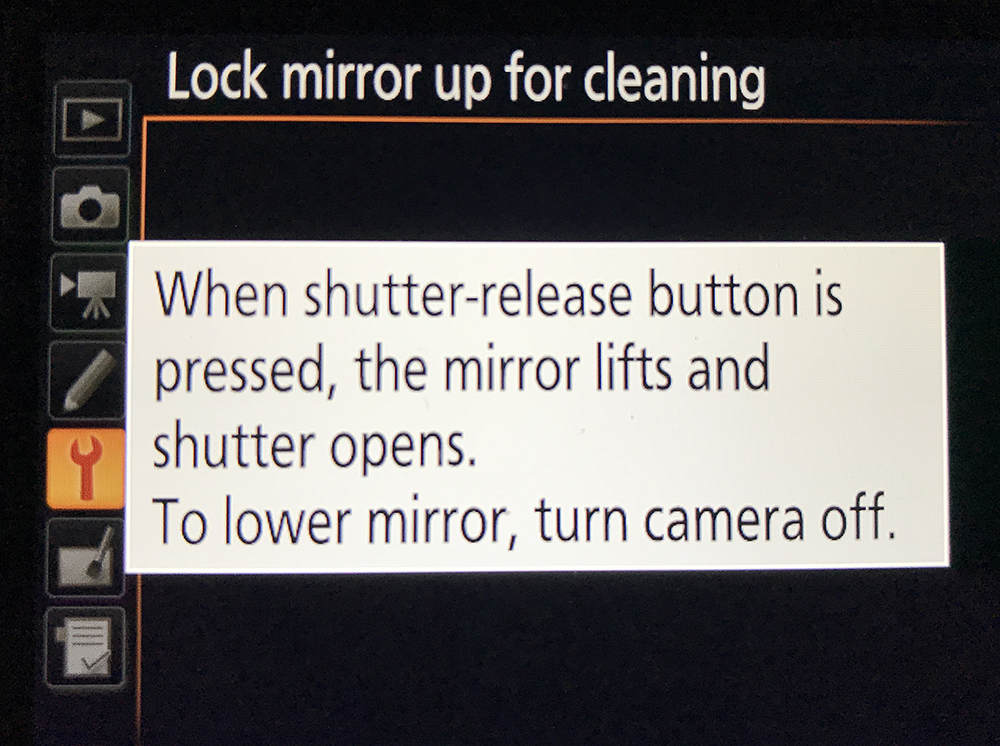
- Now hold the camera sensor facing down and use a blower to blow air into the camera. This way, any dust particles sticking on to the sensor will fall off to the ground.
- Care needs to be taken during this process so that the blower does not touch the sensor.
- After blowing a few times, using the sensor loupe, examine the sensor for any visible dust.
- Repeat using the air blower if you still see more dust.
- Turn off the camera and this will release the mirror back to its usual position.
- Attach the lens to the camera.
- Now take one or two shots similar to what we did before to test for sensor dust.
- If the dust specks do not appear as dots on your image, it means the dry cleaning process was successful and you do not need to take any other actions.
If the above process was not successful, then you will need to go for the dry or wet cleaning process to clear off dust from your sensor. It is again not a daunting experience as you think it might be. When done with care and patience, you will be amazed to see how easily this can be done in a matter of few minutes.
Wet Cleaning The Camera’s Sensor:
Using A Swab And Cleaning Solution: This is one of the most challenging and most effective methods for cleaning your camera’s sensor. The first four steps are similar to what you did above for cleaning the sensor using the blower,
If your camera is a DSLR, once your camera is switched on, you will need to look for the menu option to manually clean your camera. If you are not familiar with the cleaning menu option or are not able to find this, then refer to the user manual. Choosing this option will lock the mirror up, so you can gain access to the sensor for cleaning.
Use this option also on your mirrorless cameras while cleaning the sensor.
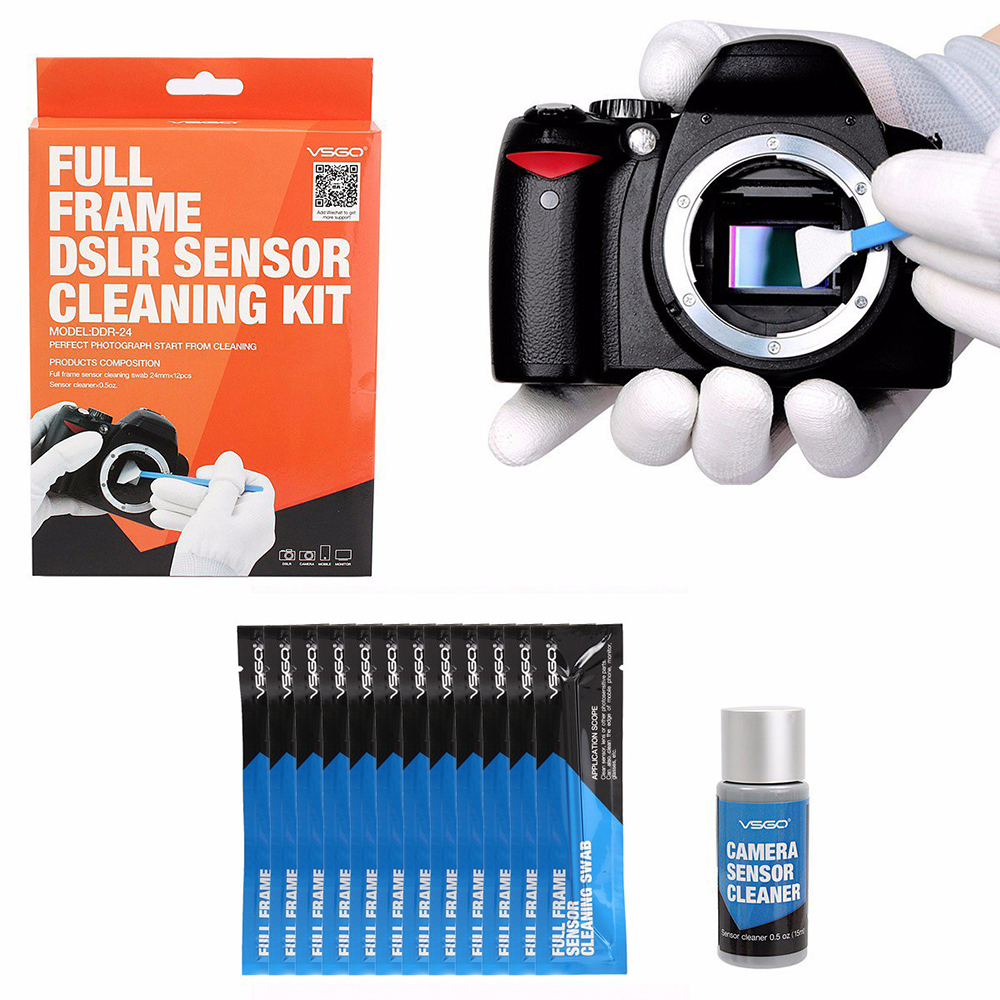
- Read the instructions very carefully on the cleaning kit as it can vary between kits.
- Pull out a sensor swab from its packaging and make sure it is clean. Use a blower to blow it a few times so that any dust or other particles sticking on to it if any, will get blown off.
- Add a drop or two of the sensor cleaning solution to the tip of the swab. Be careful not to soak it much as any extra solution can leave streaks on the sensor, having to clean it a second time. Let the solution soak in for a minute or two.
- Place the swab on one end of the sensor and gently move it across the sensor in one go, without applying much force. When you get to the other end, turn the swab around and gently move the swab back across the sensor.
- Use a new swab if you need to repeat the cleaning process.
- Inspect the sensor for any remaining dust.
- Just to make sure that the dust is completely removed, replace the lens and make a test shot or two as we did to test sensor dust.
- If there are no dust specks/spots, then this process was successful and you do not need to do anything further.
- If there is still dust left, you will need to repeat this process again. Make sure you use a new swab this time and not reuse the used one.
Note: If for some reason you find that the cleaning solution has left streaks on the sensor because you used more solution, then wait for a few minutes and repeat the cleaning process with a very small amount of solution, perhaps just a drop. This has to be done with a new swab.
Some Precautionary Notes:
- Never blow air with your mouth into the inner parts of the camera.
- Never use compressed/canned air as it can leave a residue that will need professional cleaning and/or can cause moisture to condense on parts of your camera. It can also be very powerful that it can damage parts of your camera. Moreover, instead of blowing the dust off, it can send them deep into the camera parts.
- Do not drop cleaning liquid directly on the sensor. Apply only using a swab.
- Only use good quality sensor cleaning liquids that are highly recommended for cleaning your camera’s sensor – preferably manufacturer recommended ones.
- Dust you notice when looking through the viewfinder are not sensor dust. These could be on the lens, mirror in case of DSLRs or even dust on the viewfinder.
- Do not touch any internal parts of the camera with your hand – especially the mirror in case of DSLRs and the sensor as this can leave permanent marks or scratches or lead to serious damage.
It is always better to prevent dust from entering the camera as much as possible. Always make sure you change lenses in locations where the air is clean and still and change only if it is necessary. Keep your camera bag clean and always have a lens cap on when not in use.
Have you cleaned your camera’s sensor at home? If yes, please share what methods you used and your experiences, in the comments section below. If you have any tips, do not forget to share them as well.
Further Resources:
- How to Clean a DSLR Sensor Without Ruining It
- A Spring Cleaning Checklist for Your Camera
- 3 Tidy Checklists To Get Your Photography Gear In Order
- What to Do When There is Dust Inside Your Camera?
- How to clean your camera sensor safely
- The Best Way to Safely Clean Your Camera's Sensor
- How to clean the image sensor for ILCE series and NEX series.



1 Comment
I have read many of these posts and they all fail to address a major concern.
About a year ago I got an Olympus OMD-EM5ii, largely for the IBIS, it came with a stern warning thar home cleaning could permanently damage IBIS, yet no one ever addresses this. What is your opinion?