Additional information and update from Dahlia Ambrose
If you are seeing dust inside your camera or on your lens for the first time, don't panic…you need to relax and understand something – it’s normal. Let's face it.
How Does Dust Enter The Camera?
Your camera is a dust magnet from the inside out – whether it is a DSLR, a mirrorless camera, or even a point and shoot. Dust can enter the camera and settle in the internal parts mostly when changing lenses. As dust builds up it can be pretty annoying depending on where the dust has settled. Dust on the sensor will show up on your images, especially when shooting at narrow apertures.
The only way you can truly avoid getting dust in your camera is to shoot inside an airtight-vacuumed room or put a protective suit on it. That sounds absurd but that's just the reality. And since it is normal, it is best to just live with the fact that getting rid of some dust will be a life-long activity as you continue doing photography.
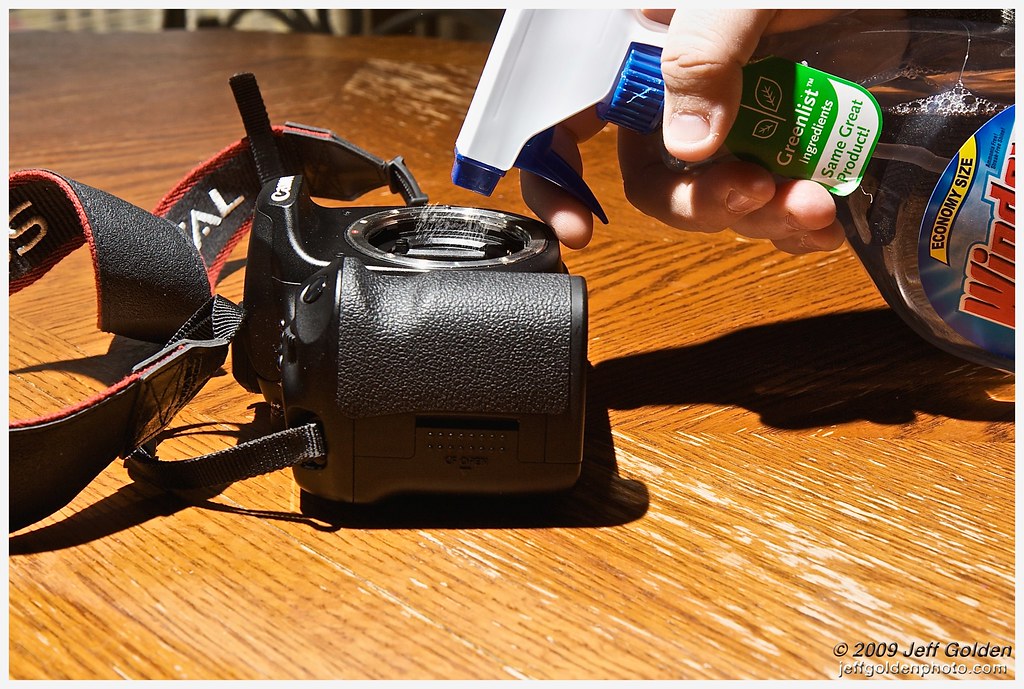
Since there are already gazillions of resources out there on how to remove dust in your camera or lens I won’t reinvent the wheel but will rather give you some handy direction as to what to do when you do encounter dust.
Here Are Some Things to Consider:
Two Questions to Ask After You Spot Dust Inside Your Camera:
When we see dust in our camera, our obvious initial response is to find out how to get rid of it. But whether you see dust inside or outside your lens or inside your camera as you change lenses, it is still best to ask two essential questions:
- “Is dust affecting my ability to compose?”
- “Can the dust be seen in my images?”
Remember that the presence of dust inside your camera is okay – and if your answer is “No” to any of these two questions and it’s quite alright to just ignore it. Of course, having your camera cleaned and maintained is a good habit but being obsessive about having dirt will only disappoint you. But, if your answer is “Yes” to these questions, then it is best to figure out how to effectively remove dust.
Dust Affecting Your Ability to Compose:
You look into your viewfinder and you see a speck of dirt right in the middle floating about – does it annoy you? I would be if it happened to my camera.
Dust that becomes an added element as you create your shot will affect your ability to compose properly. Perhaps some may be able to simply ignore it but a normal photographer would definitely want to remove it.

When this happens, there are three places you can check where dust usually accumulates depending on your camera – the lens, the mirror (for DSLRs) and the viewfinder.
Checking for Dust Location:
Again, dust can either be in the lens, viewfinder, sensor, or mirror. If you did the above test, you can determine where the dust is located. When dust shows up after doing the test, the dust is either in the lens or on the sensor. Blurry dark spots are a sign of dust either in the sensor or lens. Larger spots would normally mean the dust is in the lens while smaller ones are dust accumulating on the sensor. Sharp prominent spots can also be seen and are usually dust on the sensor.
Lens Dust:
Dust in the lens can be in four places – outside the front element glass, outside the back element, in between the front elements, and in between the back elements.
Dust on the front and back elements are easy to remove. You can do it on your own with the right tools. You can clean it using an air blower, lens brush, carbonized lens pen, lens cleaning solution, cotton swabs or microfiber cloth. Clean the lens only if needed as you do not want to damage the glass coating or the glass itself by not carefully handling the lens while cleaning.
Any dust inside the lens should be done by authorised service centres as disassembling the lens will lead to trouble where you will not be able to assemble it back precisely. Moreover, any warranty on the lens will become void.
Some tips to clean dust in the lens:
- Blow the dust with a blower or brush off the dust with very soft brushes recommended for cleaning lenses.
- Use lens cleaning solutions on lens cleaning tissues that are recommended by the lens manufacturers, to remove smudges due to oil or sweat. Make sure you remove any dust before cleaning to avoid scratches
- Use microfibre cloths to remove minor spots and smudges. Again make sure that the surface is free of dust before cleaning.
- Use cotton swabs to clean the grooves on the lens body.
- Always clean by working in concentric circles starting from the centre. Never wipe across.
- You can use a UV filter to protect your lens from dust, dirt and scratches and accidental damage. Just clean the filter instead of the lens.
Some tips to safeguard your lens when cleaning dust:
- Do not blow on the lens with your mouth
- Avoid cleaning the lens often when there is a speck or two of dust.
- Do not use t-shirts or random material and solutions to clean the lens
- Gently do the cleaning process without applying much pressure.
- Do not clean the lens contacts.
Here is a detailed article with tips on how to clean your lens.
More resources on cleaning the lens:
- For instructions on how to use most of these tools, read this article from BH photo on how to clean your lenses and filters properly.
- I personally use a Lenspen to remove dust since it also takes care of fingerprint smudges. It has served me well for a number of years.
- If dust is inside your lens in between glasses, you can follow these instructions in this article on removing dust inside the lens.
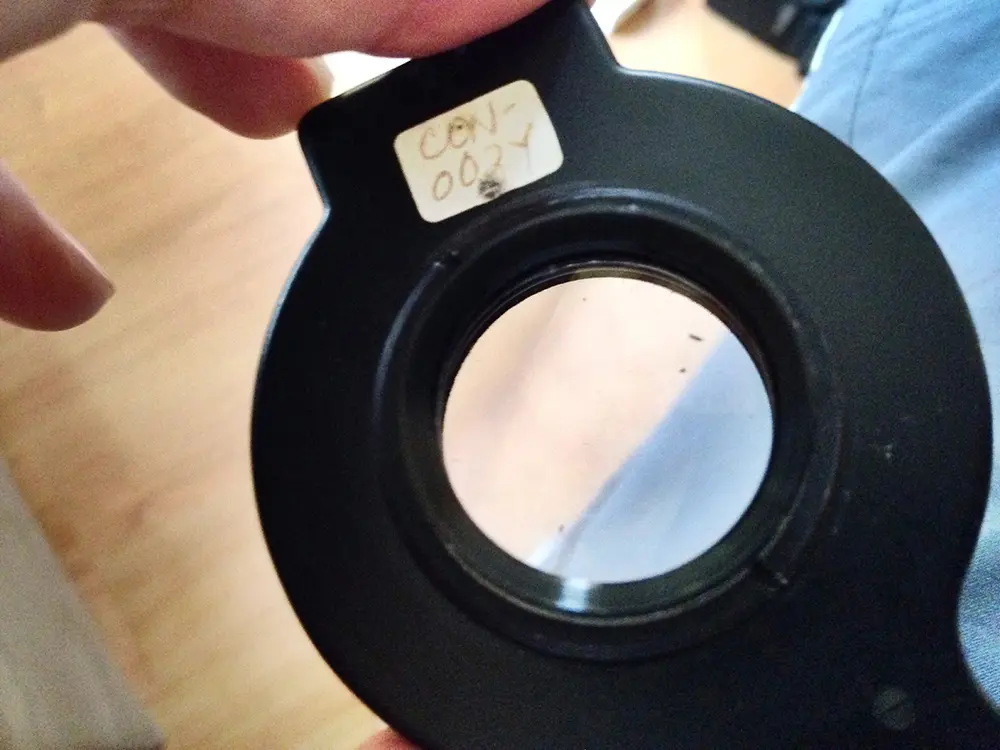
If all else fails or if you don’t have any capability to clean the insides of your lens, then it is best to contact, the lens manufacturer, for a cleaning service if it is included in your warranty. If not, take it to a camera shop where you can have it cleaned.
Mirror and Viewfinder Dust:
With DSLRs, it is possible to see dust through your viewfinder and not in your shots. Essentially if you have dust in the sensor, it means, you won't see it in your viewfinder.
When dust is in the viewfinder or the mirror inside your camera, the best way to clean it is with a rocket blower by blowing the dust off. It is the same air blower used to clean the sensor. If this doesn't work then the only other solution is to take it into a camera service centre for cleaning.
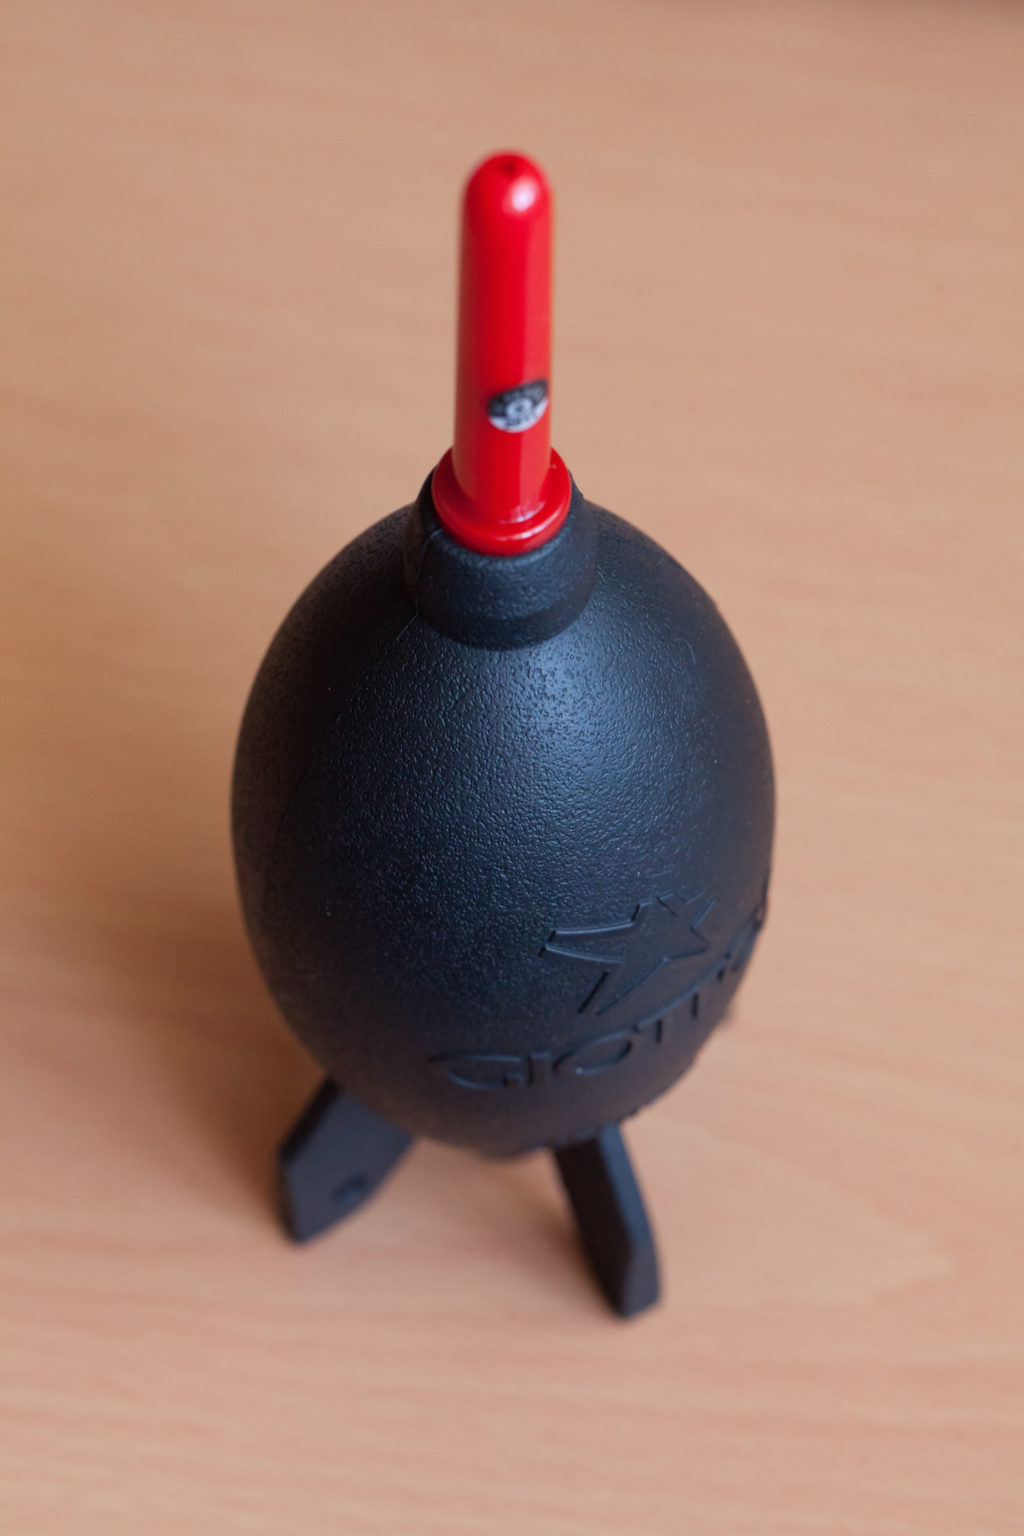
Mirrorless cameras don’t have this problem since these cameras use digital viewfinders, and any dust on the viewfinder can be blown off using a blower or cleaned using soft tissues recommended for cleaning lens glasses. For other camera types, the only solution is to take it to a service centre for cleaning.
Sensor Dust:
The first thing you should try to do if dust is on your sensor is to clean it using your camera’s automatic sensor cleaning option. Most DSLR and Mirrorless camera manufacturers have included this feature almost half a decade ago. If you have this feature then sensor cleaning will only take you a few seconds by just going to the menu options of your camera and without having to open your DSLR. Some even allow you to do this automatically when you turn on or off your camera.
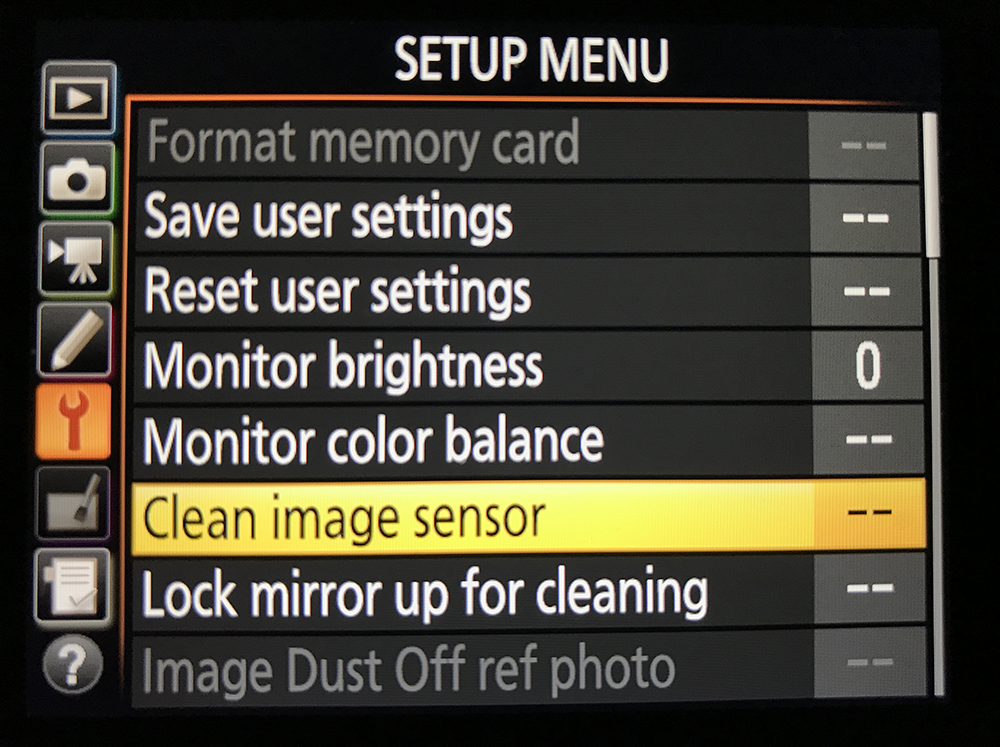
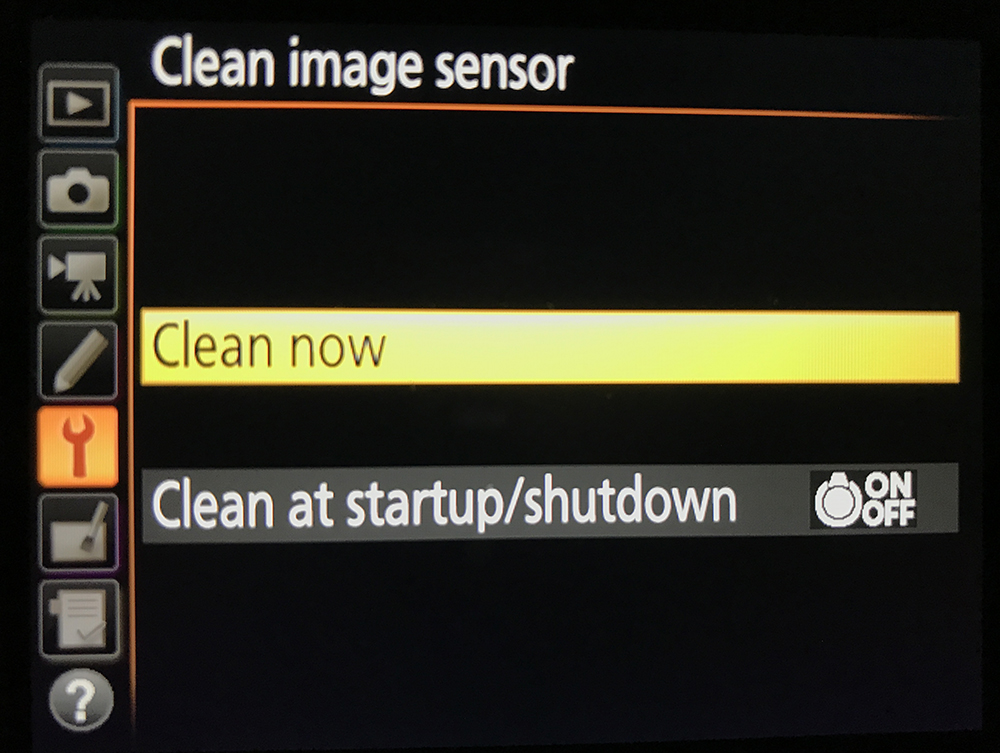
If your camera doesn’t have this feature, or if the above method does not work, there are other tools you can use to clean your sensor.
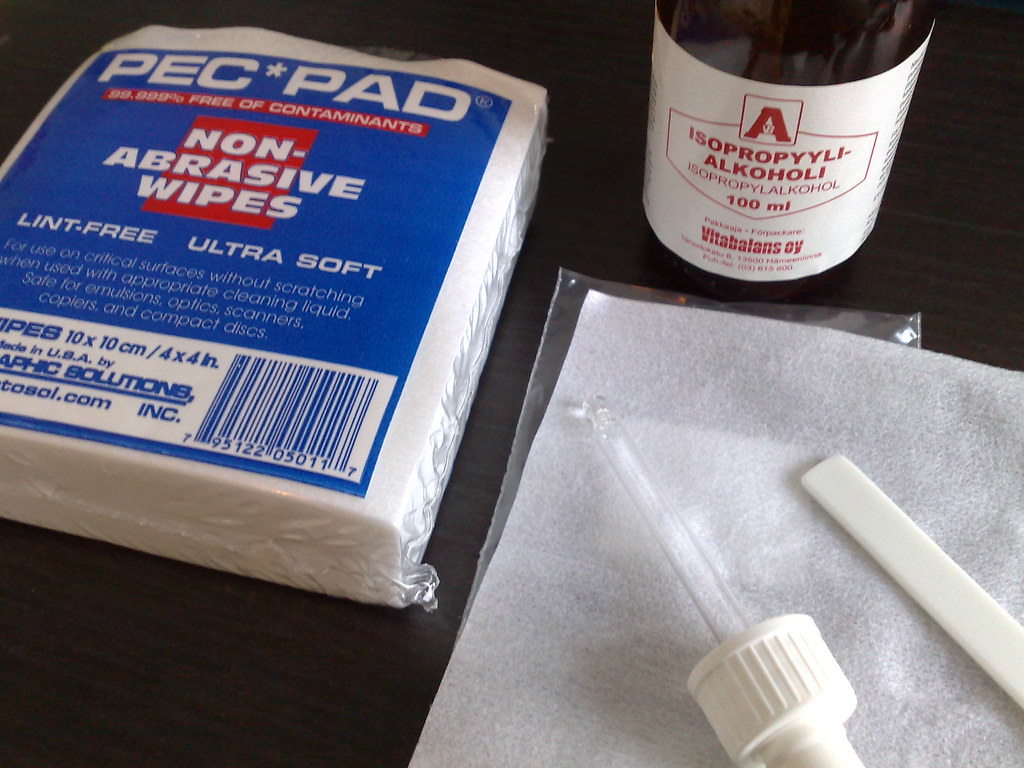
Point and shoots and bridge cameras don’t give users access to the system’s sensor. For these units, you will need to take the camera in for service. For DSLR and mirrorless users who wouldn’t want to do it on their own, you can do the same too.
But, if you are going to do the cleaning yourself, before cleaning the camera’s sensor, you need to make sure that it is definitely sensor dust because you do not want to end up cleaning an already clean sensor. If there is sensor dust, it is clearly going to show up in your images. That way you know that the sensor needs cleaning.
How to Check for Sensor Dust in Your Images:
Like mould, dust affects image quality. Seeing a faint speck of dust in your shots is quite normal, some will choose to remove it while others won’t. But seeing one or two prominent ones, like those that are thread-like in nature, can be very annoying.
Just imagine what dozens of those could do! This is a result of dust on the sensor.
So How do you Test and Confirm if There is Sensor Dust?
Method 1 To Check For Dust in Camera:
The first way to see dust is to observe floating elements in your shots. If it is in all your photos showing in the same spot, then you have dust that needs to be removed.
Method 2 To Check For Dust in Camera:
Another way to check for dust is by shooting a white surface in a place where there is enough light. Shooting against a cloudless sky away from the sun is also an option. Take some shots using these settings: ISO 100 (or lowest possible number) in order to not mistake noise for sensor dust, Aperture Priority, Matrix Metering mode, Exposure compensation 0, Aperture between f/16 and f/22.
Some like doing this with everything blurred out, so make sure to disable Auto-Focus and set your lens out of focus. You should also test for dust using your longest focal length set to infinity. For other camera types unable to choose these settings, just try shooting on a white surface.
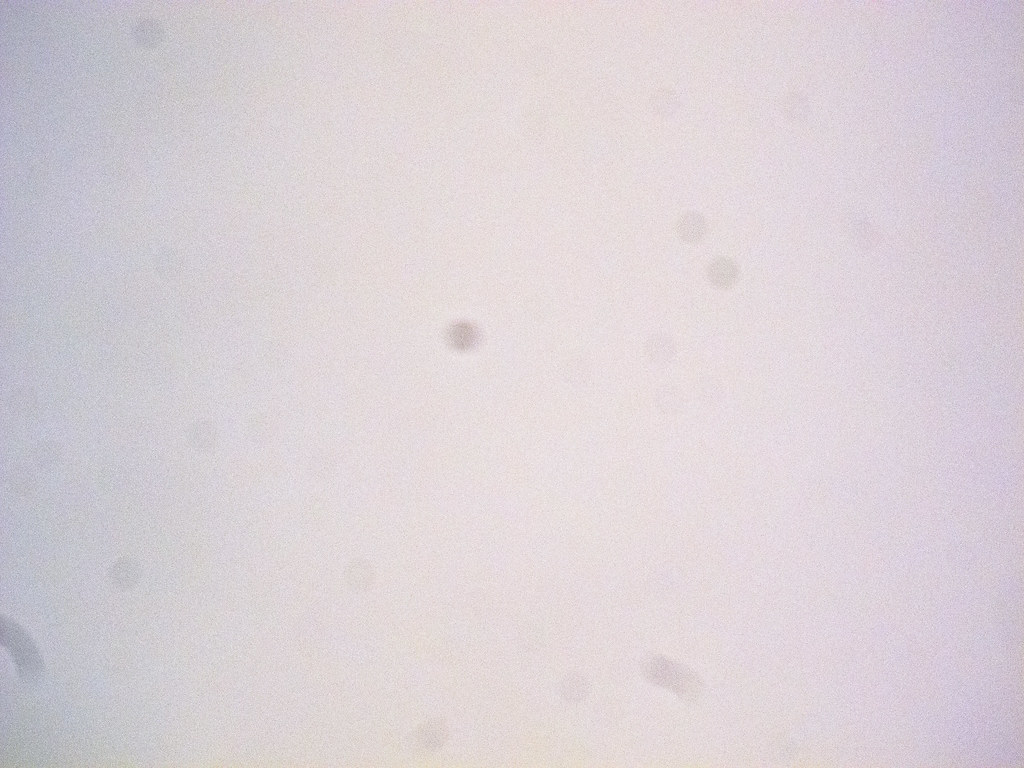
If there is any dirt affecting your shots, it will show up in the images. It is best to view it in your computer at 100% so you can easily scan through the image thoroughly for dust specks, although sometimes you can see it when you zoom in the image using your camera.
Method 3 To Check For Dust in Camera:
Another way is to use Lightroom’s “Visualize Spots” feature to locate dust specks in your images.
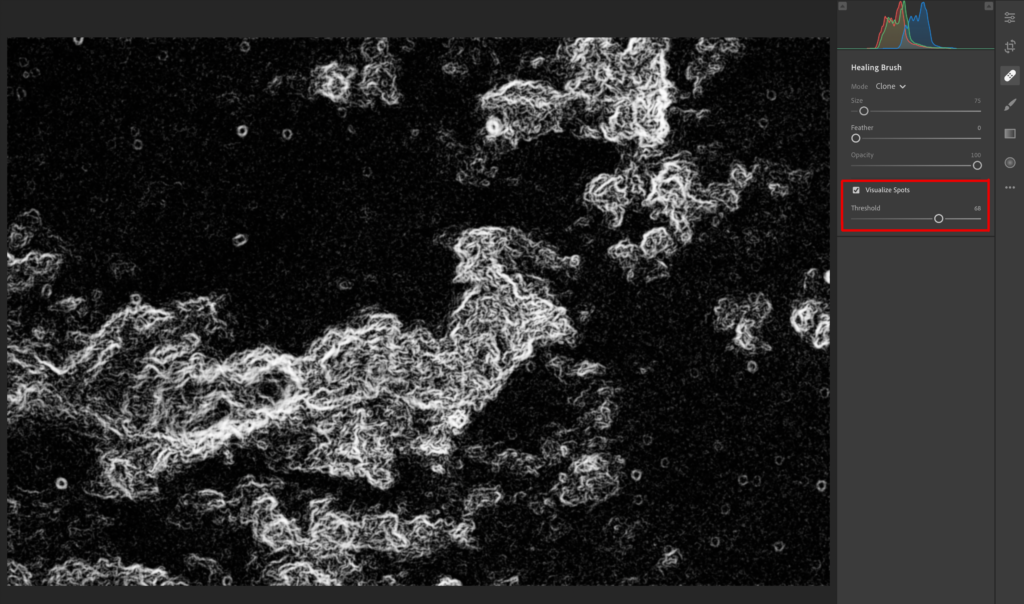
Lightroom Classic and Lightroom CC for desktop include the “Visualize Spots” feature to help you find dust spots in your images. What this does is, it displays the image as a high-contrast black and white image to reveal areas of contrast which means it will reveal the dust areas prominently.
Here’s how to use the feature in both Lightroom Classic and Lightroom CC:
Check For Dust Spots In Lightroom Classic:
- Import the image that has dust specks and switch to Develop module.
- Select the Spot Removal Tool, or press the Q key.
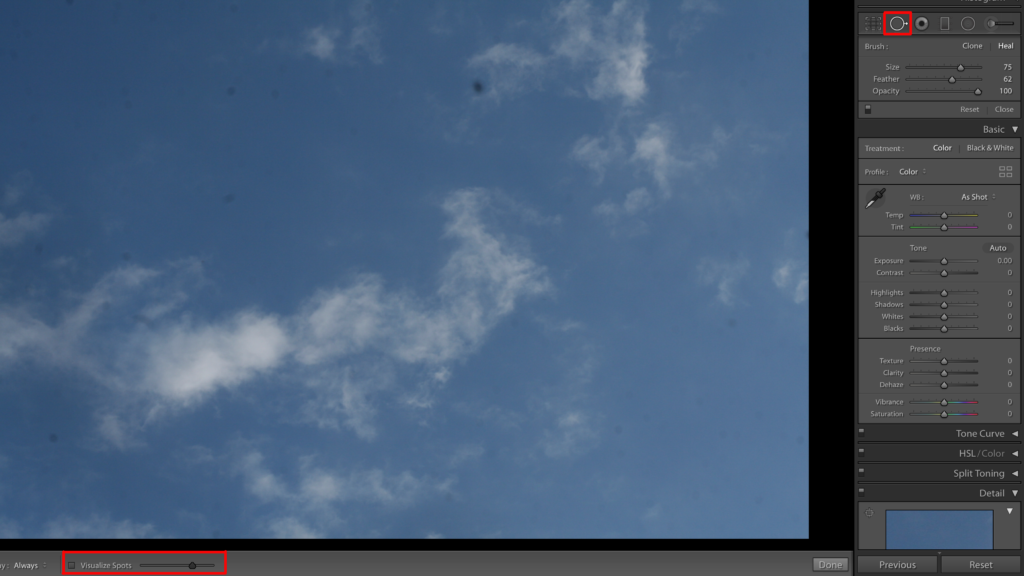
- Click the “Visualize Spots” checkbox (at the bottom – see image below) – it is right below the photo in Lightroom Classic.
- Now use the “Spot Visualization Threshold” slider to set the effect or detail of the spots so as to effectively reveal the spots in much detail.
Check For Dust Spots In Lightroom CC:
- Import the image that has dust
- Select the Healing Brush, or press the H key – it is right below the editing panel in Lightroom CC
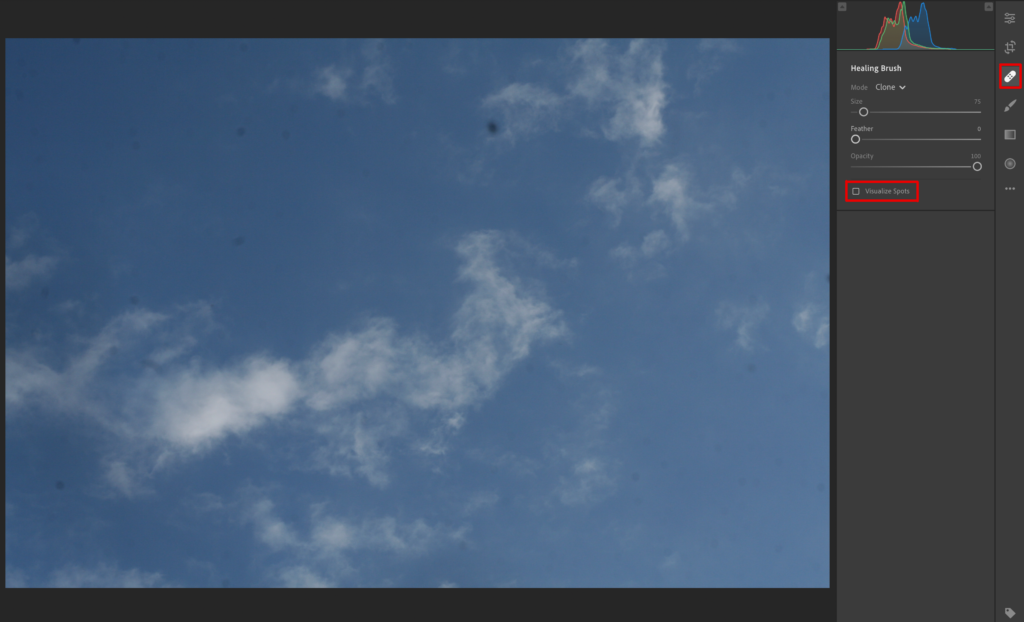
- Click on “Visualize Spots” and use the “Threshold” slider to set the effect of the spots in order to reveal spots in detail.
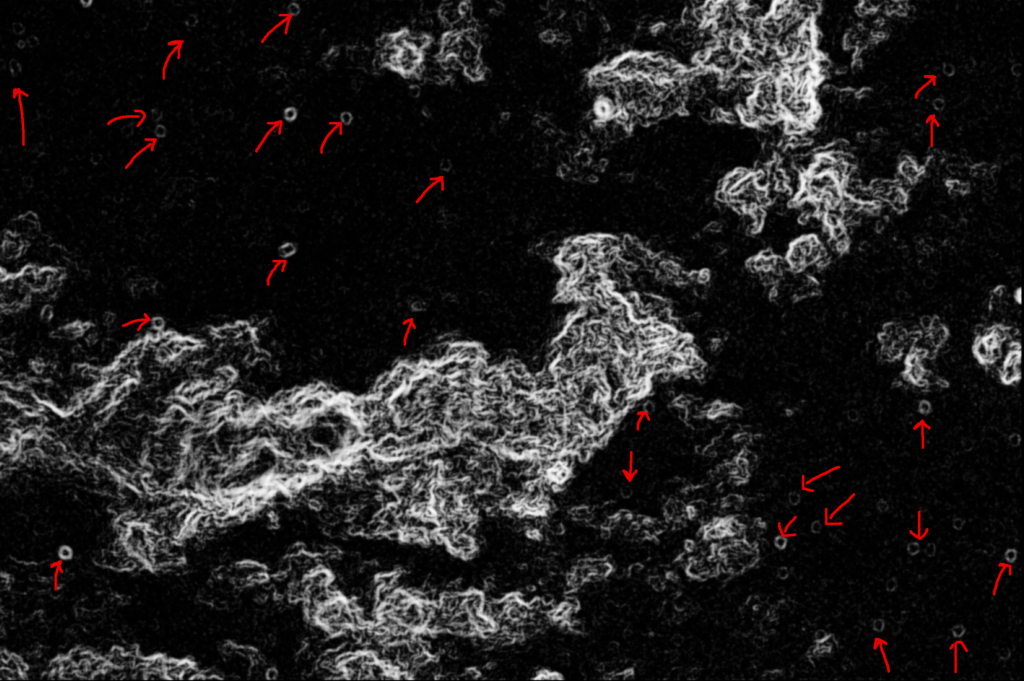
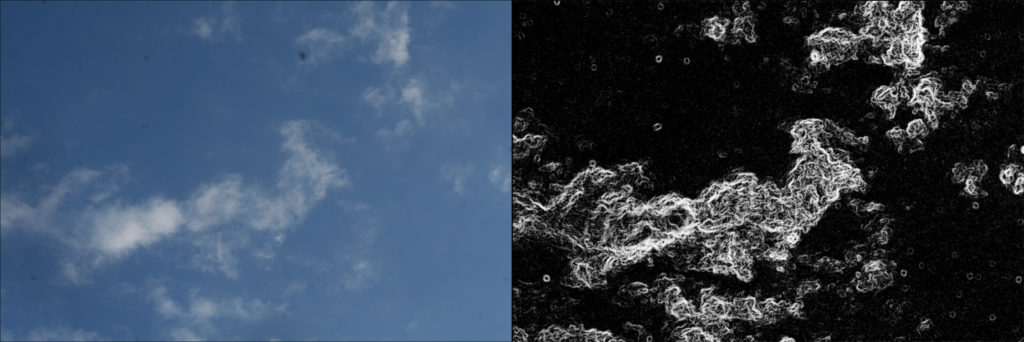
In the image below you can compare side by side the dust specks on the image compared with the dust specks using “Visualize Spots” feature
What To Do When You are Sure There is Dust in the Sensor?
If you know for sure that there is dust in your camera’s sensor, try using a manual air blower to clean the sensor. Here is how to do it.
- Have the camera fully charged
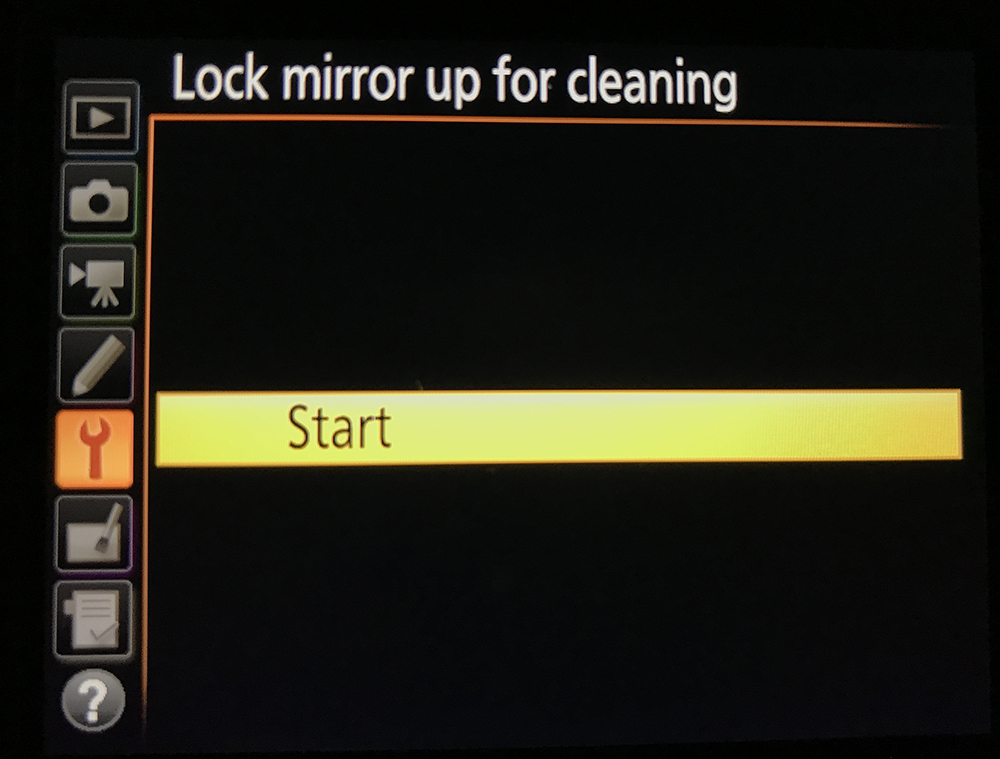
- You need to lock the mirror up to gain access to the sensor while cleaning. Use the option in the settings area of the camera to lock the mirror up for cleaning. This could be under any name like Mirror lock-up, Mirror up, Sensor cleaning, etc.
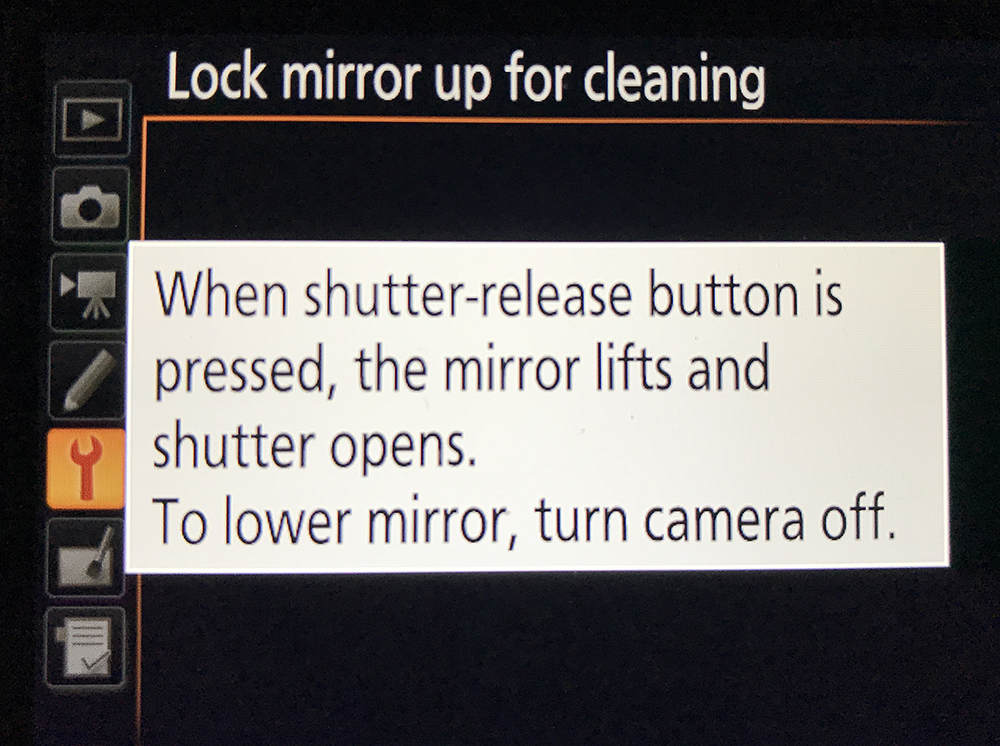
- Holding the camera sensor facing down, use a Manual Air Blower to blow air while making sure that the blower does not touch any part of the camera inside.
- Examine the sensor for any dust using a Sensor Loupe, and if required repeat the blowing process.
- Turn off the camera, attach the lens and take images to see if any dust spots are recorded in the image.
If the above method does not work, you will need to wet clean the sensor which is the most challenging yet effective method to clean the sensor. Here is how to do it:
- Clean the exterior parts of the camera before cleaning the inside to avoid more dust from entering the body during the cleaning process.
- Follow the steps above where you need to use a manual air blower to clean the sensor.
- Lock the mirror up for cleaning. Refer to the user manual if you are unsure of how to do that.
- Read the instructions on the Sensor cleaning Kit and follow that
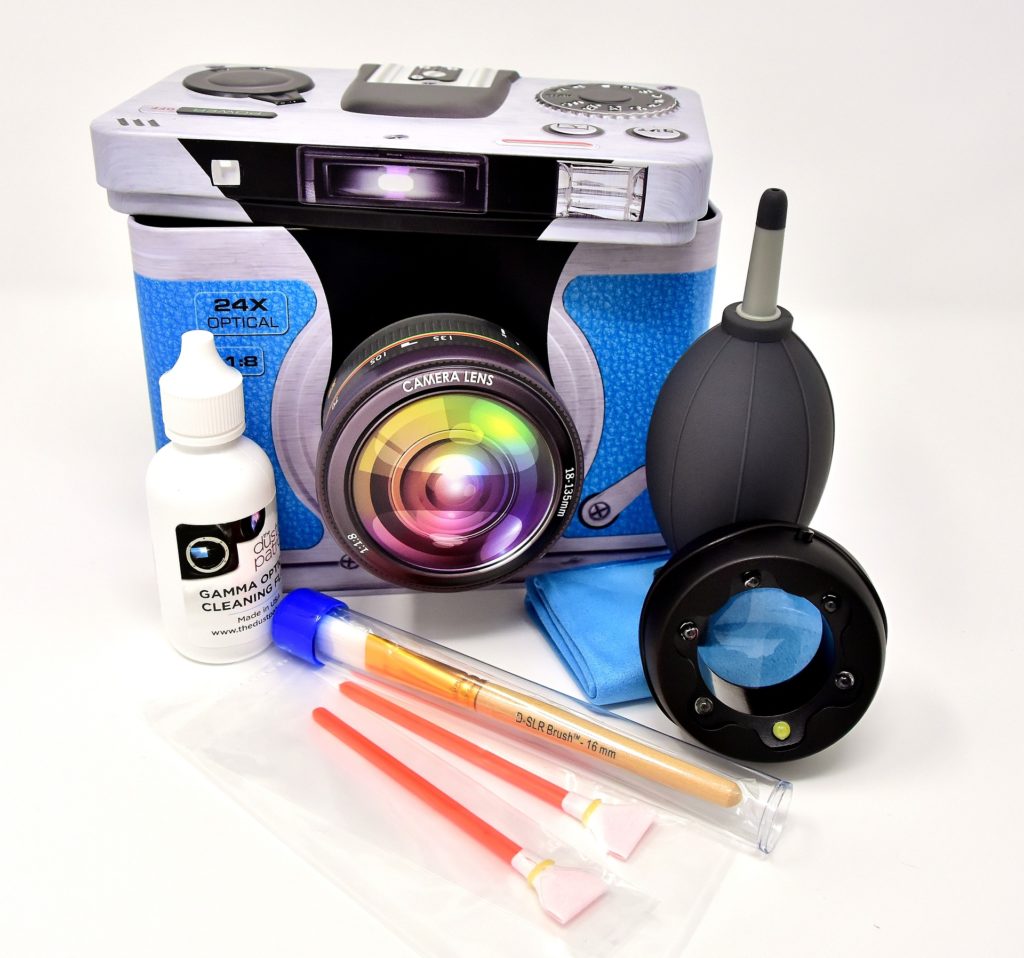
- You will usually have to add a drop or two of the sensor cleaning liquid onto the swab, allow it to soak in for a few seconds and move the swab across the sensor in one go without applying much pressure.
- Check the sensor for any dust. If required, repeat the cleaning process with a new swab.
Some Precautions That Need to be Taken When Cleaning Dust In Camera:
- Never use compressed air to blow on the sensor or other parts of the camera
- Do not drop the cleaning liquid directly on the sensor
- Only use a cleaning kit recommended by camera manufacturers.
- Do not touch the internal parts of the camera while cleaning.
- Always keep your camera bag clean and keep your camera body free of dust and dirt.
- Do not frequently change lenses outdoors unless it is important. Do not change lenses at all in dusty and windy conditions.
- As much as possible, look after your camera well.
It is always good to have your camera sensor cleaned in a service centre approved by the manufacturer. But if you still want to check out, here is an article with detailed instructions on how to clean your camera’s sensor at home.
There are other tools out there in the market you can check out like the sensor gel stick and lens sensor vacuum. But like any other tool out there, since sensors are pretty sensitive, it is best to research further and use with caution.
Further Resources on Camera Cleaning:
- A Spring Cleaning Checklist for Your Camera
- 3 Tidy Checklists To Get Your Photography Gear In Order
- What to Do When There is Dust Inside Your Camera?
- How to Clean a DSLR Sensor Without Ruining It
- How to Clean Your Camera Properly
- 7 Simple Maintenance and Care Tips to Keep Your Digital Camera in Great Shape
- How to Clean Your Camera Lens Properly (VIDEO)
- 6 Tips For Looking After Your Precious Photographic Gear
- How to Be Nice (vs. Naughty) to Your Camera Gear
- Don’t Make These Expensive Mistakes in Gear Maintenance




4 Comments
Enjoyed the info …even though I receive your info ….my friend sent me an email with this article someone had given it to her…..I knew before I even began to read what she was going to say…she only looks at photos and never reads …she saw the windex bottle and it being sprayed into the camera….She says “See I told you it was okay to clean inside with windex …it is for glass and metal..” maybe you should put a big red line across that photo …just saying …..Great read and lots of great info …..
Do like we did “back in the day”, when the ash tray in the car got full it was time to get a new one.
I use a sensor cleaning kit and the blower for the inside and lens cleaner for my lens
This guy has a really good step by step video on how to clean your camera and lens….especially for Canon users!!!https://www.facebook.com/video.php?v=744005565677117