I’m sure that you have had that experience in which, after hours of editing a photo you shot, you still sense that there is something missing, but you can’t seem to put your finger on it. The way we photographers are – we think that the devil is in the details – and it often blinds us to the bigger picture. One element that is often “the missing part” of the photo is the atmosphere. Talking from experience, the atmosphere is something that is usually forgotten in the editing process. Believe it or not, after all those complex and time-consuming processes of shooting and editing, something this simple tends to slip the mind.
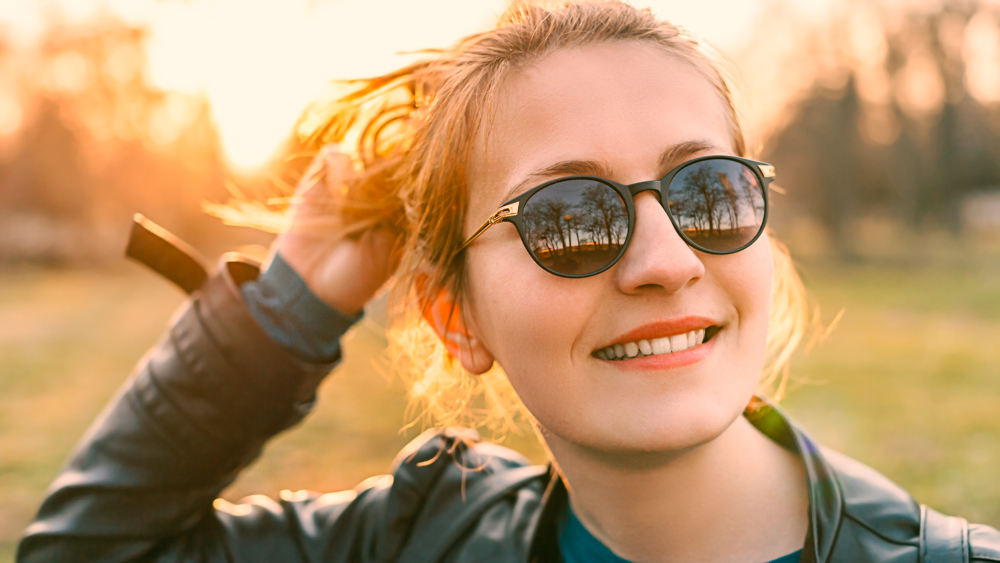
The following picture suffered from this very same issue when I posted it to 500px. I didn't remember to add atmosphere, since it took me several hours to edit it.

In this article, I will show you a simple way to add some atmosphere and particles in your image in order for it to feel more natural.
First of all, the particles. I’m going to use a particle brush which I've obtained somewhere and somehow, a long time ago. The good thing is that a dust particle brush isn't really hard to create, and it is something you will use quite often.
Creating dust particle brush

Open a new document 500×500 px in size. Choose a white background and pick a black brush. Lower the brush opacity (change it between particles), and paint several particles which aren't too big, and try to scatter them around. Once you are satisfied with the way your brush looks, hit: “Edit -> Define Brush Preset.” Then name the brush and hit OK. And you are done. You have the brush ready to create some particles in your image.
Adding dust to your image
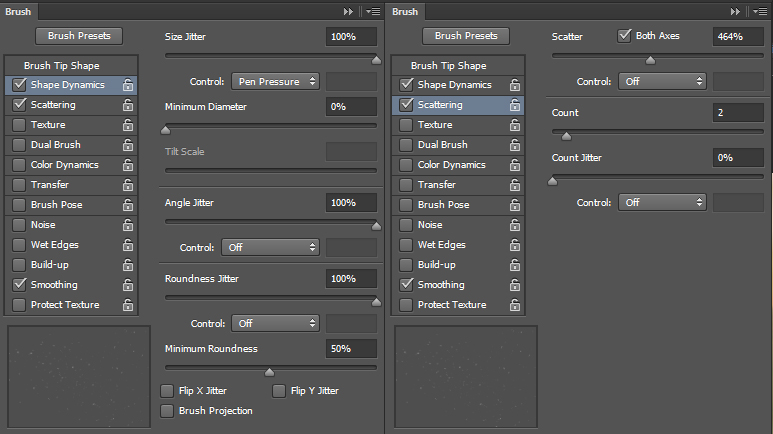
Open the brush panel with the brush you have created. Here you will set the brush “randomness” in order to lose the repetitiveness which can be easily detected by our brain's pattern-recognition ability.
First, tick the “Shape Dynamics” and then select that panel, set the “Size Jitter” to 100% (optionally, if you use pen tablet choose “Pen Pressure” in the control menu). Do the same with “Angle Jitter” and “Roundness Jitter.” Tick the “Scattering” panel as well. Set the “Scattering” panel to around a half with the “Count Jitter” set to 1 or 2 for regular, and more if you want to create denser dust with the brush. Finally, tick the “Transfer” panel and set the “Opacity” and “Flow Jitter” to max in order to change the dust opacity randomly.

Now you have your brush ready, so choose an appropriate size depending on the scenario. The dust and particles vary depending on the location. For outdoor pictures, the particles are bigger since there are particles from plants (such as small leaves or pieces of leaves) that are being blown away by the wind. On the other hand, indoor photos include regular dust found in homes, which is basically smaller particles, but typically more in number than those of outdoor photos.
Apply the dust on a new layer while sampling a color (by pressing “alt” and clicking while having the brush tool selected) that is near the color of the light source. In this case I've sampled an orange color from the background, since it is a sunset. Make sure that the color is light.

Paint in the dust wherever it will be lit up from the light source directly. That’s the dust which isn't lit up directly (for example here the dust that is in front of the model has the light blocked by the model making it practically invisible).
Adding glare
This is an easy fix. All you need to do is just pick a large soft brush, choose a white color (or something close to the graded color you are using for your light), and tap a few dots on the light sources or near the edge where the light is coming from. This will create a large glare effect which you could control, if it has been done in a new layer. You can use blending modes to control the way it blends with the rest of the image.
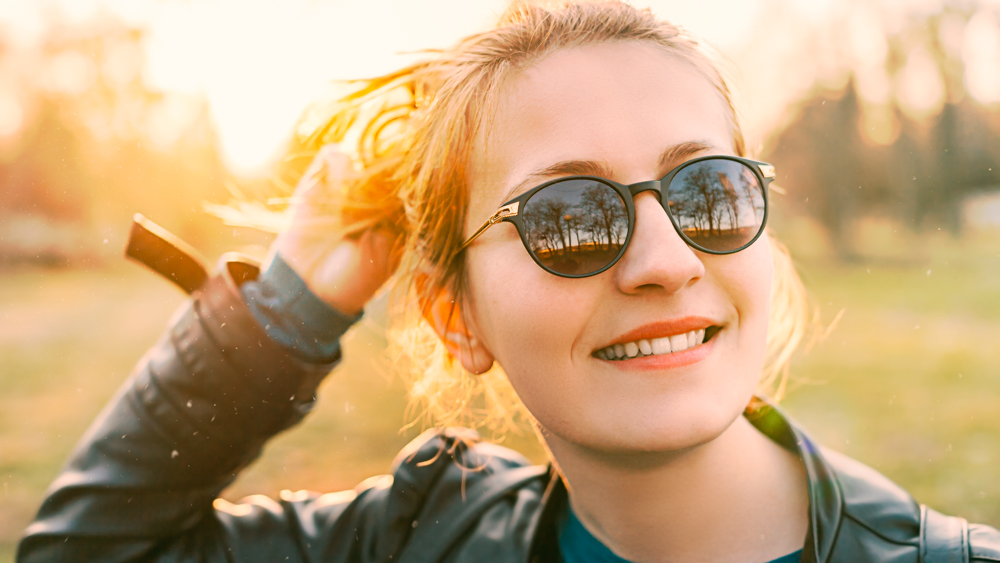
In this case I've made one large glare from the left side of the image, and one smaller glare from the right side in order to create the desired effect.

out.
So basically, tone it down with the opacity slider on the layer, blend it properly, and you’re done.
Summary
Make sure these changes are subtle. You don’t want them to be strong and harsh because that will ruin the picture. Subtle changes work best because they look more realistic. After all, you should always strive to make all of your photos look as real as possible.
I’m sure there are many more techniques for adding atmosphere in a photo. What techniques are you using to create atmosphere in your images?


