There is something about silhouettes that makes you want to rush out and create one yourself. They have that dramatic atmosphere that always keeps a photograph interesting. The ability to create silhouettes becomes a natural habit when taking photos of sunsets becomes a regular part of your routine (as it does for most outdoor photographers. Luckily for us, there are rules that you can follow in creating photographic silhouettes with great results. If you're ever wondering what they are, then read on.
Lighting Conditions
An essential key in creating an effective silhouette is to have lighting conditions that create high contrast. The higher the contrast between light from the background and the shadow of the subject, the more defined your silhouette will be. Therefore as a basic guideline, you need a bright background and very little light hitting your subject. In fact, having no fill light at all is great to begin with.
Perfect times to execute this are during sunrise and sunsets or having a strobe or artificial light setup positioned right at the back of the subject and with no other light available.
Sometimes, even with strong foreground light, as long as the background light is stronger, high contrast can still be achieved. Those who have knowledge of lighting can even create some form of edge light and provide a little fill to give accent to their silhouetted subjects. But as a guide, simply remember “brighter background, darker foreground” since brighter lights causes darker shadows. In this case, the shadow should encompass your whole subject creating the silhouette that you want.
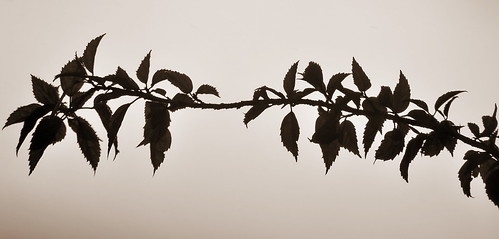
Silhouette of a plant by kg.abhi, on Flickr
Also, given that images used in creating silhouettes have a variety of bright and dark spaces, the eye will tend to go to the brightest part of the image, therefore moving your subject closer to the brightest space is ideal. Otherwise, you may lose the essence of your subject as the eye is drawn closer to the brightest part and away from your subject. The is the first step and your basic foundation in creating effective silhouettes.
Defining the Form
The real secret however, is found in the subject’s form. The key element of every photograph is the subject. It should be the center of attention, the main destination of your eye flow as it is the reason for your photograph. I remember as a kid I would play around with my hands to form shadows on the wall shaped like a bird or a dog. You've probably tried that before as well. Have you ever formed an object that doesn't look like anything at all? It’s not very interesting is it?
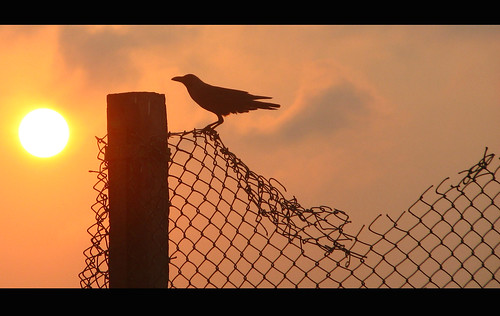
Crow – Silhouette by Natesh Ramasamy, on Flickr
Silhouettes work the same way. Have you ever seen one where you don't understand what the photographer was trying to show? Sometimes we may think that because we know what the subject is, that the people who are viewing the photo also know what it is. Effective silhouettes are those where you clearly know what the subject is based on the form the silhouette creates. The secret therefore is making a well-defined shape for your subject, positioned near or at the back of the light source or brightest area of your photo and creating the highest contrast in the image.
Take a look at the first photograph and locate the brightest part of the image. You will see that it is right behind the main subject. Because of this, your main subject's outline, a statue of a woman, becomes very prominent. The angle the photographer chose is also very effective as it defines the shape of the subject. At first glance, you will immediately notice that it is a woman based on the shape created by the body.
Then we have the photo of a plant or branch with leaves. The background isn't very bright unlike the first photo but it is enough to create a contrast that defines the spikiness of the leaves. How about the photo of the two deer? Can you imagine the deer looking forward? Would they still be recognized as deer or would they look like some other animal? How about this next photo? Notice that the angle the shot was taken highlights the full outline of the bird and the wire fence.
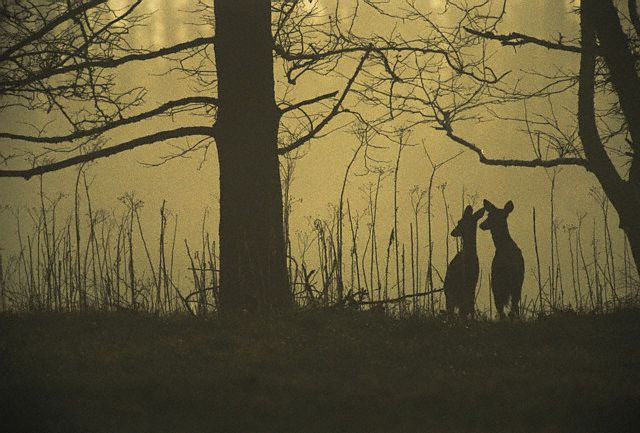
deer_silhouette by Zest-pk, on Flickr
Did you notice how well defined the outlines of the silhouette in the photos? Were you able to take mental notes of where the brightest area is from the subject? As I have mentioned, well-formed silhouettes are those where subjects are well defined by the brightest area of the photo. That is not always true, but it is in general a good rule to follow.
In this next photo, you will see the difference between the left side of the photo and the right side. Notice how the right side is more illuminated than the left. The outline of the person, basically the subject, is more prominent on the right side than the left. Therefore if you want to give emphasis on a body part, it would be good to create that outline on the right side rather than the left. Should the person's face have been on the right side, its outline would have popped out really nicely.
Of course, we can never question a photographer’s purpose of a photograph. What I am simply offering is a quick solution to effective silhouettes that anyone can use to experiment. Now go! Try and create your silhouettes and enjoy the process of doing it.
Further Resources on Silhouette Photography


1 Comment
nice kuya karlo, happy seeing a work of my kababayan here..