If you have not heard about duotone in photography printing, you need to know about a process where some editors printed a black and white image with a specific color added to it. This was done to save on color printing costs and this is called a duotone image. A split tone image is different where a color image has its tint changed in the highlight and shadow areas. Today, we will look at how to create a duotone and split tone image in Lightroom.
Creating a Duotone
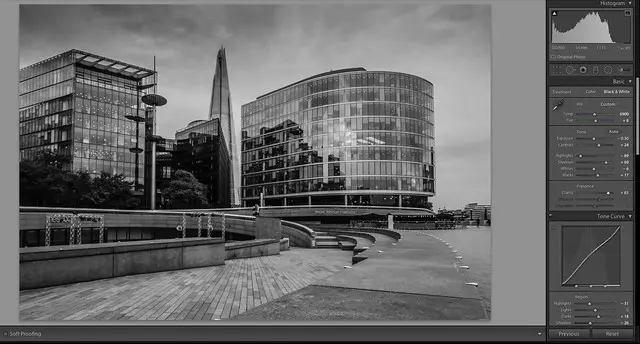
As we said, Duotones are generally best created from a black and white image so let’s do that first. There are a few ways to do this in Lightroom, the easiest probably being to click the Black and White tab in the Basic section of the Develop Module. If you want a little more control, you can use one of the Black and White presets found on the left side of the Develop module.
Be sure to pick an image that works well in black and white and once converted, make the usual exposure and clarity adjustments to give it some punch. When you are happy, it's time to go Duotone.
To do this scroll, down the right hand screen in the Develop Module until you see Split Toning. Open this window by clicking on the triangle top right.
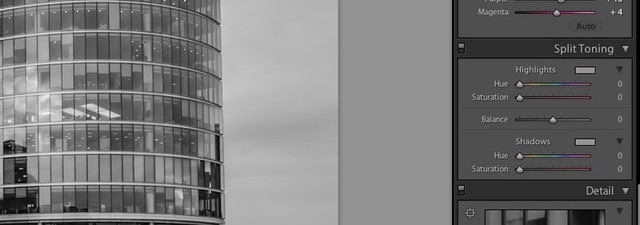
You will now see four sliders, Hue and Saturation for both highlights and shadows. What we are going to do is move the highlight saturation slider to the midpoint. You will now see color being introduced into the picture. The color will be red/pink as this is where our Hue slider is currently sitting.
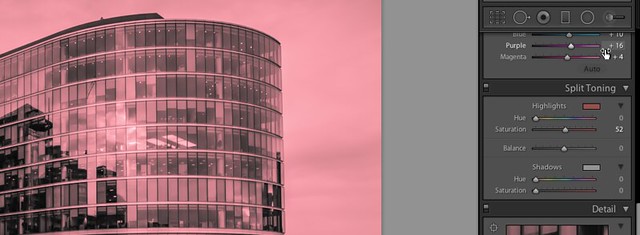
Now, if we look under each of the Hue sliders we will see a color swatch. Slide the highlights Hue slider to a suitable color. In this example I am going for a blueish Duotone so I have set the highlights slider to a hue of blue. The key is to find a subtle balance between the hue and saturation to give a hint of color in a black and white image. Using Lightroom’s Virtual Copies, (Right Click – Create Virtual Copy) you can experiment with many different styles of Duotone
Creating a Split Tone
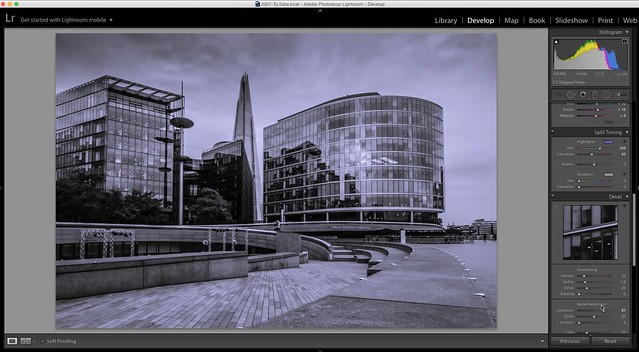
Split Tones are done in a similar way only this time we can start from a color or black and white image. In a split tone, we add or change the color in both the highlight and shadow areas. For this example we will use a similar shot, but this time in color. Returning to the Split Tone module we repeat what we did for the Duotone, except we move both the highlight and shadow saturation sliders to the middle. We now move the highlights hue slider to the color that we want our highlights to be. In this case I want the sky to be a more intense blue so I have moved the hue into the blue range. For the shadows I have tried to enhance the green glass of the building by doing for a green/yellow hue.
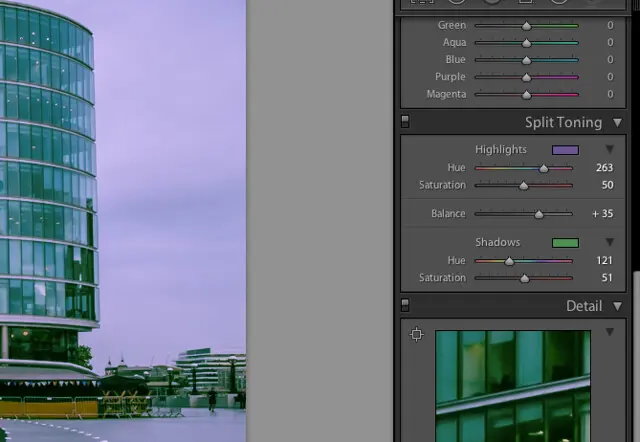
Once happy with the coloring, we again make subtle adjustments using all the sliders to obtain the image that we desire. There is, however, one further slider that we can use on the Split Tone and that is the Balance slider in the middle. Sliding this to the left we prioritise the effect to the shadow regions whilst sliding it to the right enhances the highlight areas. This is an excellent tool for fine honing your shots.
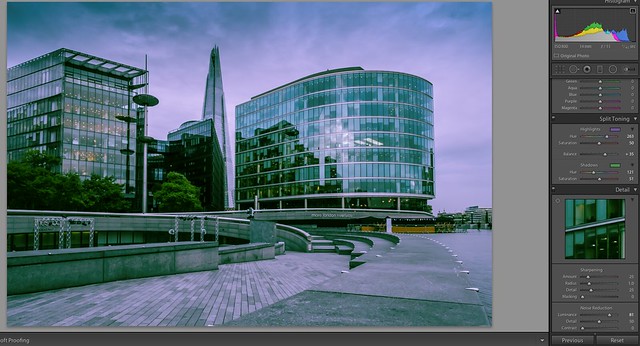
Duotones and Spilt Tones are a remarkably easy and effective way of creating interesting and dynamic black and white images as well as enhancing and adding saturation to color shots. Choose you images will and you can soon be making creative Duotones and colorful Split Tones.




5 Comments
This is an awesome edit wishing I had skill as these. Image turn out beautiful.
Thank you again for posting tutorials I can print. For me, it makes it so much easier than toggling back and forth between my work and a video. THANKS!
I have several photos that I can apply this too right now. Thanks.
Sorry about the previous post. I was trying to avoid effort if the posting failed.
I wonder why people post who are only saying ‘Thanks’. It is exceedingly boring. I wish posting was only done by someone with something to contribute beyond that. Even this post is in the useless ‘Thanks’ category. Apologies again. However, I have read many of Jason’s articles and find them useful and enlightening. Keep up the good work and I will only bother you again when I have something real to contribute. Perhaps a simple Thanks or Thumbs Up Button attached to the article would deal with this.
By the way, I don’t know how can you stand living in Ukraine. I visited twice for the 2004 election and one other parliamentary election and was appalled at the damage done to the country by the f_____g Leninist and now Putin pigs and now it is much, much worse. This is the home of my ancestors.
Love this neat little Lightroom “How-To”!