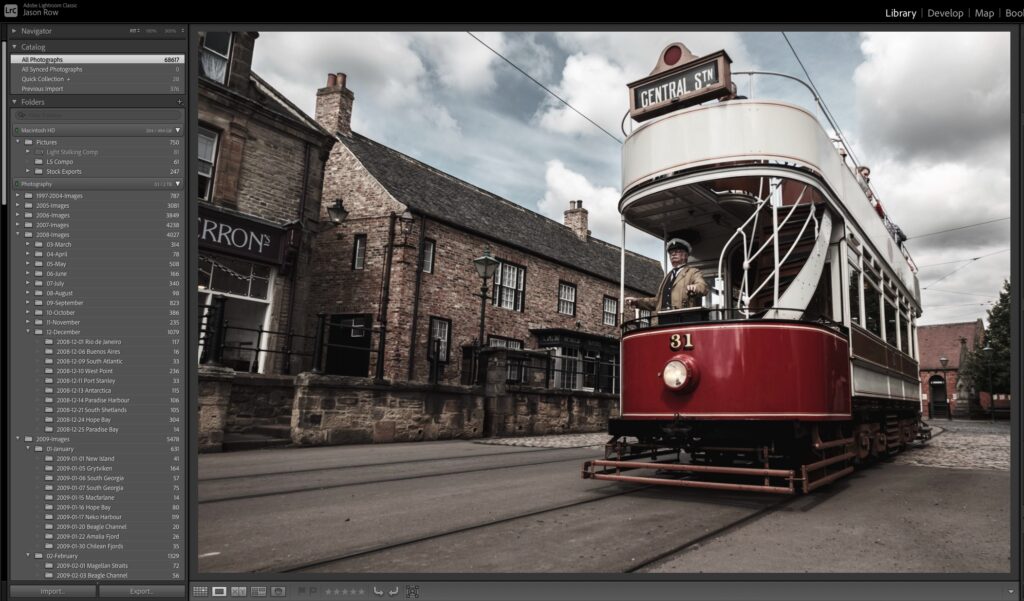
Photography wouldn't be the amazing medium it is if we couldn’t end up with the images we intended to capture with our cameras.
In the film era, this result happened thanks to the wonders of chemistry; but nowadays we develop our photographs in a much drier way.
The best thing about technology is that it has no limits for emulating materials, and your hardware offers development tools and outputs that old-style film photographers could only have dreamed of.

RAW files are today's equivalent to film, and RAW development software is basically a handy emulation of that amazing darkroom experience.
In fact, some software, like Adobe’s Lightroom, has been conceived as a digital version of a darkroom. Today, Lightroom is the favorite choice of many photographers and has been for some time. Today I will share some useful tips for giving your photographs the punch they need to make people stop and stare.
Basic Adjustments
One of the big advantages of Lightroom is its logic for developing images; it’s a very easy-to-understand and structured way to process your photos.
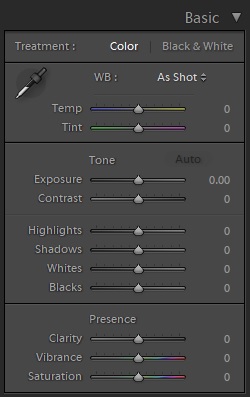
In the Basic Adjustments panel, we have various tools related to white balance and overall light contrast.
White balance can be used to get an accurate representation of color or a specific mood via light temperature in the scene. Let's imagine we have a photograph of a cosy interior, and we want to make it even cosier. This can be easily achieved by adjusting the temperature and making the scene warmer. Or we can make a kitchen look gloomier by adjusting the image to give it a colder (i.e., a bluer) temperature.
Exposure can be easily tweaked with the exposure slider, and the sliders below exposure will help you achieve beautiful contrasts. Clarity is often confused as a sharpening tool, but in fact, the clarity tool focuses on the borders between light and dark tones – also known as micro-contrast – and should be used with care to avoid odd-looking results.
Tone Curve
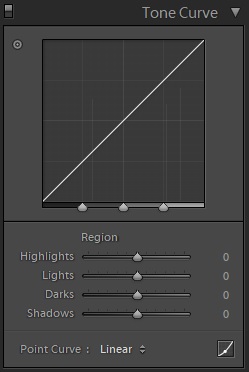
Tonality is everything, especially when working with black-and-white image conversions. With this tool, you can realize the full available richness of a photograph.
If you have an overexposed image, you can recover tones in the highlights and light zones of your photograph by pulling down those sliders a bit. Also, you can get some beautiful contrast by playing around with the darks and shadows sliders.
With these four sliders, you can recover information from extremely bright or dark zones of your pictures. Some photographers like to make contrast by manipulating the curve in this tool, but I prefer using the sliders due to their precision.
Color Correction

This set of tools lets you control the hue, saturation and luminance of each color channel in your photographs. This can be extremely fun, or an absolute headache.
The trick is to see the image first, and then decide which specific colors need adjustments. When used in black and white, this is the best way to achieve extremely striking contrast in a very natural way.
Imagine a beautiful landscape photograph with a rich, bright blue sky, but you didn't shoot the image using a polarizing filter and want to make the sky look deeper and more dramatic. You can easily achieve this by pulling down the blue color channel dedicated slider.
Sharpening
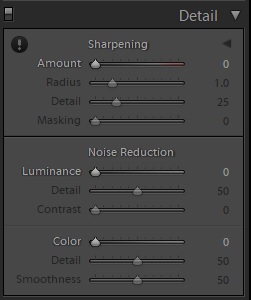
The Sharpening tool works via adding small dots to the photograph, and you can control these tiny dots structure via the amount, radius, detail and masking tools. Here you can also control the amount of noise in a photograph using the tools below the sharpening section. The best way to use this set of tools is by enlarging the image to 100%.
Filters and Adjustment Brush
It is highly likely that you have heard of Photoshop’s layers, masks, filters and brushes. Lightroom has a limited set of tools in this area, so if you need some heavy post-production, perhaps outputting the image into Photoshop will work best for you.
With these tools, you can do some awesome stuff. Imagine them as precisely targeted flashes in your photographs. These tools aren't as powerful as Photoshop’s brushes, masks and brushes, but they can be easily used by any photographer who has basic post-processing needs.
Lens Correction
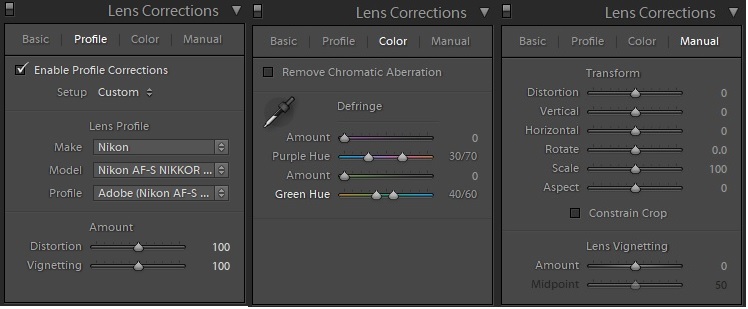
It's a shame that few photographers really know the importance of this tool. Every manufacturer has engineered their optics for their own needs but you should be aware that for optimal results, lenses need profile adjustments to avoid barrel distortions and lens-produced vignetting. Using this tool will guarantee you that your photograph is rendered in exactly the way it was supposed to be.
And speaking of vignetting, Lightroom's vignetting tool (in the Manual section) is so easy to handle that it’s worth trying. Not all images require vignetting, and some photographers even hate it, but sometimes it can help you achieve beautiful results. You can get extremely good-looking photographs by using the vignetting tool in an experimental way.
The trick in every development process is to make the image appear stunning, but still natural. This will depend on each photographer's taste, but the trick is to play with the sliders until you finding the sweet spots that make your photograph not only look great but also match your original visual intention.
The development process is an essential step into any photographer's workflow, especially with regard to style. Specific means of contrast and color correction happen more at this stage than when a photograph is taken, and it’s important for photographers to wrap their heads around this process if they want to stand out from the crowd.
Get Better at Post Processing
If you found these quick tips helpful, but want to get the most out of your photos then take a look at – The Ultimate Guide to Fundamental Editing. This guide gives you a step-by-step post-processing workflow to help you create great-looking photos efficiently and consistently, using popular programs like Lightroom, Elements and Photoshop. Click here now to check it out.


