Have you come across situations like these? Your landscape images look very dull and seem nothing like what you saw on location? The sky could be too bright with no details, the foreground too dark and the image as a whole looks boring with no colour or contrast?
Well, if your answer is yes to all or some of the above questions, do not worry. There are ways to rectify these issues in Lightroom and in this article, we will look at some quick and basic Lightroom edits you can make to improve any landscape image. Quickly dragging a few sliders should be able to get you better images, but bear in mind – start with a raw file.
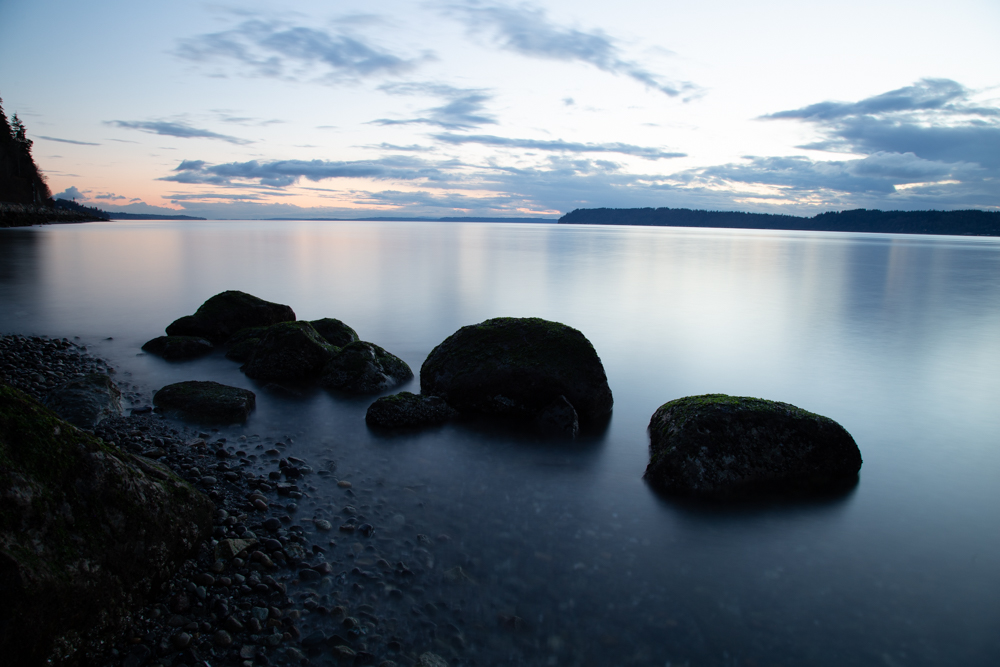
In order to illustrate this process, so that you get to see how a dull image can be turned into a striking image in a matter of few seconds, I will be using the image below, to start with. As you can see, the foreground is dark with no details, the horizon is tilted and the colours in the image look a bit cold (at least for me).
The best thing to do in Lightroom, before starting your basic adjustments is to:
1. Get The Basics Right:
- Straighten the horizon and crop the image to get the composition right if you did not get it right in the camera
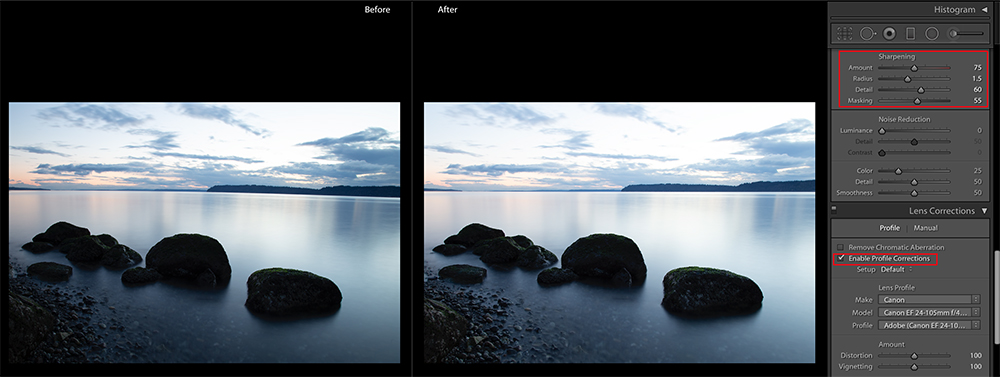
- Make lens corrections to correct any distortions using the Lens corrections panel
- Adjust the verticals using the “Transform” panel, if there are any vertical structures in the image
- Sharpen the image a bit if required. A good tip would be to press the alt key and use the masking slider to choose how you want the sharpening. Again pressing the alt tab, adjust the radius and detail in the “Detail” panel. These values depend on how much sharpening you need for your image.
- Adjust the exposure
2. Adjust The White Balance:
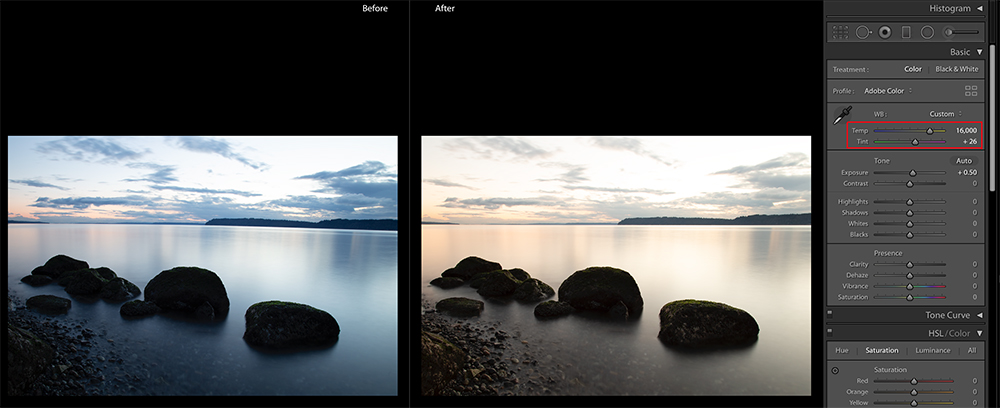
Most of the time, if you do not use the correct white balance settings while shooting, your image may look too cold or too warm and sometimes with weird tints. In this case, make use of the white balance panel to get the white balance right. Make changes to the temperature and tint slider to get the desired mood in the image.
3. Get The Sky And The Foreground Right:
To get the details and textures in the clouds, you will need to decrease the highlights. Dragging the “Highlights” slider to the left lets you get as much detail in the sky. This adjustment will affect the brightest tones in your image. This helps with recovering details from very bright regions in the sky, especially adding texture and details to the clouds.
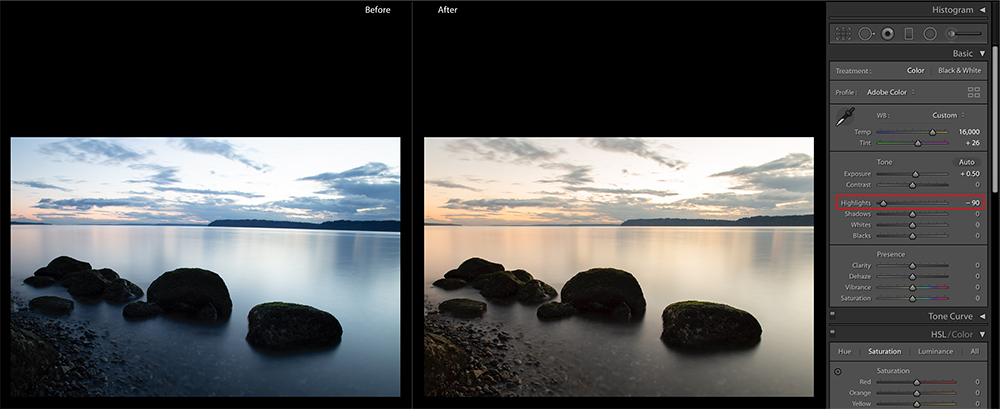
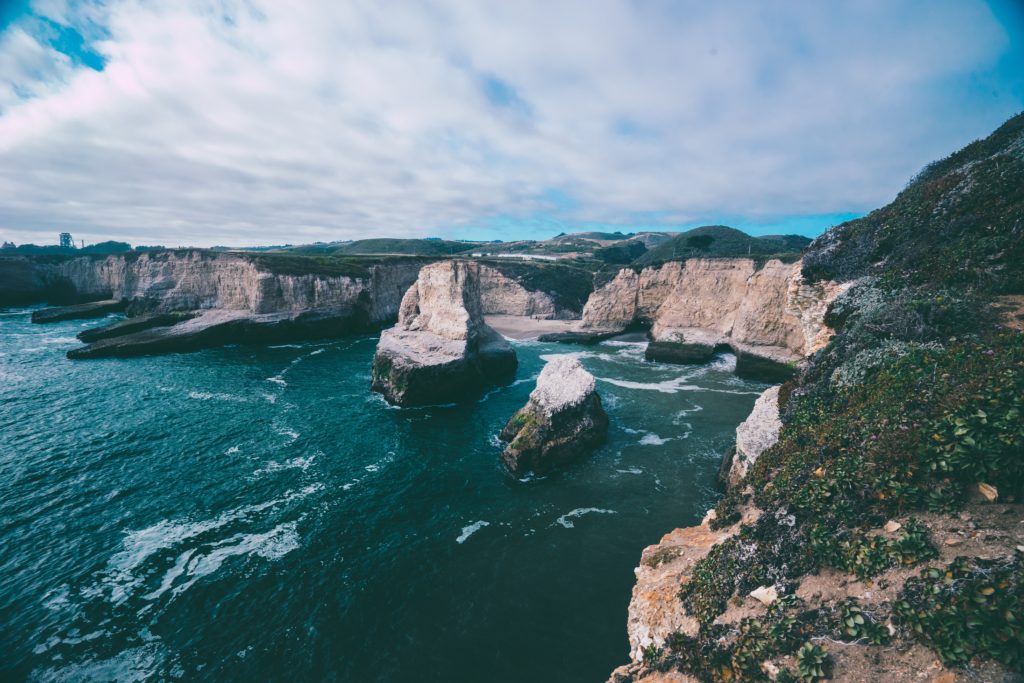
Here is another image to show how some details can be brought into the sky by just dragging the highlights slider to the left.
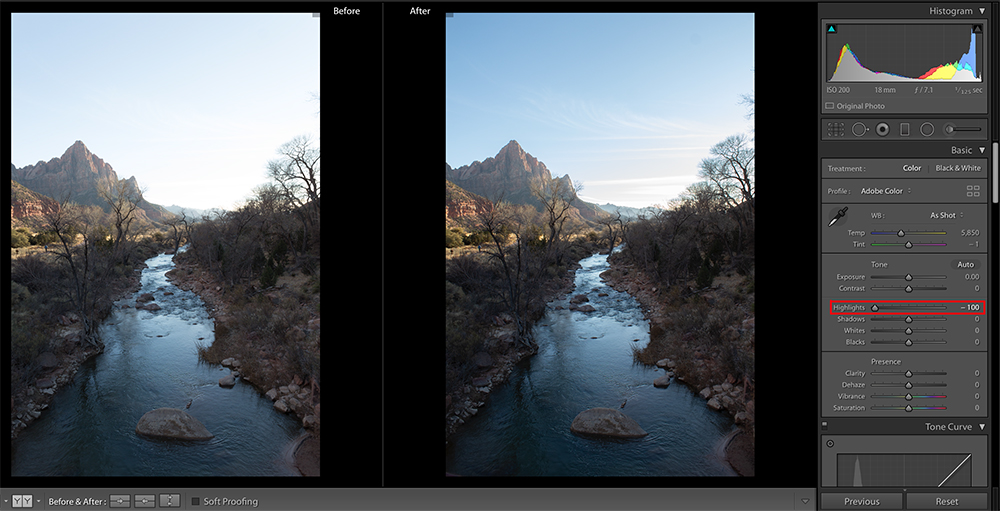
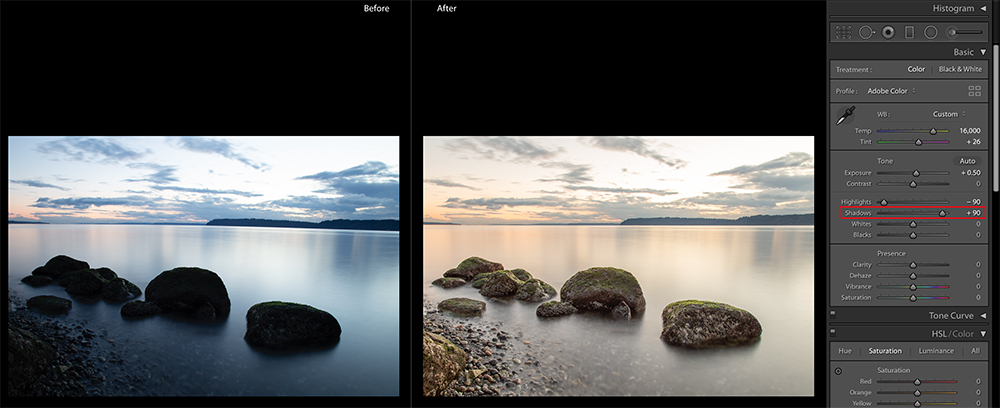
To retrieve details from the darker regions, you will need to to increase the shadows. If you have darker regions in the foreground or shadow regions in the image for examples mountains, dragging the shadows slider to the right will help you retrieve details from the darker regions. This will however make some images look a bit washed out. This can be rectified in the next step.
4. Reduce The Blacks, Increase The Contrast And Clarity:
Drag the blacks slider to the left to add some contrast to the image while keeping an eye on the histogram. This will bring back any details in the darker regions that were lost while increasing the shadows. A quick tip is to drag the blacks slider to the left while pressing the alt key on the keyboard. As soon as you see black areas appear on the image, you can stop.
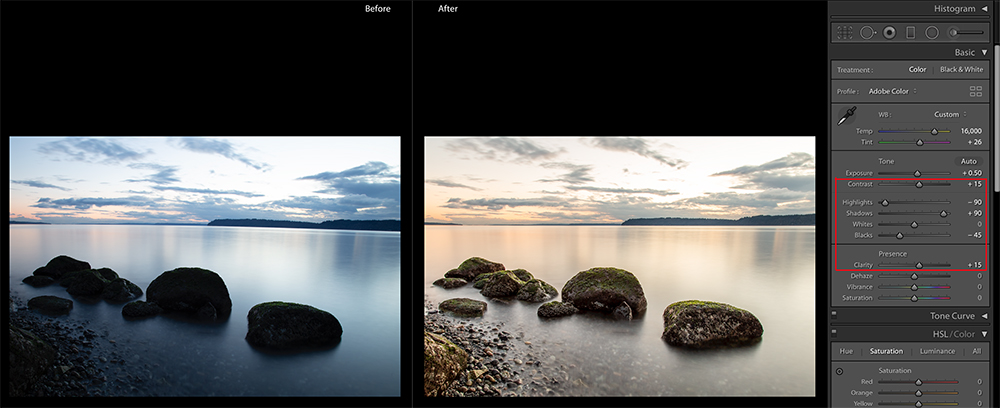
Drag the contrast slider to the right a bit to increase the overall contrast of the image (do not overdo it). Now increase the clarity a bit to add a punch to the contrast and this will make the image look a bit sharp with defined textures.
5. Increase The Vibrance And Adjust The HSL Sliders For Specific Colours:
If your images lack colour, drag the vibrance slider to the right to make the image pop. Increasing the vibrance adds
If you think that the sky or any elements in the foreground lack
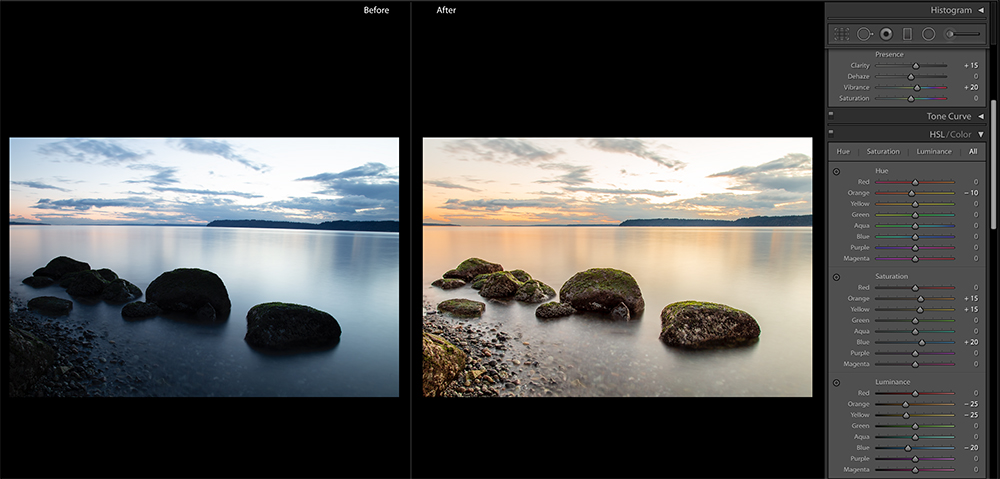
The above adjustments are basic and should bring out most of the details and colours from your raw file.
Are you happy with the above adjustments?
If your answer is “no” you could use the following quick tips to make some more adjustments to your image.
- If the image is hazy, make use of the dehaze tool sparingly to bring some more contrast to the image.
- If there are snow that look a bit greyish in your image, you can use the whites slider to get the whites right in the image. Again, here you can use the alt key and drag the whites slider till you begin to see whites in the image. Also adjust white balance to get the right feel in the image.
- After all the adjustments above, if you are still looking for more colours or details in the sky region, use a graduated filter to add some details and colours to the sky. If you are familiar with the split tone panel, make use of it to bring good colours to your image. Remember, this is optional and not mandatory.
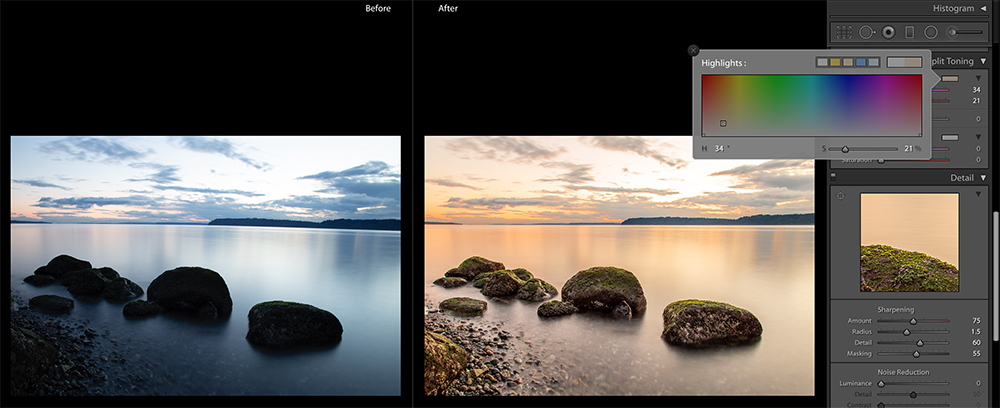
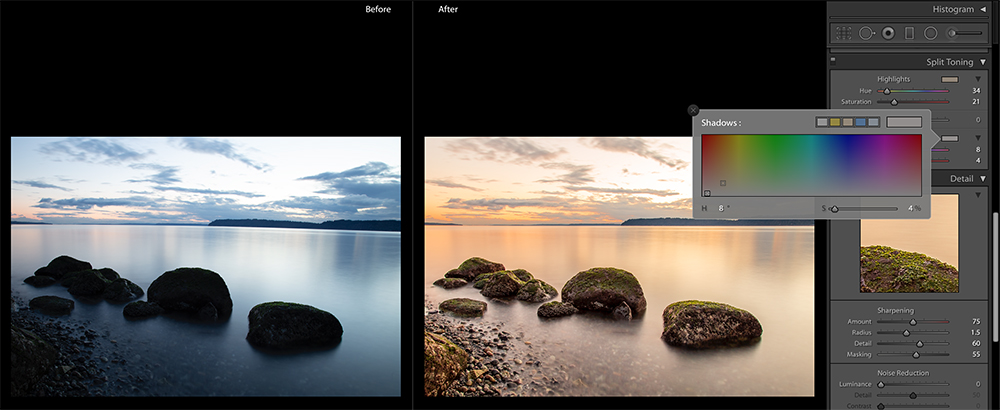
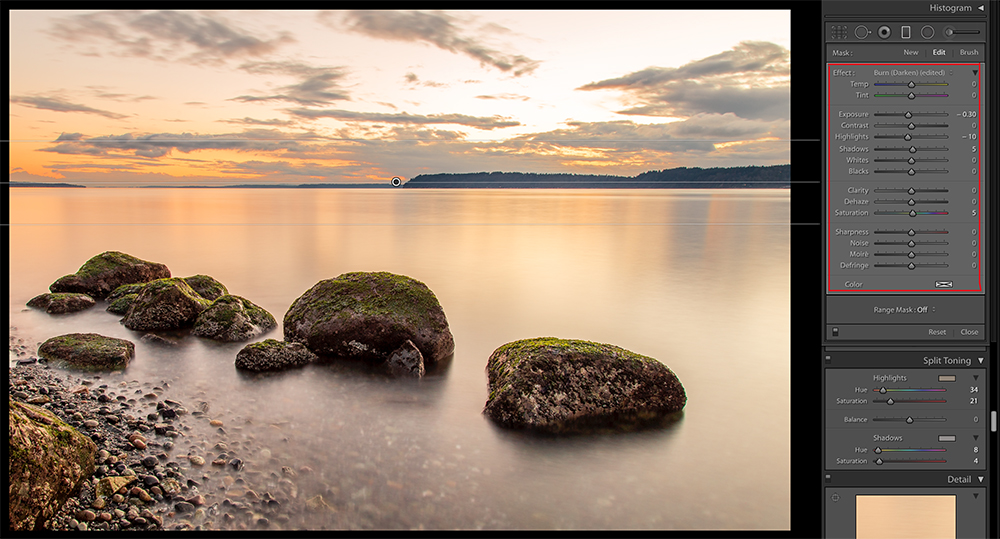
- Remove chromatic aberration if you find fringes around the edges
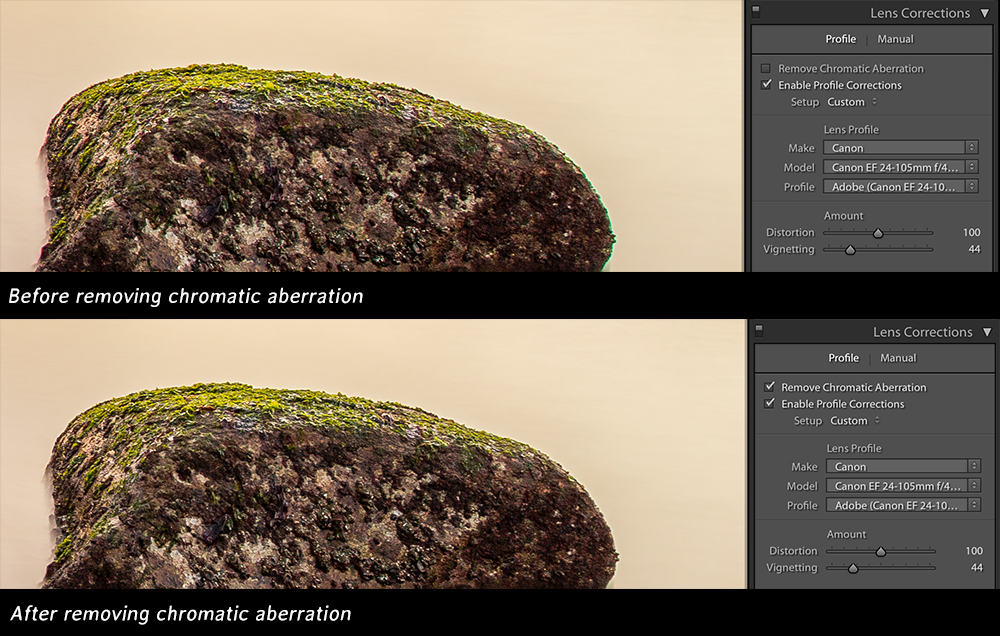
- Remove sensor dusts if any using the spot removal tool
- Always shoot raw so that you can make all required adjustments to your image
Here is the final image.
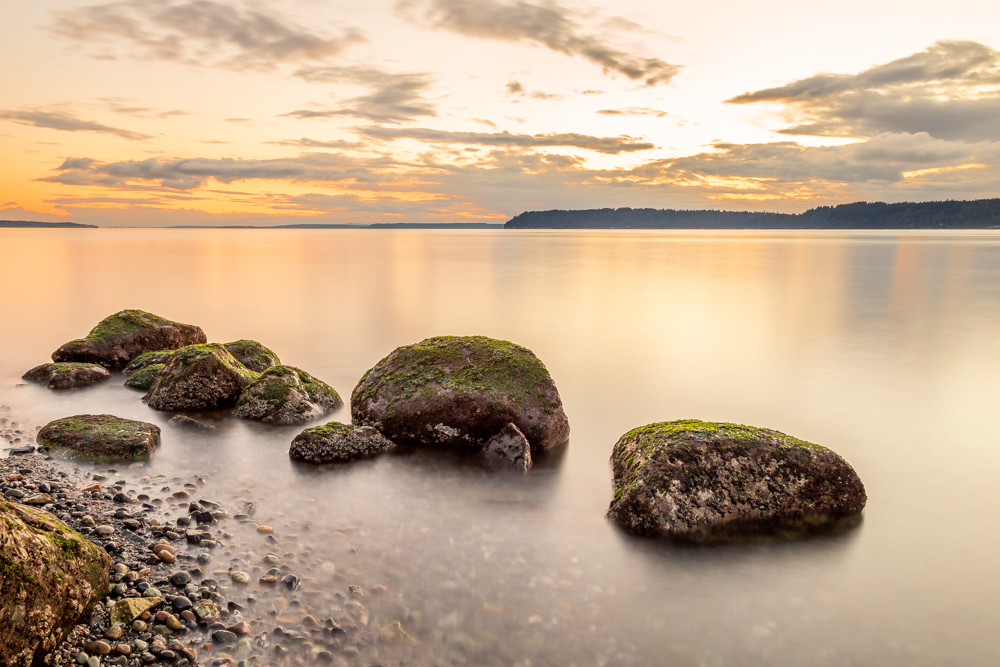
Please note, the mood you want in an image depends on what you are looking to achieve and it is different for everyone. So use this quick guide as a reference to make your dull images pop. You don't have to make all the adjustments mentioned here – only adjust or change what is relevant for your image.
Further Resources:



4 Comments
Hi Dahlia,
Excellent post.
Your post helped me a lot to learn new things in Lightoom and Photoshop. Will continue reading your articles.
Hi Stephen, glad to hear that you found the information in the article useful. Thank you 🙂
Hi Dahlia,
Great article. Steered me in the right direction to enhance some dull landscapes.
All the best
Chas.
Hi Chas, thank you and glad that you found it helpful 🙂