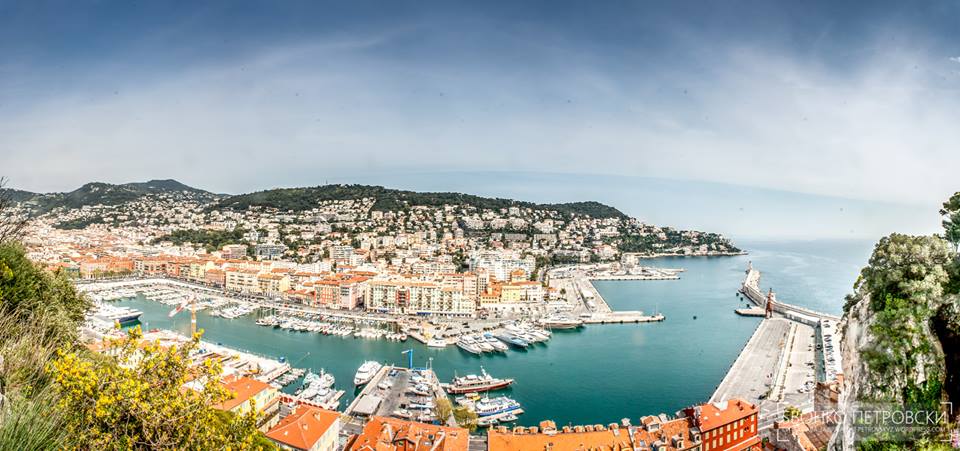
Imagine those occasions where you need a wider lens but you don’t have one on you at the right moment. The only thing you can do in that scenario is to shoot a panorama and hope that you are able to succeed in stitching it afterwards. This article will help you in improving the success ratio of getting the right shots for that panorama.
The main thing is to know the requirements of the software you're using for the panorama stitching. Then you can feed it the appropriate images in order to get satisfying results.

Most of us use Adobe Photoshop for stitching, however there are alternatives which are simpler or more advanced when compared to Photoshop. For example, the professionals who shoot panoramas (360 degree spherical ones) use PTGUI. As far as I know, it is as good as it gets, however you probably don’t need such an advanced program for simpler panorama stitching (shots which don't result in 360 degree panorama).
The goal of this article is to teach you how to simulate a wider lens when you don’t have one on you.
One issue you will run into is tonal differences in each shot. What you need to do with your DSLR to avoid those tonal differences is to use it on manual mode. But completely manual: white balance, shutter speed, aperture, ISO, everything, even the focus should be manual (due to lenes which have focus breathing).
MKeter and set up your camera beforehand, focus and then set the focus to manual. You will be shooting in portrait mode. The goal isn’t an image which is extremely long with low height, quite the opposite, the goal is to retain the standard ratios (or as close as possible).
Once you have the settings and focus in place, start shooting from the point where you want your image to be, to the end (obviously, right?). But you need to have one extra frame at the beginning and one at the end (go a bit wider). This will give you more room for cropping later.

If you are taking more than 4-5 shots (not including the extra two) then it is wise to shoot another row of photos above and below the main row (you can go without the extra two images here). This will provide more of the sky and ground – information which you lack with wider panoramas.
Be careful, however, with your main row of images. Make sure you follow the horizon and don’t deviate from it (as much as humanly possible of course) and provide at least 25% overlap in the images, or else the software won’t know how to stitch the shots together.
You should shoot in RAW since you will process all the images as if you were processing one image taken with a wider lens. It makes everything easier if you are using a software like Adobe Lightroom in order to be able to have the exact settings on all the images in order to avoid tonal and color differences. In Lightroom load all the RAW files and select them, select Auto Synchronise and do your edits. That way the edits will apply to all the images you have loaded.
When editing don’t forget to correct the lens distortion, color fringing and vignette. You can do this by using the lens profiles at the bottom of the correction panel. Color fringing is a manual fix, however.
Once you have that done, while all of your images are selected, right click, edit in, and merge to panorama in Photoshop.
Now depending on the images and how straight you were shooting, you should choose the proper stitching scenario, or just use auto (as I do most of the time) since it does a pretty good job.
It can take a while, especially if there are many images. The output will be an extremely high resolution image which will be a pain to edit on low end computers, therefore it is wise to downscale it a bit.
However, do not merge the layers just yet. Instead, turn off all the layers but the first one, and then turn each layer one by one, while checking the points of blending for any ghosting or misplaced objects. That way you will be able to spot inconsistencies much easier, rather than staring at the complete images and looking for errors.
When you are sure that you don’t have any inconsistencies, merge down the layers, fill in the gaps (if there are any) which are usually on the corners, crop and save your panorama.
You can save the panorama in Photoshop format which will load automatically in Lightroom if you want to do any last minute tweaks, and you are set.


