HDR stands for “High Dynamic Range,” meaning that the method is supposed to increase the dynamic range that one image can have as if the sensor had the same amount of dynamic range. I'd been looking for HDR processors that did a realistic job, and for a while the search didn’t yield a processor that I was happy with – until Lightroom 6 began generating RAW HDR photos.
The best feature of Lightroom 6 is its ability to merge the RAW files with a DNG file with all the RAW data. This process effectively increases dynamic range in the resulting image without any of the negative post-processing effects. You can process the HDR image as a regular RAW file in post-process. This allows you to retain a good deal of the shadows and highlights in great detail, minus much of the noise.
Remember too that Lightroom 6 can now stitch panoramas, which is done by merging RAW files into RAW panoramas. This also works with HDR RAW files, giving you a RAW HDR panorama.
Let's look at how to do both together to get a great result.
Shooting an HDR Panorama
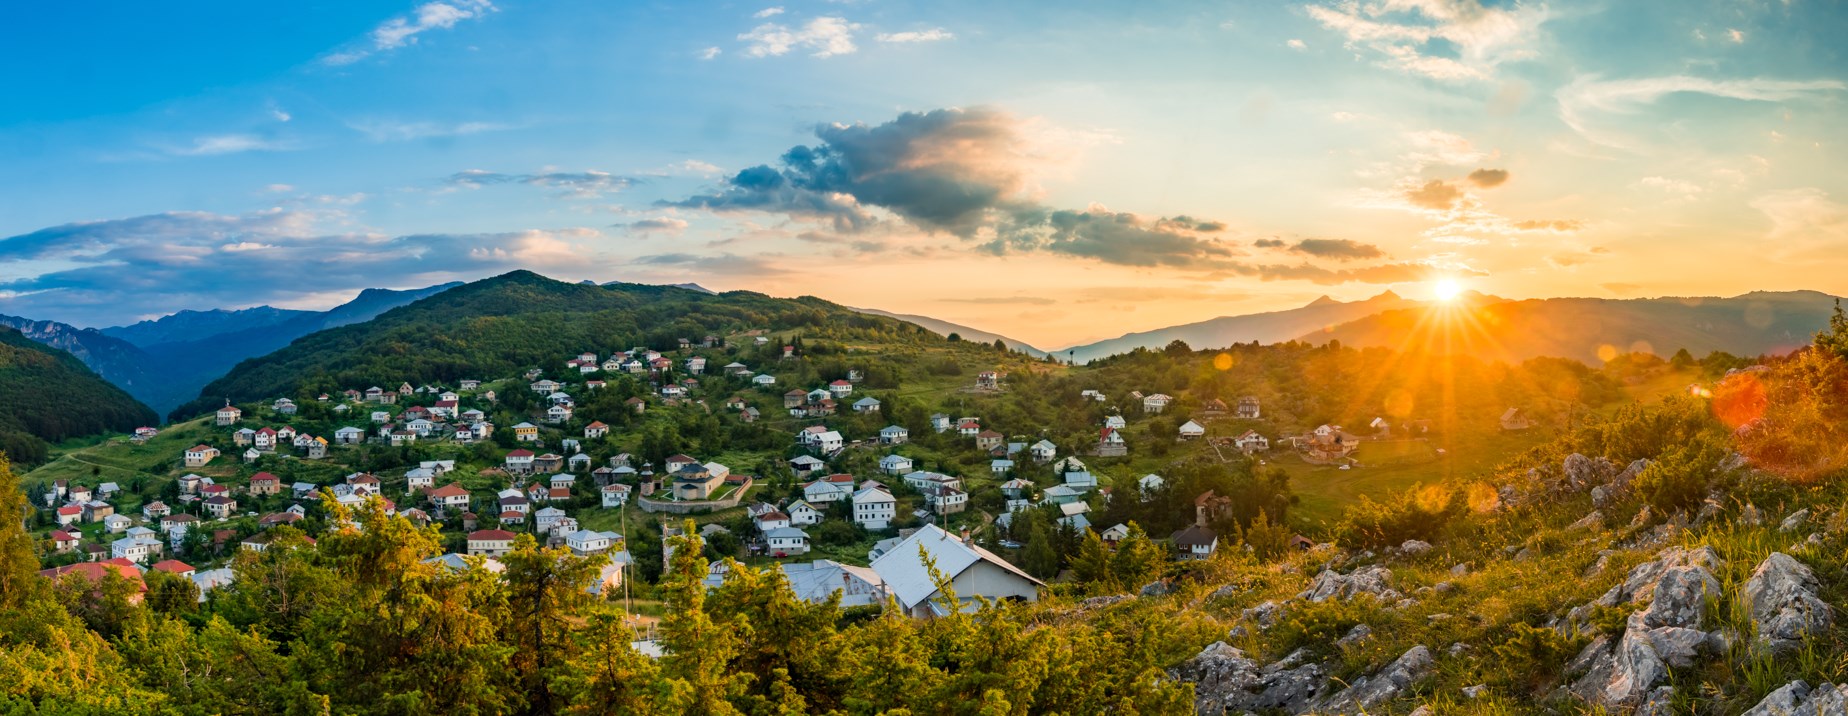
I usually shoot panoramas by hand, but a tripod is necessary in this case since you need to take several shots in succession from the same angle with as little movement as possible. For this panorama, I took five shots per angle, from six angles, and all in portrait mode. You can usually do this with only three shots for the HDR, but since I was shooting a sunset, I would need to recover a great amounts of highlights and shadows, so I decided on five shots, just to be safe.

Before you take the panorama, make sure you have practiced the angles well enough that you can do it quickly to avoid light changes. This isn’t normally a problem, but taking three to five shots per angle can take up to five minutes of shooting, in which time light can change drastically. Even though my 7D mark 2 camera is capable of ten frames per second, it took me two minutes in total to capture the shots.
Merging, Stitching, and Editing the Shots

After uploading the shots in Lightroom 6, you need to merge each angle into HDR. Select several HDR files which you will stitch into a panorama later. To prevent you from getting lost in all the photos, pick a color to mark the HDR shots. Later, you can activate the filter to see only the ones you marked. For the HDR merging, make sure that you have ticked the “Auto Align” box, but that the “Auto Tone” box is NOT selected. Having different de-ghost levels between the HDR shots shouldn’t be an issue. Do a lens profile correction on each HDR shot so that there aren’t any discrepancies in the stitching process.
Once you have the HDR shots nicely merged and selected, you can then merge them into a panorama with Lightroom 6. This process might take a bit longer than regular files, but be patient; it will merge eventually. Choose the projection you like the best and hit “merge.”

After completing the image, go down to Camera Calibration and choose a profile you like best. Work on top of that profile as you normally would.
The first alteration I like to make is removing the color fringing (which is often increased with HDR). Next, I de-haze the image using the de-haze slider.
Now you can complete your post-processing as usual. However, if you need further shadow/highlight recovery, you can do so using the filters. Filters are stackable, so you can do a great amount of recovery, as long as the dynamic range allows it.
Don’t forget to crop the photo at the end of the process! Those white empty blocks aren’t something you want to see in the finished product.
Summary
Producing a realistic HDR panorama isn’t something extremely complicated to do. It just takes some practice, some patience, and the will to go the extra mile for that dynamic range. The process will be rewarding since it gives you a lot of flexibility in post-processing. Additionally, it will look as if it were taken with a sensor capable of 16-18 stops of dynamic range. It will always look natural, and I hope that using HDR this way will soon change the opinion that some people have about it.


2 Comments
Can I assume that when you say you “took five shots per angle, from six angles” that the tripod did not move, yet you took shots from six points while panning your camera? Also, have you tried to shoot like this and use more than one horizontal plane to get a taller and wider panorama? This would mean having the “top row” of pictures overlap the “bottom row” of pictures a bit, so I wonder how that may work out.
I have overlapped photographs horiz. & vert. In panoramas and it works out well.