Recall the last time someone complimented your photography. Did they compliment you or did they compliment your camera? Surely, we’ve all heard it at least once: “Wow, your camera takes great photos!” Of course, this is rarely said with any inkling of malicious intent; when people make such statements, they aren’t really trying to minimize your effort, they just aren’t educated on all that goes into making anything more than a snapshot.
For the rest of us, we understand that a good photograph starts with the photographer and the way that he or she is actively interpreting and internalizing their subject. It’s all about vision. But we do need the camera to do its job also. We need to know what to tell the camera to do in order to translate our creative vision into something a bit more tangible — a photograph.
Of all a camera’s available settings and functions, the one that most allows you to convey a sense of energy in your work is shutter speed. It is shutter speed that, in numerous scenarios, provides for the greatest degree of flexibility in terms of how you present your subject to the viewer.
Fast Shutter Speeds
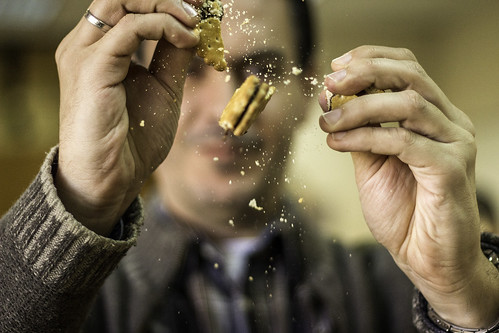
A shutter speed of 1/500 sec. or higher is generally considered a fast shutter speed. The purpose of a speed this high is to freeze motion. If there’s any rapid action that you want to capture dead in its tracks, then you will need to use an appropriately fast shutter speed. Exactly when might you want to use such a fast shutter speed? Here are a few possibilities.
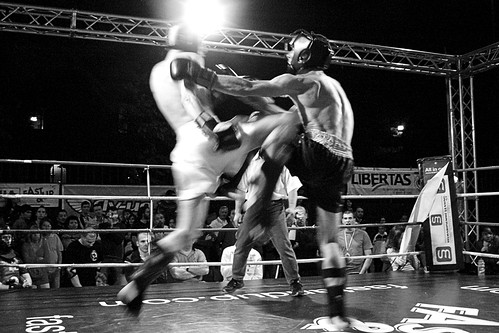
- Sports. Sports action occurs at a breakneck pace, so it would make perfect sense to use a high shutter speed when shooting sports. This is the only way to ensure sharp images when everything is moving so rapidly. There are no concrete rules about exactly what speed to use in every situation but, as a frame of reference, consider that 1/500 sec. is usually fast enough to freeze the body motion of a basketball player; a speed of 1/4000 sec. will freeze the motion of a baseball moving at 90 mph (145 km/hr).
- High Speed Photography. It’s all there in the name. High speed photography is the process of capturing images that consist of rapidly occurring events. It is distinct from the use of high shutter speeds to photograph sports, as high speed photography is concerned mostly with capturing those events that often happen too fast for the naked eye to register. Water droplets, bursting balloons, moments of impact. All of these phenomena require very high shutter speeds.
Before setting your camera to 1/8000 sec., there are a couple of important points to bear in mind.
- If you have the opportunity to do so, set up your camera ahead of time with your main AF point trained on the spot where you expect your subject to pass. This way, all you will have to worry about is perfectly timing your shot.
- Remember that fast shutter speeds require a lot of light; the shutter is open only for a fraction of a second. A great many events where you will want to use a fast shutter speed take place outdoors; surfing, auto races, air shows. But bright conditions are never a guarantee, and there are indeed events that occur at night or in otherwise poorly lit settings. In such cases you’ll have to boost the ISO, which many DSLRs handle at least reasonably well.
Medium Shutter Speeds
Medium shutter speeds fall roughly in the range of 1/20 sec. to 1/80 sec. and are used to introduce motion blur into scenes with moving subjects. Using good technique, motion blur can inject a sense of animation into your photos. Here are some situations in which you might want to use a medium shutter speed.
- Sports. Yes, there is more than one way to shoot sports. There is no rule that says you must freeze action (though there are very good reasons why photographers take that approach). Slowing your shutter and introducing motion blur to your shot is simply an alternate method of representing the intensity of the action.
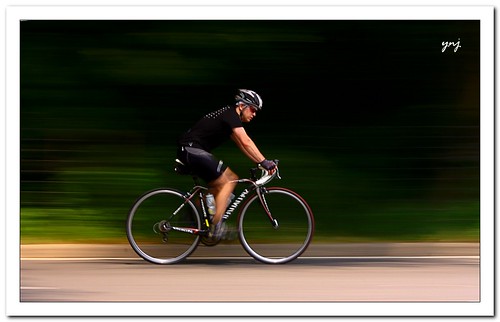
- Panning. Panning is sometimes referred to as an “advanced” technique; admittedly, it does take practice and patience, but it isn’t as complicated as some might think. Panning is simply the horizontal movement of the camera as you follow a moving subject. The goal of this particular method is to get a blurred background and a sharp, in focus subject. Follow these basic tips and try your hand at panning:
- Set your shutter speed between 1/30 and 1/60 sec. Aperture and depth of field are not much of an issue here, as the background will be blurred.
- Make sure you aren't too close to the subject. Use at least an 85mm focal length.
- Set your AF mode to AI servo/continuous focus mode so that you can track the subject.
- Aim at your subject and press the shutter button halfway to get an exposure reading. Be sure to stay with your subject’s movement.
- Press the shutter button completely while panning the camera along with your moving subject.
While panning is somewhat of a specialized method of using motion blur, there are a couple of other commonly used approaches to motion blur.
- If you are shooting a stationary subject, try moving your camera in various motions around the subject; you may like the more abstract stylings of the blurred colors and lines that result.
- Keeping your camera stationary, take a photo of your subject just as it passes by you. You will get the opposite effect of panning: your subject will be blurred and the background will be in focus. Your subject will appear as if it is moving out of the scene.
Slow Shutter Speeds
Even if we were to assert that slow shutter speeds start at about 1/8 sec., there really is no cap on how much slower you can go. While you can dial in a shutter speed as slow as 30 seconds in one of the standard shooting modes, you can use bulb mode to keep the shutter open for any thing over 30 seconds. Here are some of the great uses for long exposures.
- Light Trails. A favorite of long exposure photographers is to photograph moving cars at night. Using a shutter speed of approximately 2 seconds will convert car lights into colorful trails that snake along with the road. The longer the exposure, the longer the light trails.

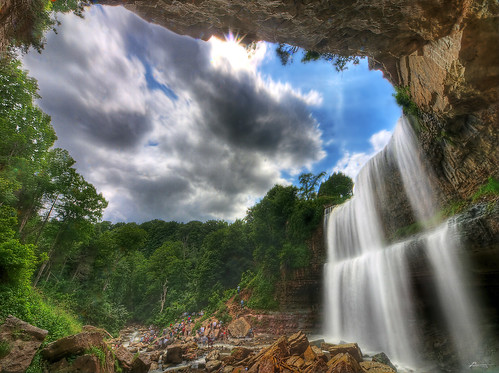
- Moving Water. Moving water will have a smooth, silky appearance when photographed at speeds of 1/8 sec. or longer. If you’re shooting water during the daytime you will need to use a suitably strong ND filter so that you can slow the shutter sufficiently.
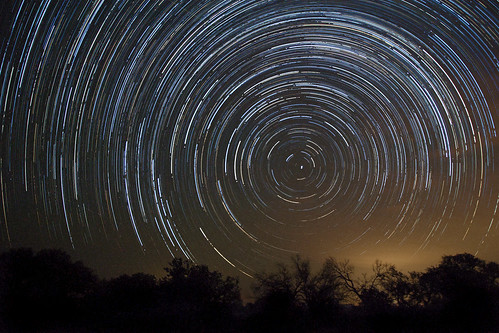
- Astrophotography. If you want to photograph celestial adornments such as the Milky Way, you’ll have to do it at night. Further compounding such endeavors is the apparent dimness of these bodies; a long exposure will be required. Star trails are another popular subject within astrophotography. Similar to light trails, photographing stars using a long exposure renders stars in uniform, elongated circular patterns.
Experimenting with shutter speed can be fun, educational, and insightful; learning to harness the power inherent to shutter speed can help you bring your creative vision to life.


3 Comments
A great succinct refresher. Thanks.
Very educative, filled with many practical hints. Thank you.
Easy to understand and to the point. Good article 🙂