Photographic compositing has been with us since the dawn of photography. The merging of two or more separate images into one is seen as a way of extending our creativity. In the digital age, of course, this has become a whole lot easier with the use of Photoshop’s layers and blend modes. As well as compositing different images, layers and blend modes can be a great way to improve the look of your images. Today we are going to look at five of the best blend modes for a photographer, but before we start we should briefly look at what a blend mode is.
What is a Blend Mode?
In layman’s terms, a blend mode works out specific differences between two layers, the upper layer and the lower layer. Depending on the blend mode, these differences can be in exposure, contrast, color or other factors. The blend mode then uses this information to merge the two layers together.
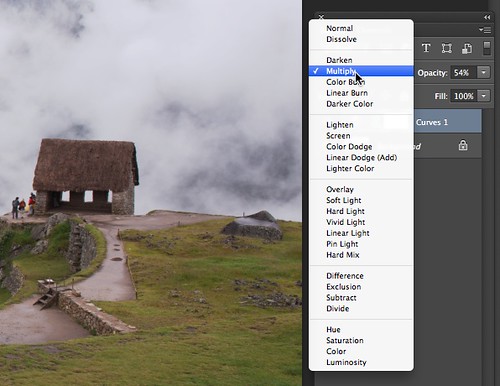
The blend modes can be found on the top left of layer palette once there are two or more layers available. To use a blend mode, select the upper of the two layers that you wish to blend. Another useful tool to be aware of when using blend modes is the Opacity slider, this is found to the top right of the layers palette.
Multiply
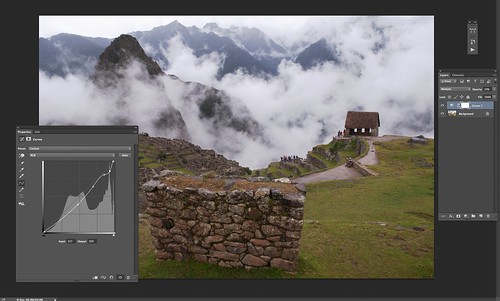
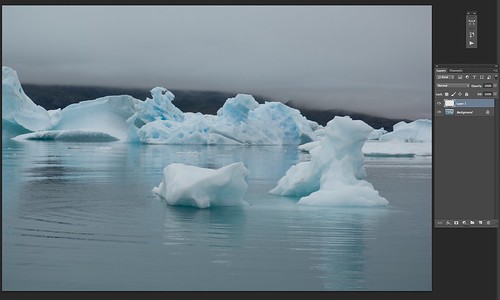
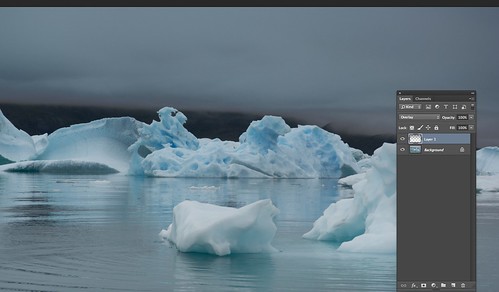
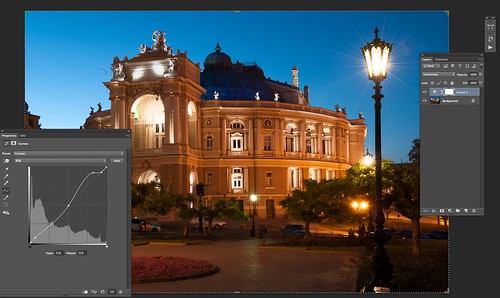
This is an excellent mode for outdoor photography such a landscapes particularly if they look light and washed out. A useful technique is to create a curves adjustment layer to reduce the highlights a touch, then apply the multiply blend mode. This has the effect of darkening the image by the equivalent of one stop. If your image is now too dark, you can back the blend mode off a little using the Opacity slider.
Soft Light
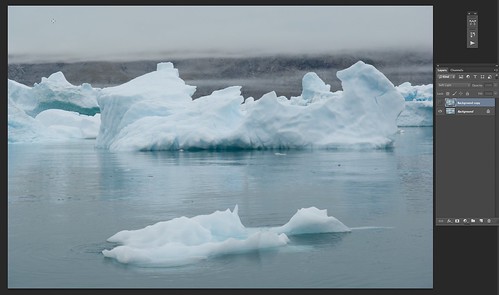
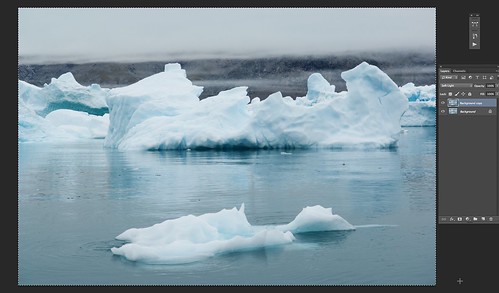
This is useful mode for boosting contrast within an image. If you have a flat, low contrast image you can get an instant contrast boost by duplicating the original layer and applying the Soft Light blend mode. Again, the effect can be backed off using the opacity filter but if you need a further contrast boost, duplicate the upper layer again, the Soft Light mode will also automatically copied to the new layer.
Overlay
Overlay is in many ways similar to Soft Light in that it is a contrast based mode. One of its most powerful uses is in adding graduated filters to flat skies. To do this, create a blank layer above your original. Using the graduated fill tool with a neutral graduation selected, drag the fill tool down from the top to about two thirds of the way down the image. Apply the Overlay blend mode to this graduated layer and you will see the graduated filter effect darkening your sky. Again, you can back this effect off using Opacity slider. You can also apply the Soft Light mode to this for a more subtle effect.
Lighten
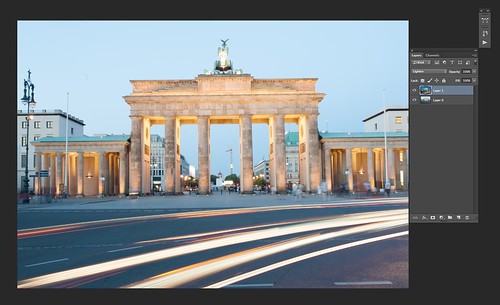
Lighten is an excellent mode for merging identical shots with different exposures. For example, if you took a series of identical shots of a cityscape through sunset and wanted to merge a night image with an earlier, lighter image that had more detail, Lighten would be the mode to use. It works by removing all the dark areas from the upper image and bending purely the lighter areas into the layer below.
Luminosity
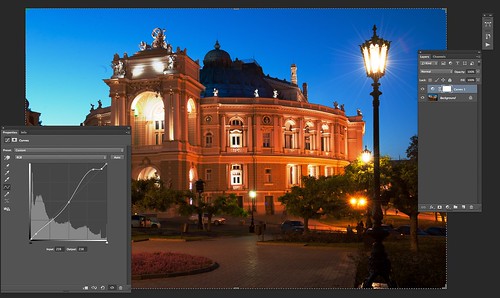
This mode is extremely useful for boosting contrast without affecting saturation. Normally, when you boost the contrast of an image using either levels or curves, the color is also boosted, often leading to an over saturated feel. To avoid this, create a duplicate adjustment layer, either curves or levels, carry out your contrast adjustment, then switch the blend mode to luminosity.
The combination of layers, adjustment layers, blend modes and opacity combine to make the layers palette in Photoshop one of its most powerful functions. They give us the ability to work on specific elements of an image such as contrast or luminance without affecting other elements. Although they might seem a little daunting at first, blend modes, and in particular the five listed above, are a powerful tool in the photographer’s post production workflow.


20 Comments
I’m sorry but I completely disagree this kind of “recipe” explanations. Every blend mode in Photoshop has a particular behavior in the form how a given layer blends its contents with the layer/s under it. This is only collaterally related with the effect that this blending modes causes on “a particular” image. Digital Image Processing is a science developed from a long time ago (aprox. from the seventies of past century). Photographer’s knowledge about that has been always poor, but this is not an excuse to write the first thing that passes between our neuronal connections.
Carles, I’ve been using blend modes for a long time … and I think a “recipe” explanation is useful for someone who has not been exposed to blend modes. So I appreciate the article. And if you have more to share on blend-modes, I think myself and others will appreciate your learning how you have used blend modes.
Refraining from writing the first thing that passes my neuronal connections, I would say that the majority of people here on Lightstalking want simple explanations of how to achieve certain effects in Photoshop. They have neither the time nor inclination to spend hours studying the science of digital imaging, they simply want to apply a particular effect to an image. It is for these people that I wrote this article and will continue to write them.
I don’t spend a whole lot of time in Photoshop, but I definitely appreciate the to-the-point explanations of these blend modes. I’ll give them more consideration next time I use PS.
For those who are at early stage of photography and postprocessing, like myself, I find this article very useful. Thx alot for sharing youre knowledge with us for free 🙂
Thank you so very much for helping me to understand these blend modes with your simple, quick, and effective guide on how they can be applied to enhance an image. Just exactly what i needed to know and I hope you’ll beable to share, in the same way, how the rest of the blend modes can be used. Truly appreciated!
Carles, get over yourself. Write sth better or stop criticizing others.
Jason, thank you for your tips. Very useful indeed.
This article is helpful to me at my level of development. It gives me a starting place rather than having to shoot in the dark. I’m new to PS and it seems overwhelming at times, but a rich resource. Thanks for sharing.
I agree, this is a great tutorial to understanding the blend modes … I’ve been playing around with them for some time but now I have a better understanding of why in plain English ….Carles …. I think you may have a better experience in this understanding but I’m not sure exactly what you said and this is an important factor in the learning experience …. making a tutorial of your own would help me?
I could’t agree more !!! Thanks for this understandable article, I for one, had no clue what to do with thos blending modes, apart from getting my pics high up on a background. I will be trying everything out in the future… again, thanks a bunch.
Great tips Jason. Although I have been using Photoshop for over twenty years, since 1.0, it is nice to see someone else’s iteration of its features in a simple and useful way. Even as an experienced PS user, I found the info valuable. Never mind about the nonsensical comments here that come from elements lacking in full mental faculties. 🙂 Keep up the good stuff.
I thought it was a great article that gives another way of understanding blending modes. Photoshop is complicated for most people – perspectives like this help. Thank you for taking the time to write it and share it.
Thanks for the tips, keep them coming! As for the critics, if you are going to be negative and upity at least share some of your extensive knowledge of the subject so that we can see how to further our journey into the Photoshop Adventure.
I’ve been using photoshop for a good many years now, and do you know what? You learn something new every day.
I love your posts, thank you for sharing
Used blending modes in Elements for years. Think you have got the level right for inexperienced users.
I agree with Jason….I don’t need to know how the “electricity” travel to the light bulb head, I just need to know when I flip the switch the light will go ON. I don’t have the time to know ALL the dynamics of any presets, blend modes etc..but it’s nice to know if I increase or use a certain blend mode I’ll get that certain look. Simple. Why complicate things in our otherwise complicated lives?
Great posts.
Thanks!
I’ve been using PS for years but have never really taken advantage of blend modes. So I appreciate Jason’s article and explanation of each. He had his target audience and naked it with me. So thank you for the article. It is much aappreciated.
I found this article very interesting and helpful. I may lack the proper amount of “neuronal connections” to fully understand all of the discrete nuances of digital image processing but if I did it would probably take most of the fun out of it. I find too many “neuronal connections” active at the same time tend to make me annoying to others and myself. Just grab the damn Crayons and color outside the lines!!!
Every forum has one monkey that thinks his tree is the highest. I actually look for them now, then get on with the main message. A very helpful article and something to practise and play with to make up our own mind about results. Thanks,