In the pursuit of photography, light is everything. But, sometimes we're put into situations where the available light isn't very good, or it isn't enough, or, it's coming from the wrong direction. When faced with this dilemma, we have but one choice, to add light of our own. This can present difficulties. Perhaps, we don't want to carry a lot of extra equipment like a studio flash package with lightboxes, umbrellas, stands, etc. One simple answer to this problem is to use on-camera flash. The problem with solution is flat, harsh, unflattering light.
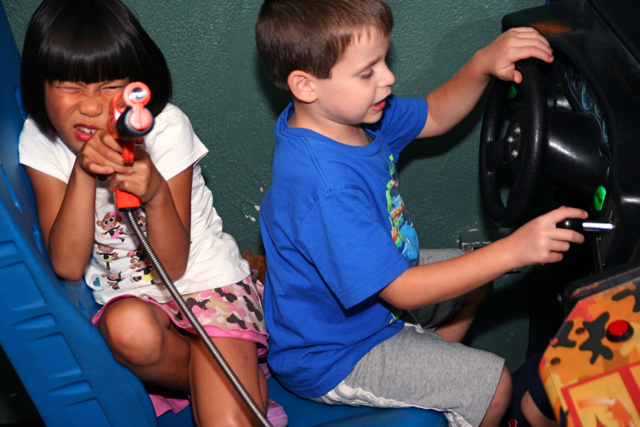
Family Pietro's Pizza Party 9-9-09 7 by stevendepolo, on Flickr
Bounced portable flash provides lighting options without all the extra gear.
 alima
alima
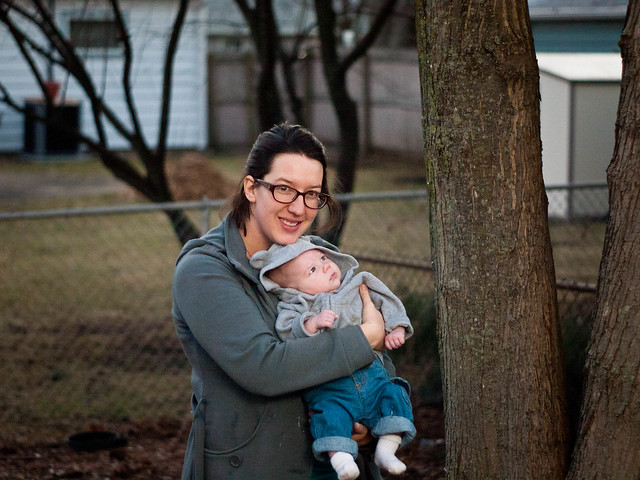
Devin and Rune at Twlight by devinf, on Flickr
This enterprising photographer used a simple bounced flash off an exterior garage wall to create a more pleasing directional light source on his family.
Why is bounced flash a good solution to so many photographic situations?
- It's quick and easy to set-up; literally taking only seconds.
- It can provide a soft wide dispersion of light for flattering shadow-less images.
- It is also directional, (rather than straight from the camera), so it provides modeling for your subject.
- With a little ingenuity, the single light source can be split and appear to be a multiple light setup.
- It's relatively inexpensive to acquire the flash unit, and you can create your own bounce surfaces for free.
- It is lightweight to carry around all day.
- It allows the photographer to move quickly from one setup to another.
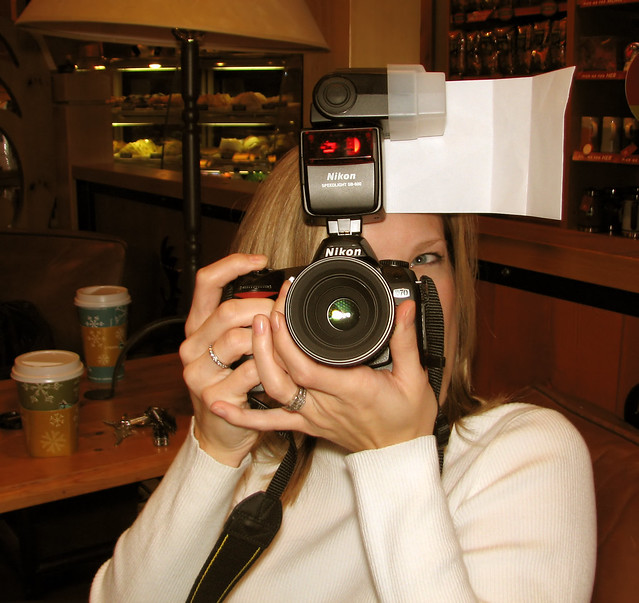
ghetto flash bounce by pochacco20, on Flickr
Bounced flash is a lightweight easy to manoeuvre light source, and it produces pleasing directional lighting.
With advanced lighting scenarios, you can bounce multiple portable flash units off of various surfaces in your shooting area. For the purposes of this article, we're going to discuss how to use a single unit, mounted to the camera, and bouncing the light from either a portable,or a fixed, surface.
It's our hope that you will be motivated to give the single flash bounce a try. Perhaps, you will even develop your own ideas as to how push the limits to this simple lighting option.
What photographic situations lend themselves to bounced flash?
1. Travel

Want Some? Made in Singapore… by williamcho, on Flickr
When traveling, it's generally preferable to be carrying the minimum amount of equipment. When you're on your feet walking all day, who wants to carry that extra weight? You may also encounter unpleasant lighting or low light conditions. This photographer took advantage of a low ceiling to bounce his flash back into the face of this angelic child. The soft light literally makes her glow, accentuating her expression, and even providing catchlights in her eyes. Imagine this same shot with direct flash; it wouldn't have nearly the same appeal!

Dumplings by williamcho, on Flickr
Travel photography often melds with food photography. This gorgeous magazine quality food shot was taken at a Singapore restaurant using a Gary Fong diffuser and bounced light from the ceiling of the restaurant. Mixing bounced light with diffusion devices can create a multi-lighting look from a single lighting source.
2. Weddings
Wedding photography requires speed and quality lighting. There will be times where you need the multi-light setup, but for candids, Bounced flash is the perfect mobile answer. You can use it as a direct fill for shadows, such as this photographer did, or you can create a directional fill by bouncing the light off of a reflective surface held to the side of your subject. We suggest going to an art supply store and picking up a couple of 3'x4′ sheets of white Foamcore. They make a great reflective surface that is lightweight and easy to handle.
3. Public relations
We once did an assignment where we had to shoot location portraits of 200 doctors, in their offices, in a 10 day period. This type of PR assignment requires a quality look that must be created in a matter of minutes. For the doctor assignment, we used a rig that looked like this-
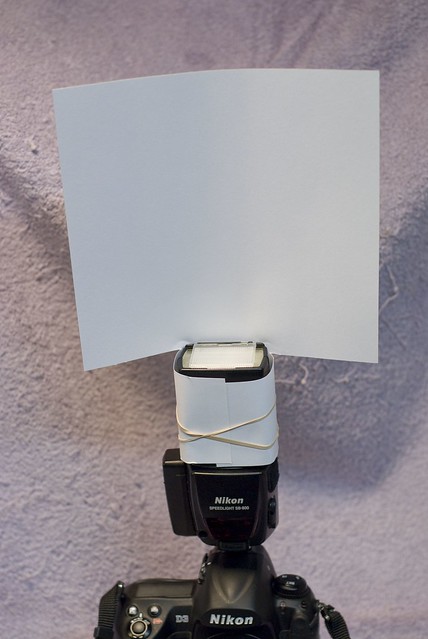
SB800 diffuser by photofarmer, on Flickr
Here is how we approached the PR assignment using bounced flash-
A. We walked into their office and met the doctor.
B. We knew that we had less than 5 minutes of their time.
C. We looked for a background that was bright and uncluttered.
D. We stood, or sat, the doctor in front of the chosen background.
E. The bounce rig was set up to provide front illumination, and a bounce illumination from the ceiling (a 2 light setup).
F. If there was a wall nearby, we would swivel the head slightly towards the wall. This then became a 3 light setup: Main sidelight from the wall, front fill from the feathered card, and an overhead hair light from the ceiling bounce.
4. Portraits
When most people think of bounced flash photography, they imagine a wide even light source that fills the room. But, the technique is really quite versatile. You can easily change the quality of the bounced light by varying the flash to bounce source distance, the bounce source to subject distance, the color of the bounce source, the surface of the bounce source, and even the direction of the bounce source.
Here are three examples depicting a single bounced flash (no bounce card) from a wall or ceiling. Take notice as to how different the lighting effects are based solely on angle and bounce distance.
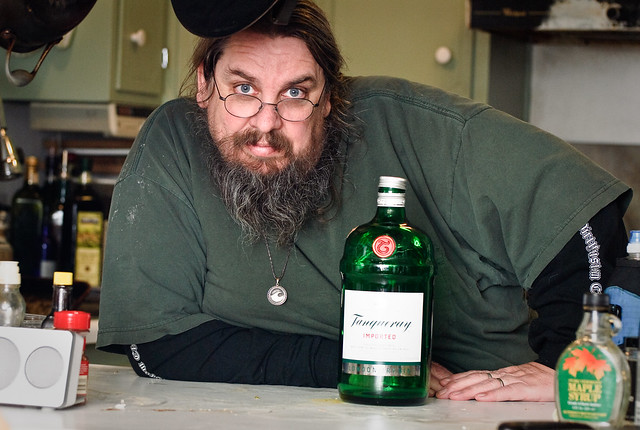
In the Kitchen by wickenden, on Flickr
Flash was bounced from a large white wall behind the camera. This provided wide, soft, shadow-less lighting.
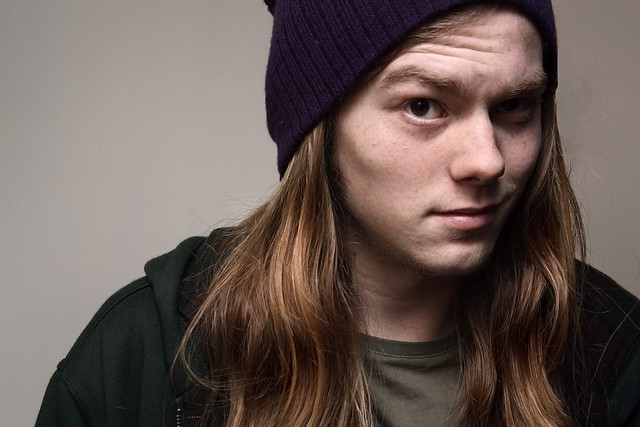
Steven by Sam Cockman, on Flickr
Flash was bounced from a nearby angled ceiling just to the right of the photographer. This provided a stronger directional light source that almost looks like a spotlight.
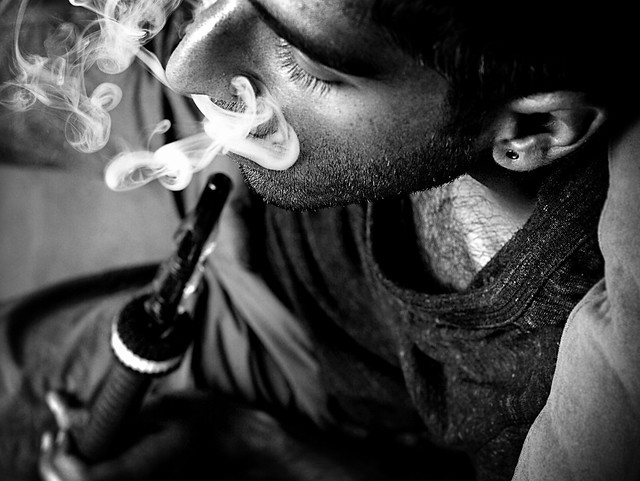
Week 32/52 PROJECT: De-stress by Sharif Sharifi, on Flickr
The photographer bounced the flash off of a ceiling /wall combination located behind the subject. This created a dramatic back-light.
5. Children
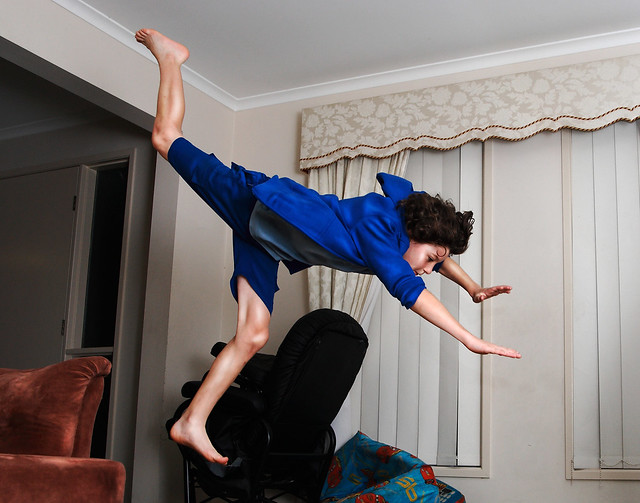
Moment of Impact by steve.garner32, on Flickr
Children rarely sit still. A quick turn of the flash head can provide pleasant light in a split second.

Baby Rosario by Donald Windley, on Flickr
6. Pets
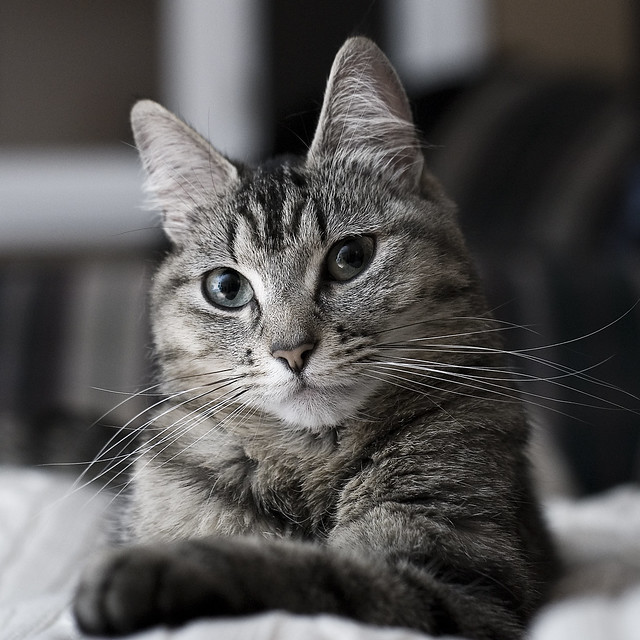
The Healing Process by seanmcgrath, on Flickr
Pets don't sit still either. Bounced flash can also prevent “glowing eyes” from their large irises, and it can accentuate the texture of their fur. A carefully bounced flash into a 3'x4′ Foamcore board can mimic the soft caress of window light. Paint the board yellow, or gold, and the bounced light will look the warm glow of a setting sun shining through a window.
7. Macro
A primary cause of poor macro photography is a lack of light. With a bounced flash and a small white card you can keep your shutter speed up, increase your depth of field, and provide directional lighting. If you look online, you can find special brackets that are made to hold your bounce card in place, thus freeing up your hands for the camera.
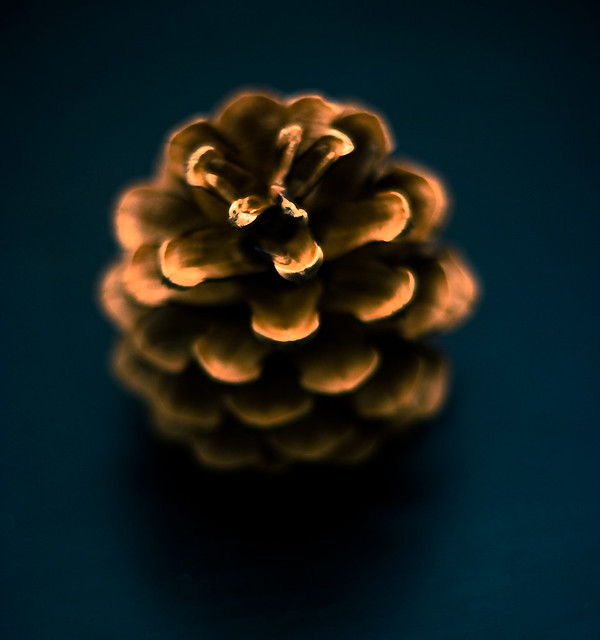
Untitled by iwolkow.de, on Flickr
This photographer used a simple bounce off of a ceiling to create a dramatic (almost abstract) macro image of a pine cone.
8. Special Effects
When considering a bounce location don't forget to look down. Lighting that comes from below can provide a cool special effect to your photographs.
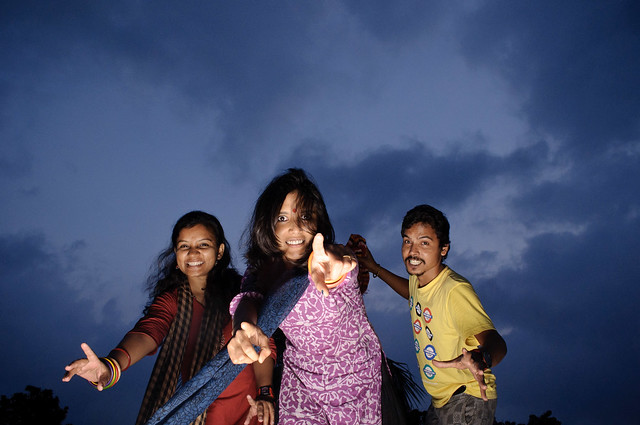
oooohhh by zaman babu, on Flickr
To get started with bounced flash photography, you'll want an external flash that is constructed with a head that swivels and tilts. You'll also want one that reads exposure through the camera lens. Most modern portable flash units will have these features. A lower priced unit may have a head that only tilts. This is usable, but not recommended. It will limit your ability to put the flash to creative use; it's worth the extra cost to get a tilt / swivel head combination.
You'll also want to make sure that the flash is compatible with your particular camera model!
Once you have your flash, you could also invest in some bounce attachments, or simply make your own! The cool thing about bounced flash is that with a little ingenuity, you can use almost anything to create bounced lighting. we've used pie tins, blankets, cardboard, pieces of wood, tinfoil, mirrors, and even a white Frisbee.
How to Setup the Camera and Flash
Experience will teach you what works best for you. Here are some guidelines to get you started.
We recommend using an auto mode when starting out. The auto mode will also allow you to shoot fast and not worry (as much) about exposure calculations. Set your flash to ETTL-ll, ETTL, ATTL, or TTL depending on the model that you own. ETTL-ll is best if you have that option.
Consider your background. If you're not worried about it going too dark, set your camera to Full Auto Mode. Bear in mind with this setting, the camera will not allow the shutter speed to drop below 1/60th of a second.
If you are concerned about the background going dark, use the aperture priority mode; start with f/5.6 Using this setting will require you to be conscientious of your shutter speed. The camera will now adjust for the ambient light on the background. You may have to put the camera on some kind of support.
What You Need to Keep In Mind When Bouncing Flash
1. Set your camera meter to center-weighted or spot. You want the camera metering the bounced light hitting your subject.
2. Keep an eye on the color of the object you are bouncing the light from; a white or slightly off-white surface works best for true color balance. The color temperature of the light will change based on the color of the surface it is bouncing from. If you bounce the light from a red wall, the light will turn warm. If you bounce the light from a blue wall, it will turn cold.
3. Bouncing light will requires more power from your flash. If you're going to buy a flash unit, buy the most powerful one that you can afford. If you're doing a lot of shooting, you may want to carry extra batteries; due to the extra amount of light output required.
We hope that you feel inspired to give bounce flash a try. Put the technique through some paces and see how many light sources you can mimic.
Don't think of bounced flash as a last solution, think of it as a perfect solution!

4 Comments
Bounce flash is a great, quick way to go. ‘Two fingers’ bounce also works and you don’t need a sheet of paper:
Great tip!
How different is the bounce flash from using a diffuser over ones flash; can you please explain?
With bounced flash, you can soften the light- yet- still create directional light. A diffuser placed over your flash head creates a broad, soft, light source that the envelopes the entire area. Each works well. Often, what dictates the best technique is the location- including what the ambient light situation is. You can combine the two techniques as well.
Let’s say that you have a diffuser on your flash. You place your subject within a couple of feet from a white wall. You stand several feet in front of your subject to take a head shot. Some of that diffused light from the flash will bounce off of the white wall and create a directional light with a diffused fill.