In the days of analogue photography, it was a necessity to use a filter in order to achieve a quality deep-blue sky. The filter types varied depending on the lens and the type of film, but a graduated neutral density filter was usually the filter of choice.
Nowadays, with digital photography, you have three choices: Use a neutral density filter, a circular polarizing filter, or using Lightroom to edit the sky to a deeper blue.
A circular polarizing filter tends to create a nice deep-blue sky, in most cases, with the added bonus of keeping clouds white and neat, but it doesn't always work. It is highly-dependent upon the quality of the filter and the angle of the light, and it does an uneven job with wide-angle lenses. Graduated neutral density filters do a decent job, but they often affect areas that shouldn't be darkened, which creates different problems. Therefore, I strongly lean towards the Lightroom-edit option, primarily due to its flexibility in this matter. Yes, it is always preferable to get it right in-camera, but that simply isn't always an option.
There are multiple ways to create a blue sky in Lightroom, but I typically use the Graduated and Radial filters in combination with HSL (Hue, Saturation, and Luminance). Let me show you how to do that.

Firstly, you need to develop your photo. Take care of everything else you must, but leave the sky for the very end. Edit the photo as if the sky isn't a part of it, since you will be taking care of it later. Make sure the rest of the photo looks as good as you want it to.
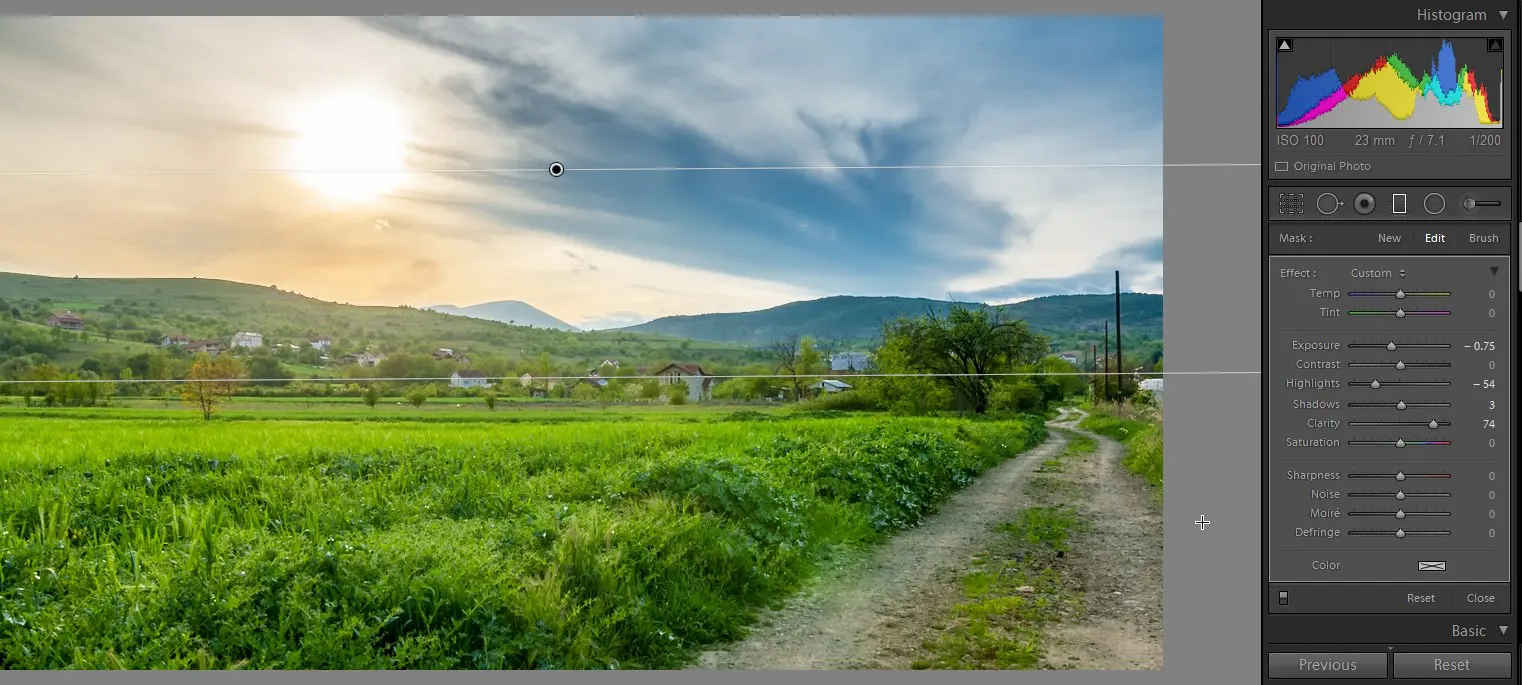
Once you have done that, select the Graduated Filter, and pull down from the top of the image. Make sure your first click is just above the photo so that there won’t be any weird edges.
After positioning the filter, use the brush to remove any areas which don’t belong to the sky, like buildings, for example. Reduce the exposure value and highlights until you feel it looks just decent enough. Keep in mind that it won’t truly look deep-blue, just yet. That deep-blue color is achieved by altering the colors of the spectrum. It might not be the most genuine way to achieve it, but it works. It also beats paying top-dollar for filters, which can cost hundreds of dollars, if they’re good quality.
Next, head down to the HSL box and open the Luminance tab. Choose the dragging tool which is the circle in the top left corner of the box. Then, pick a clean part of the sky, somewhere in the middle of it. By clean, I mean don’t click over a cloud, but a good patch of clear sky. Now, drag the mouse pointer up-and-down until you are satisfied with the luminance value, and do the same with saturation.

When you are confident that the sky has a good shade, head back to the Graduated Filter and click on the control point. This will allow you to alter the settings on the Graduated Filter you have just created. In order to make the clouds “pop,” you need to up the clarity slider, but not so much that it feels unnatural. Having done that, you’ll probably notice that the noise was amplified in the process. Use the noise slider to reduce the noise.

Additionally, if you have the sun captured in the frame, the sun now probably has a blueish tone, which obviously doesn't look natural. To fix that, you need to alter the sun using the Radial Filter. Place the Radial Filter over the sun and create an ellipse which is about 3-5 times wider than the sun itself.
Head out in the filter box and tick the “Invert Mask” checkbox and increase the feathering to 100. This will soften the mask, creating quite a natural look. Now, decrease the highlights, but increase the exposure a bit. Use the white balance slider and pull it a little towards the yellow side (don’t overdo it). The goal is to return the sun's color back to a more natural yellowish hue, but not to make it look as if you crudely painted yellow over it.
Once you have done all that, head back to the general image adjustments and alter them, if necessary, I usually find that adding some contrast and/or clarity does the job.
And there you have it, a vibrant deep-blue sky with a very natural sun.


4 Comments
This part you wrote…
“After positioning the filter, use the brush to remove any areas which don’t belong to the sky, like buildings, for example. ”
It doesn’t make sense. There is no brush you can use in Lightroom to alter what the grad filter is affecting. Even if you use a brush afterwards when you’ve finished with the filter it would be a difficult job to remove areas.
I’d love to now what you mean when you say this.
There is in Lr CC,check it out.
Maybe you should change the title to reflect that. Because this only applies to a certain version of light room. Could have saved some of the time of reading the article.
Hi! Can I ask you where the subtract brush is after adding a graduated filter? My lightroom has “new” and “edit” but mine does not say “brush” after that and I cant find any way to subtract part of the graduated filter Im adding.