Sometimes we get so caught up in the beauty of the scene in front of us that we forget that we might be pushing the limits of our cameras a little too far. One solution, of course, is to shoot with HDR in mind. HDR or High Dynamic Range is where you shoot a bracketed exposure of several shots over and under the metered exposure.
HDR gets a bit of a bad rap sometimes due to the overly garish nature of some images it can produce. It is, however, a powerful technique for pushing beyond the limits of your camera’s sensor. But what if we were so wrapped up in the moment, we did not shoot an exposure bracket? Can we recover dynamic range? The answer is yes, assuming you shot RAW. Today we are going to look at how to recover dynamic range using a single RAW file using Lightroom CC Classic.
Choose The Right Image
First of all you are going to require an image that is within the histogram both on the shadows and highlights end of the scale. Blown highlights are unrecoverable no matter what you do. Once you find a suitable image it's best to copy the original RAW and re-import to a new working folder.
With our single image in a folder in the Library module, we are going to right click and select Create Virtual Copy. We are going to repeat it and make a second Virtual Copy. The copies are denoted by a little fold over icon bottom left of the thumbnail. Select the first virtual copy and click the Develop Module.
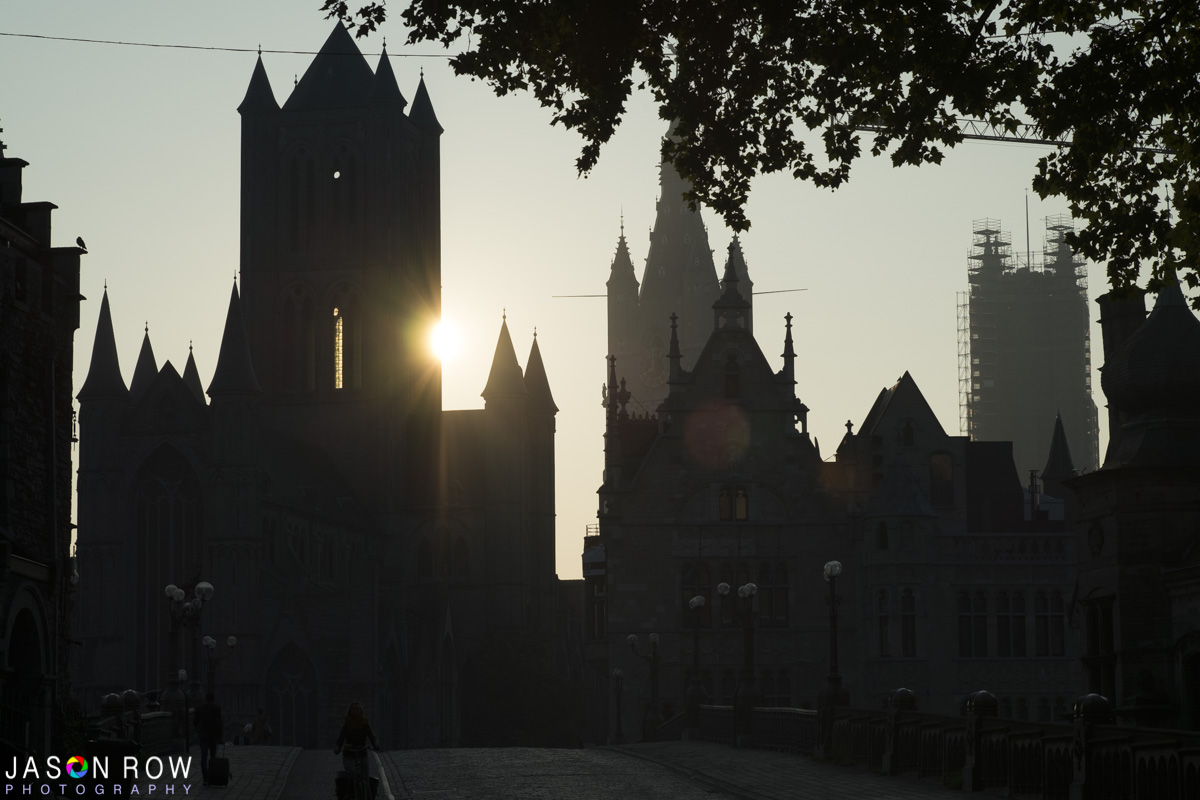
Adjusting The Exposure
In this example, we are going to simulate a three image bracketed HDR but you can use as many exposure variations as you like, just make a virtual copy for each variation. With our first copy open in the Develop module we are simply going to increase the exposure by one stop. This will add shadow detail to the dark areas of the shot. The amount you increase depends on the image you are using.
Now return to the Library Module and open the second copy in the Develop Module. You can also do this from the thumbnails at the bottom of the Develop Module. For this copy, we are going to decrease exposure one stop. This will bring definition back to the sky and highlight areas. Returning to the Library Module we should now have three versions of the same RAW, one correct exposure one over, one under.
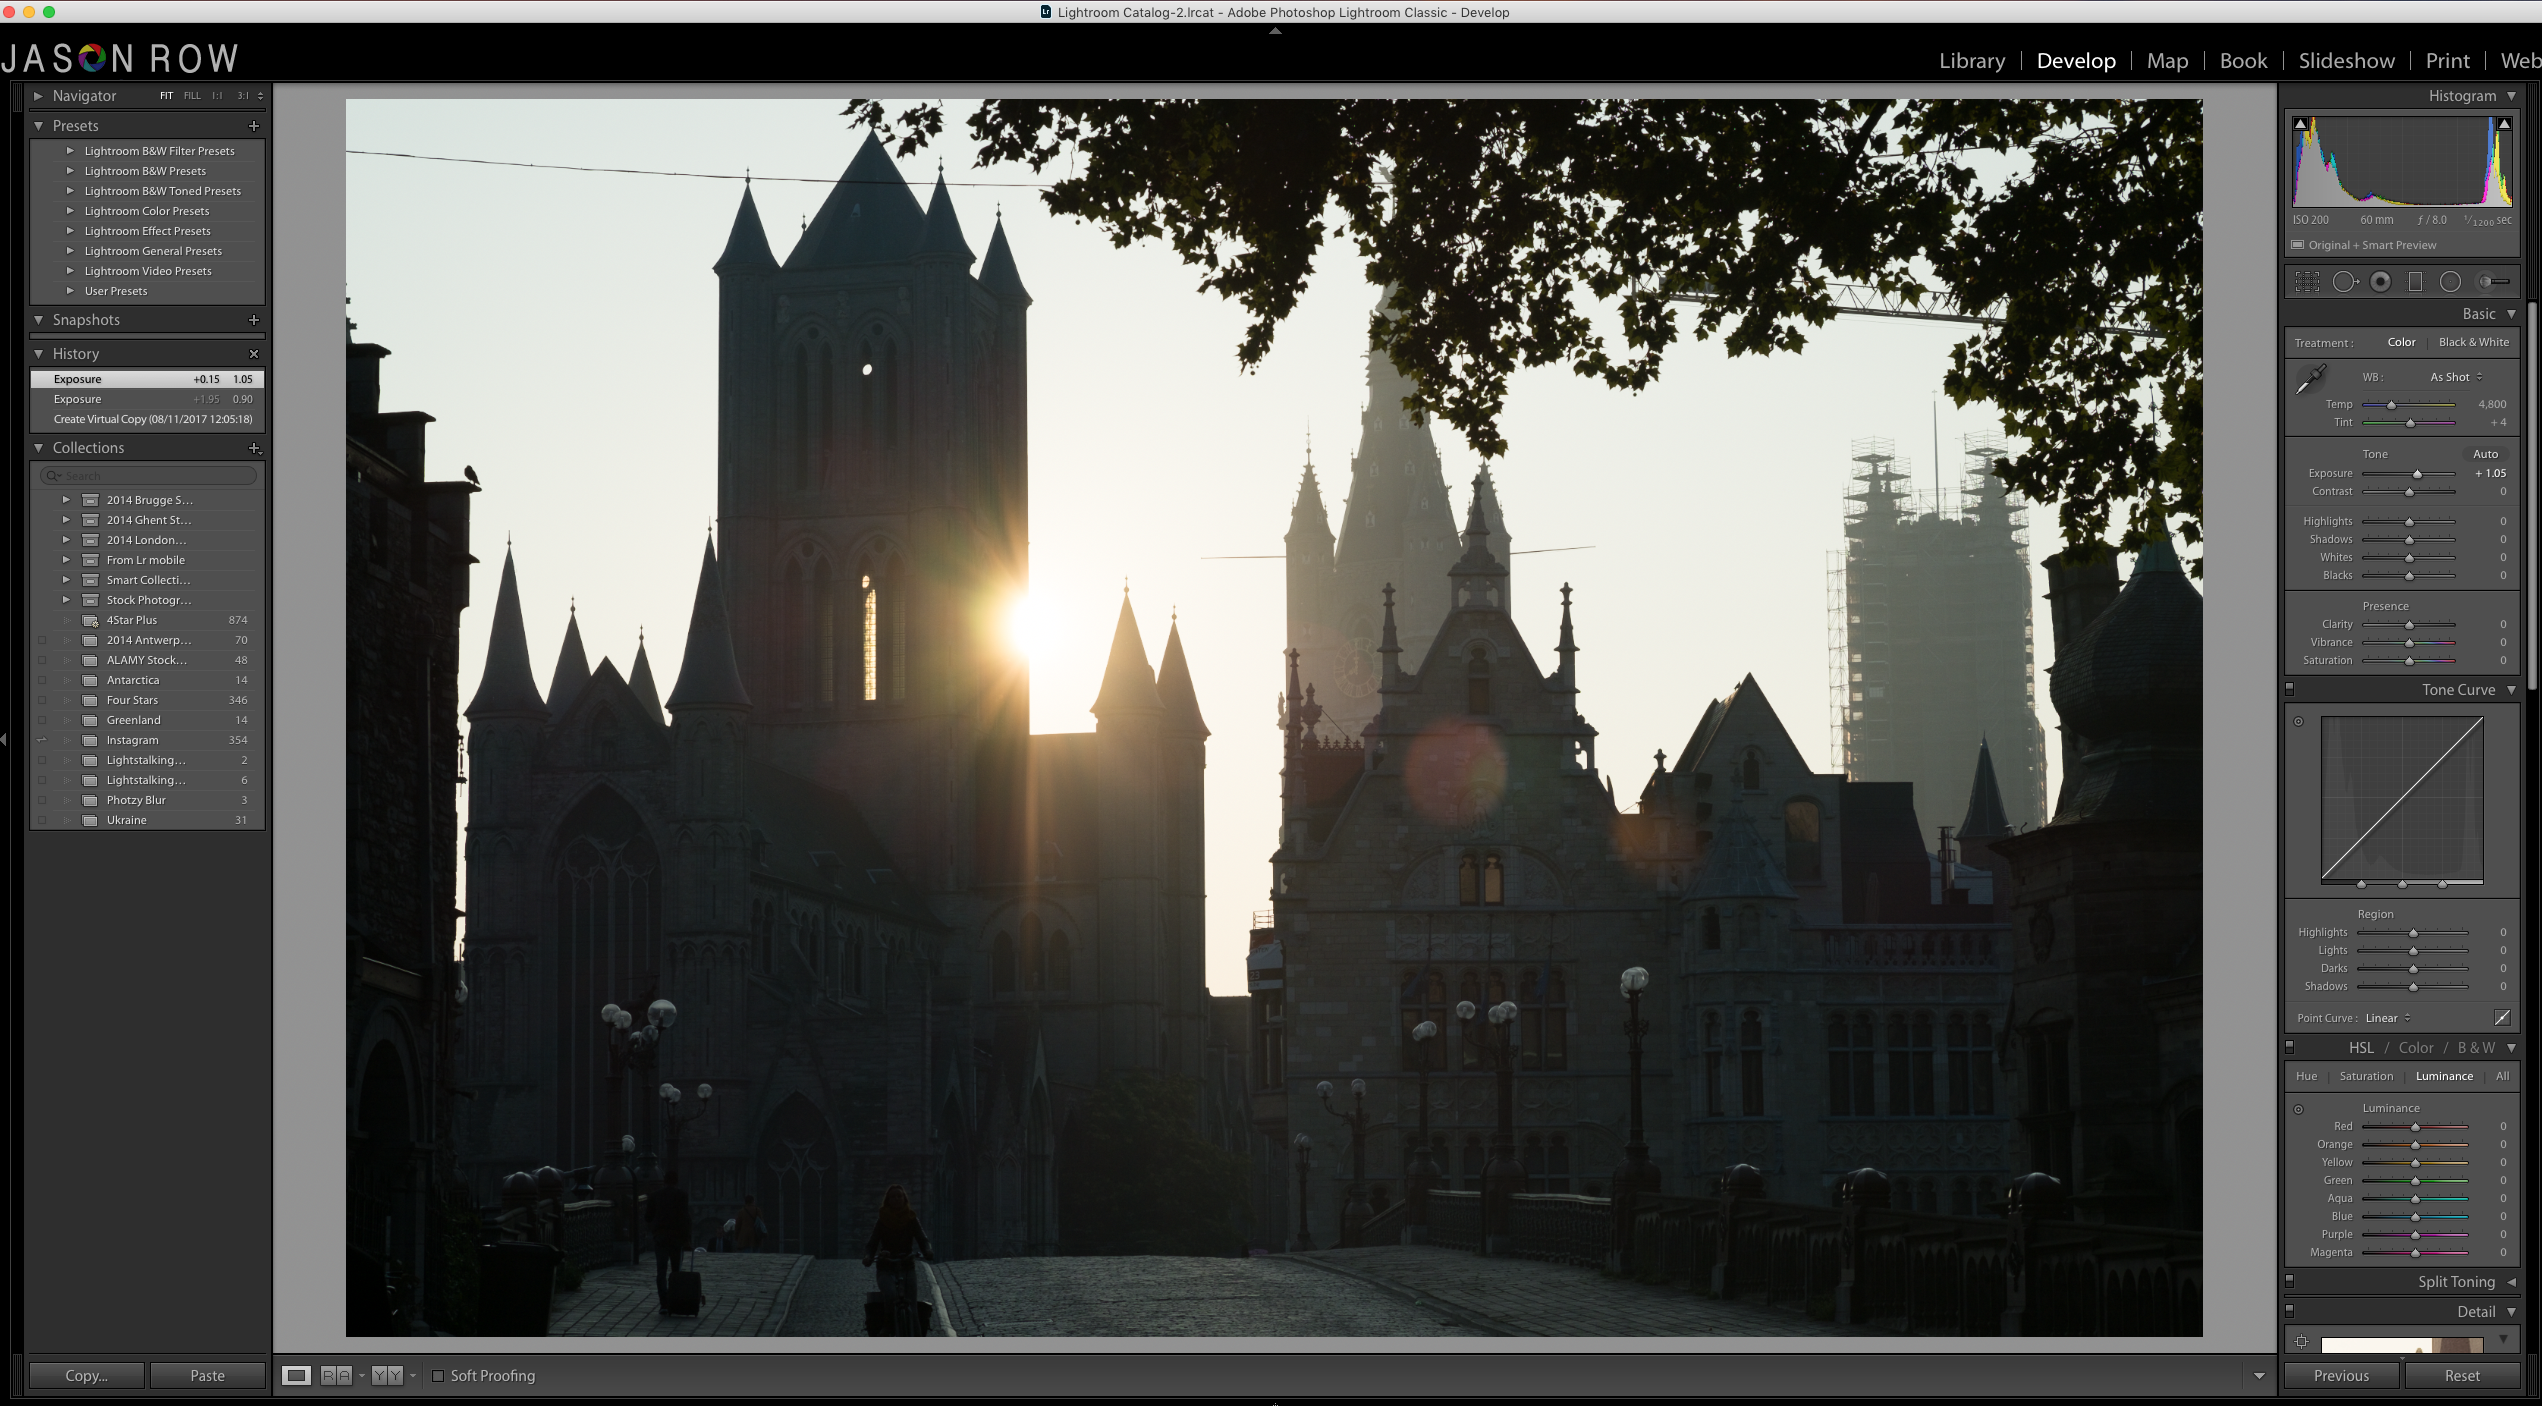
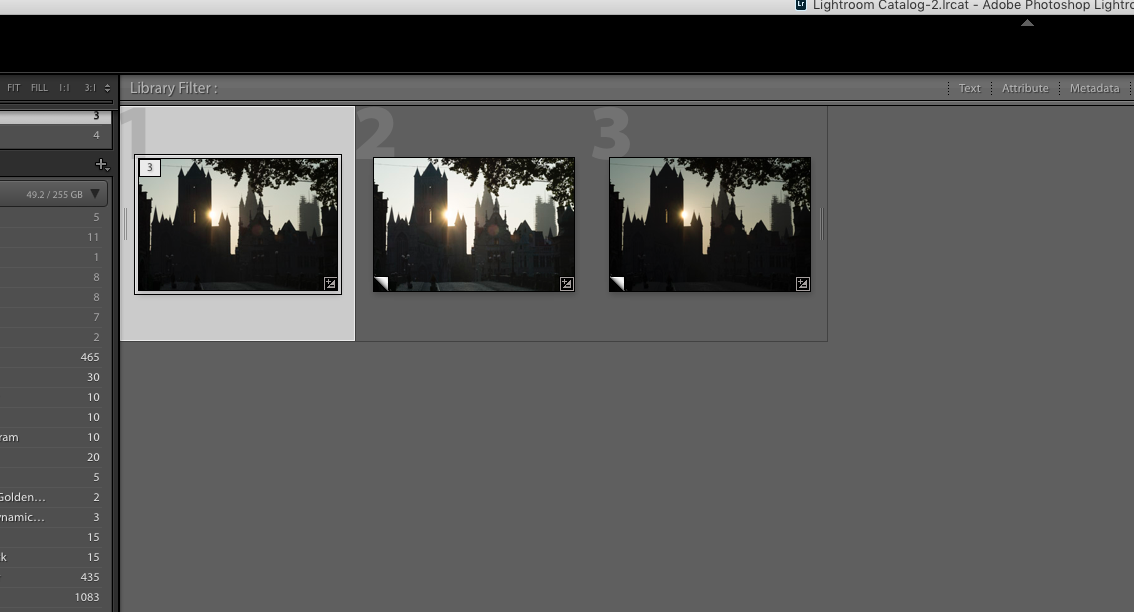
Creating The HDR Image
In the Library Module select all three copies and right click. Select Merge To HDR. The HDR options window will now open along with a preview of the final image. I find it best to switch off both Auto Tone and Auto Alight. The latter is not needed anyway as we are using a single image. You can also set Ghosting to none for the same reason. Click on Merge when ready.
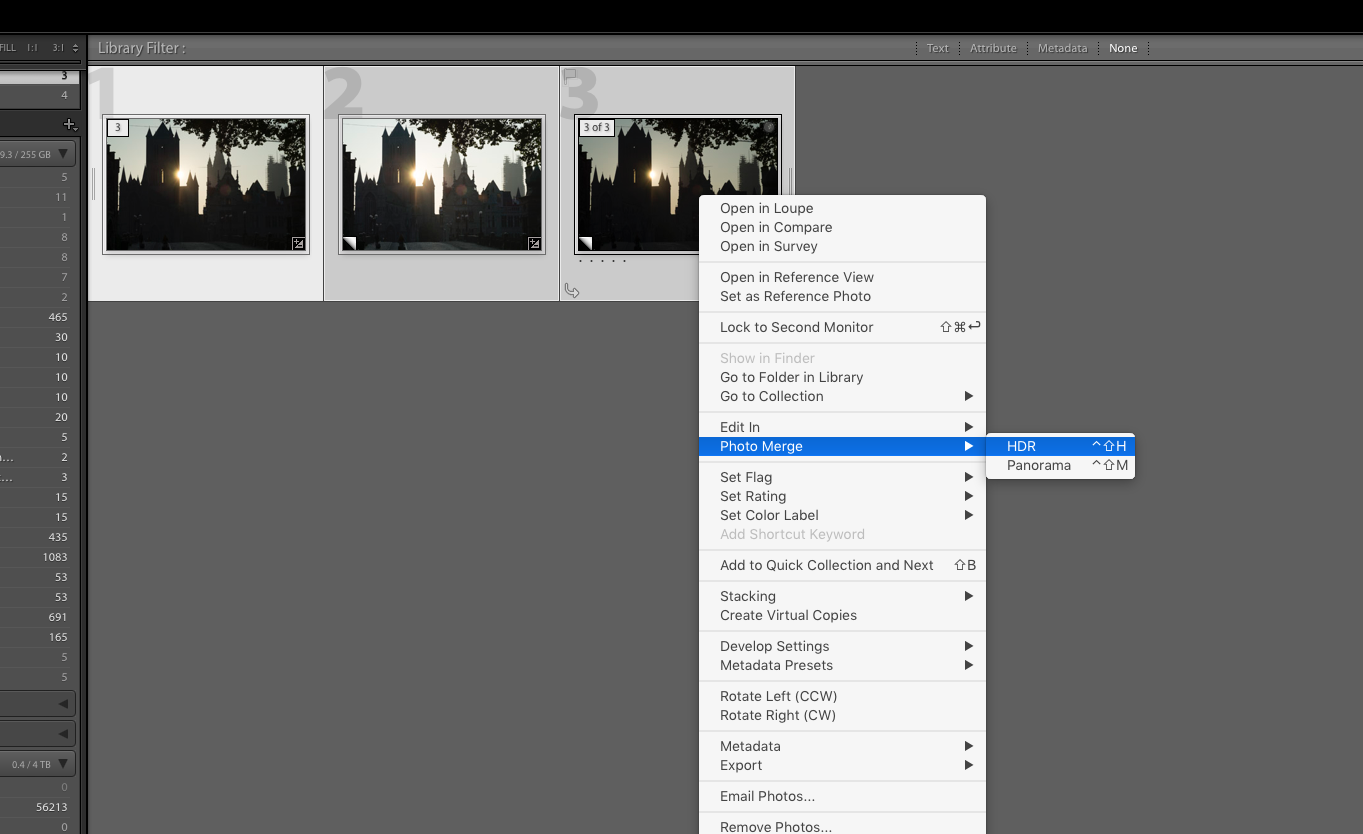
At first glance, the resultant image may not look much different but in fact what we have is a RAW file with information from all three RAW copies. We can now manipulate the file to get the image we want.
In the case of this sample, I have kept Exposure at 0 but boosted the shadows up to +90. This has revealed lots of detail in the stone buildings without introducing excessive noise. I have also pulled back the highlights to a point where the sun no longer clips. We can also adjust Blacks and Whites to boost contrast.
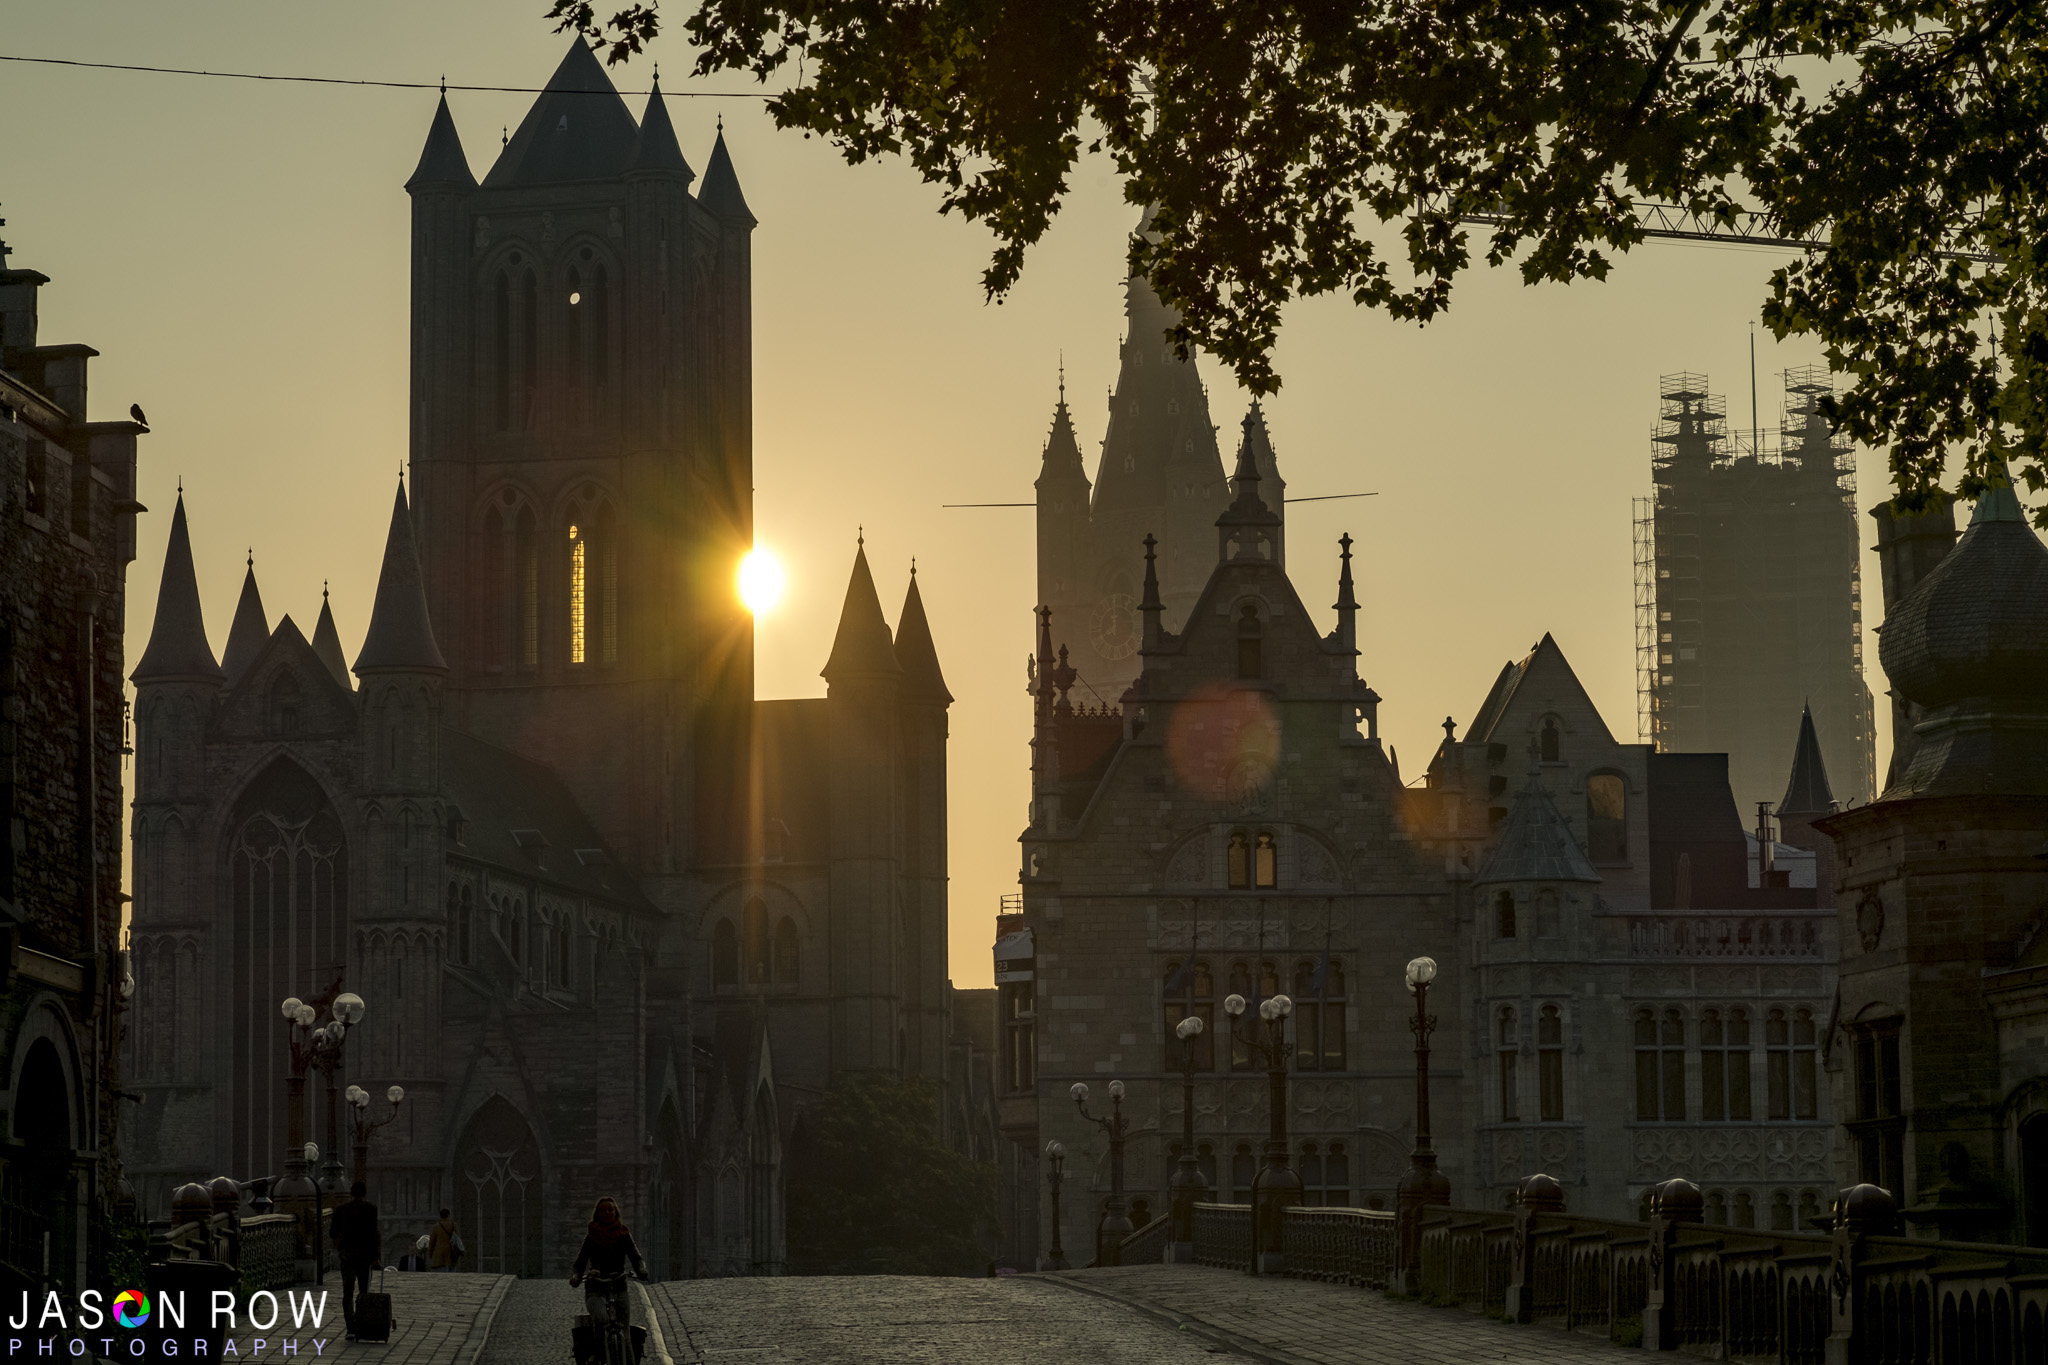
To give the image a nice dawn sunrise feel I have adjusted the White Balance from its original of 4800k to 6500K and added a little bit of Dehaze to punch out the mid-tone contrast. All in all, this has led to an image that is quite a bit different from the original single RAW. We may have got close to this result by processing that singe RAW but we would have almost certainly have had to compromise with blown highlights or noise in shadows.
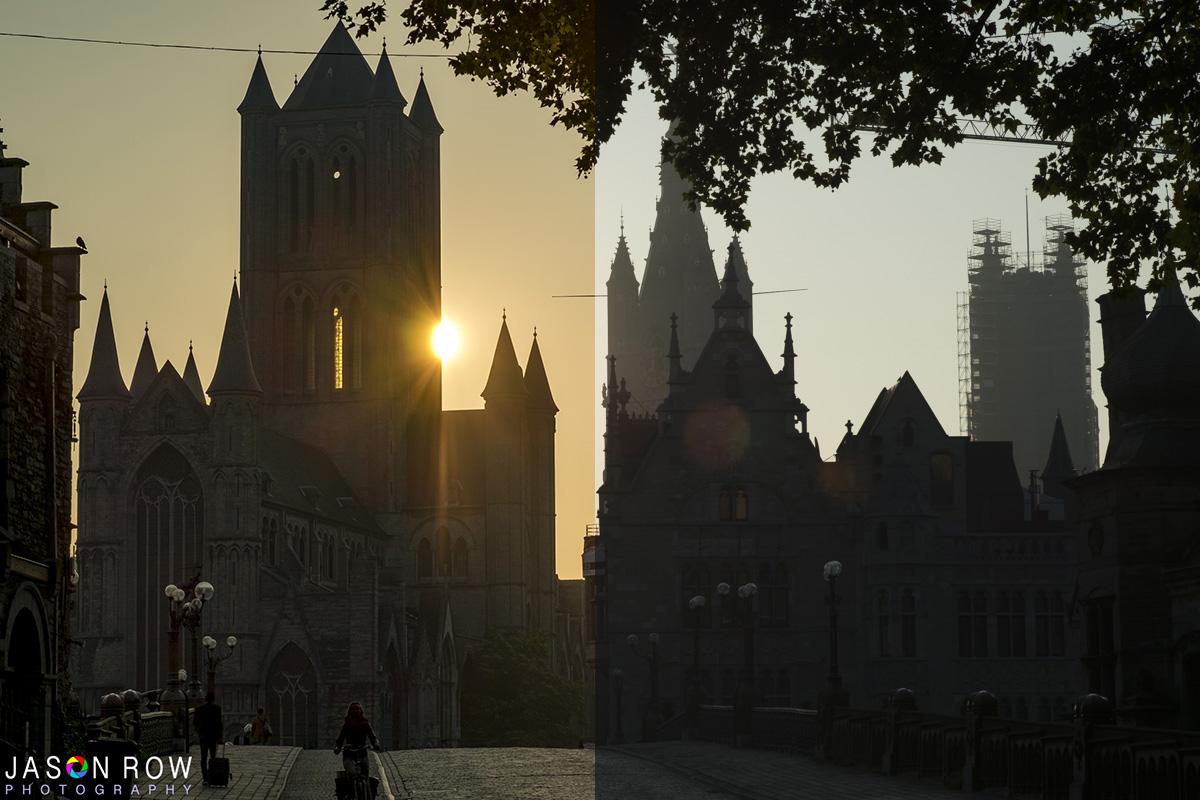
The beauty of creating an HDR from a single image in Lightroom is that it continues to treat the final HDR merge as a RAW file. That means we have all the benefits of RAWs, white balance adjustment, extended dynamic range and the ability to push the image much further than if it were a Jpeg based HDR merge.
More On The Web For You To Peruse
- Steele Training Lightroom Made Easy – If you want to learn more about using Lightroom see this great training on offer from Phil Steele
- What Is HDR on iPhone Camera + How & Why You Might Want to Use It (UPDATED FOR iOS 11) For something a little different, check out iPhone Life and using HDR on your iPhone
- 20 HDR Photographers Worth Watching – For a dose of HDR inspiration, see this post over at Speckyboy




2 Comments
I found this article really interesting, as keeping the file in RAW status. I use Paint Shop Pro and that also allows me to make HDR from a single image, albeit without the raw file on finish.
wonderful article. thank you very much!