Many of you will know that the video you can obtain from your photographic camera is often spectacular. Large sensors, high resolution, and fast lenses combine to make most still cameras powerful cinematic tools.
Like taking stills, you will still need to know the technical aspects, 180-degree shutter rule, file formats, bit rates, and the creative concepts of videography. Also like taking stills, the process doesn’t end when you pack up the camera. There is the editing, the molding of your initial idea into something more creative.
One of the key aspects of editing a video is color grading and today we are going to take a look at how to do it. For this tutorial, I am going to assume you have some knowledge of editing video footage.
What Is Color Grading?
The first thing you need to know is that grading is not correcting. Getting to a cinematic look in editing is a two-stage process. First, we must color correct, then we can do the color grade.
Color correction is not just about the color, it's really the color, contrast, and exposure correction. We must get the clip balanced, for all three of these elements before we grade the footage.
This is particularly important if we are grading a full production rather than a single clip. Not neutralizing the clips before grading will make the grade difficult and it will look uneven.
To demonstrate how to grade, I am going to use a Hollywood-level editing suite, that has excellent grading tools and just happens to be free. It’s called DaVinci Resolve and you can grab it here. At the time of writing, Resolve 18 had just been released, however, I had not had time to get used to it, so we are using Resolve 17.
Applying A LUT
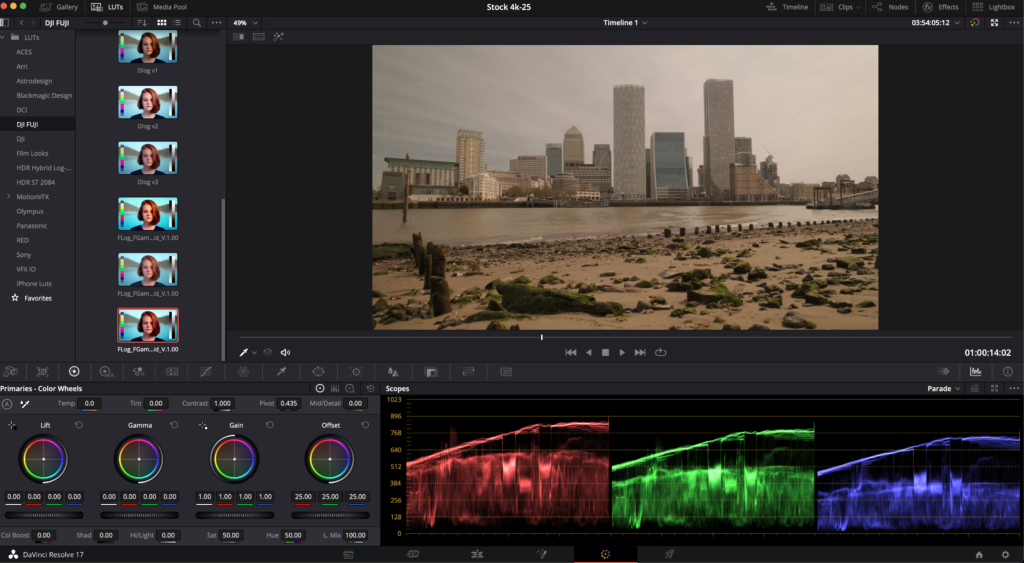
The clip I am going to color grade is this shot of Canary Wharf in London. As you can see, it’s very flat looking and that’s because I shot it in a Log profile. Log is similar to RAW for stills in that it maximizes the dynamic range of the sensor.
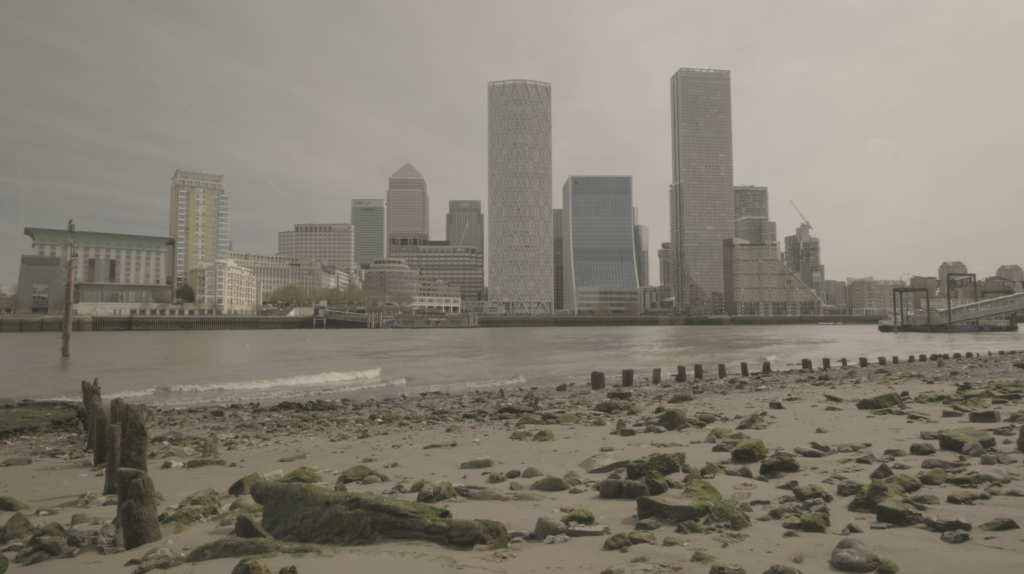
The clip is in the Color module of DaVinci Resolve. You can see the various modules at the bottom of the editing window. These cover media management, editing, sound, color, and output.
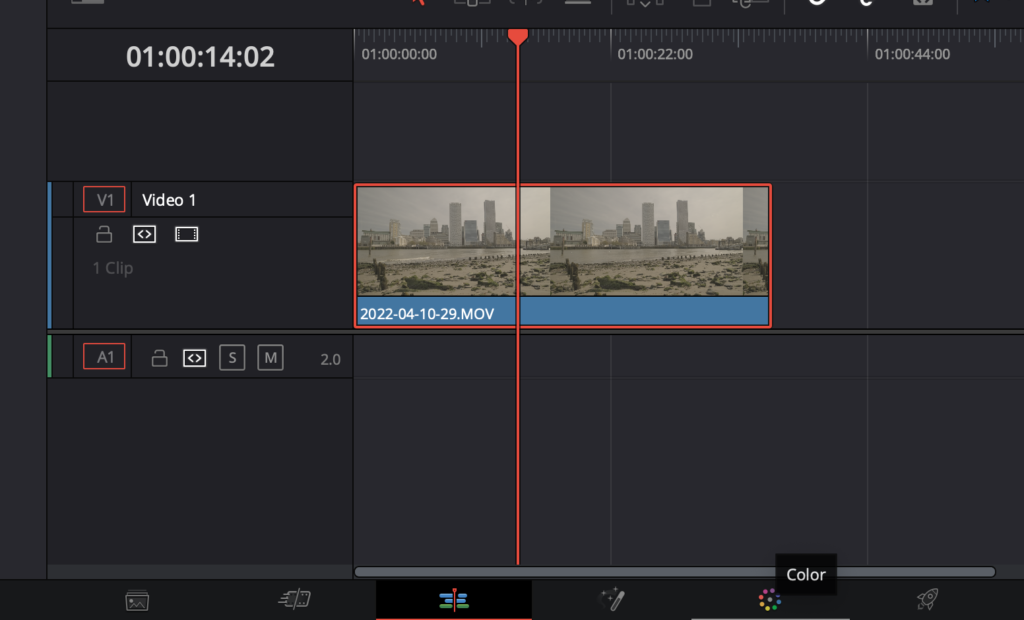
If we have shot in a Log format, the first thing we can do is apply a LUT. LUTs or Look Up Tables are like presets in Lightroom. They allow us to quickly get to a predefined look. There will be specific LUTs of your camera, sometimes more than one. For example, the Fuji camera I used for this shot has several LUTs that mimic the camera’s film profiles. You can download and install LUTs from your camera manufacturer’s website or from third-party vendors.
To select a LUT we click on the LUT tab on the top left of the Color module. The LUTs are organized by folder and I have my Fuji and DJI LUTs put together. Hovering over a LUT will preview it, and double-clicking it will apply it.
Correcting The Image
The clip now has decent contrast but an overall color cast. The first thing we will do is get the exposure exactly as we want. To do this we are going to select the Primary Wheels in the bottom left of the Color Module.
There are four main wheels and these correct both color and exposure. By dragging the bar underneath each circle, we can adjust the exposure.
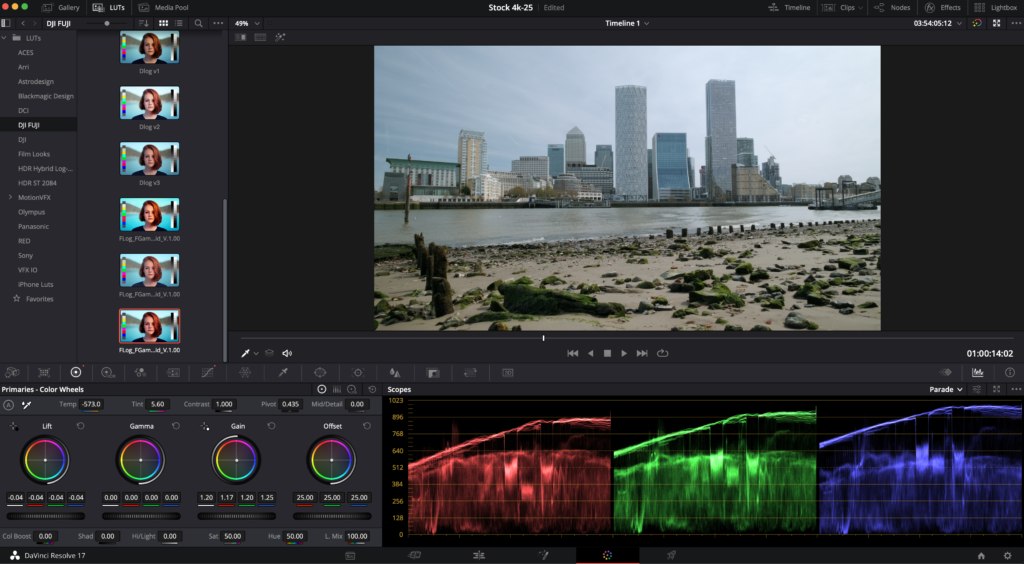
You can adjust the exposure in much the same way as you would in Lightroom. To the bottom right we can show the Parade. This is an RGB equivalent to a histogram where the top of the graph is the highlights and the bottom, shadows. I have adjusted the exposure so that the light is just inside the upper and lower edges of the Parade.

As we can see, there is a distinct color cast to the image and we can correct that using the color wheels. Again the process is very similar to using Lightroom color wheels – Adobe borrowed this technique from video edit suites.
There is a fast way to get a decent color correction if you have some neutral tones in your clip. Just under where it says Primaries – Color Wheels is an eye dropper. Select this and click it on a neutral tone in the image, in this case, I have used the pyramid at the top of one of the buildings. This has given me a very neutral-looking image. I can micro-adjust the color in the shadows, mid tones, highlights, and overall, by using the color wheels. In this case, I added just a slight amount of blue to the highlights. Now we have a corrected clip, we can grade it.
Grading Footage
The most important consideration when grading is knowing exactly what look you wish to achieve. If you are a movie buff, you will recognize the way films are color graded. The grade sets the tone for the film’s mood. A classic example is The Matrix. Two different color grades are used to show whether Neo is in the Matrix or outside in the real world. For this example, we are going to grade our clip with a cold, moody look.
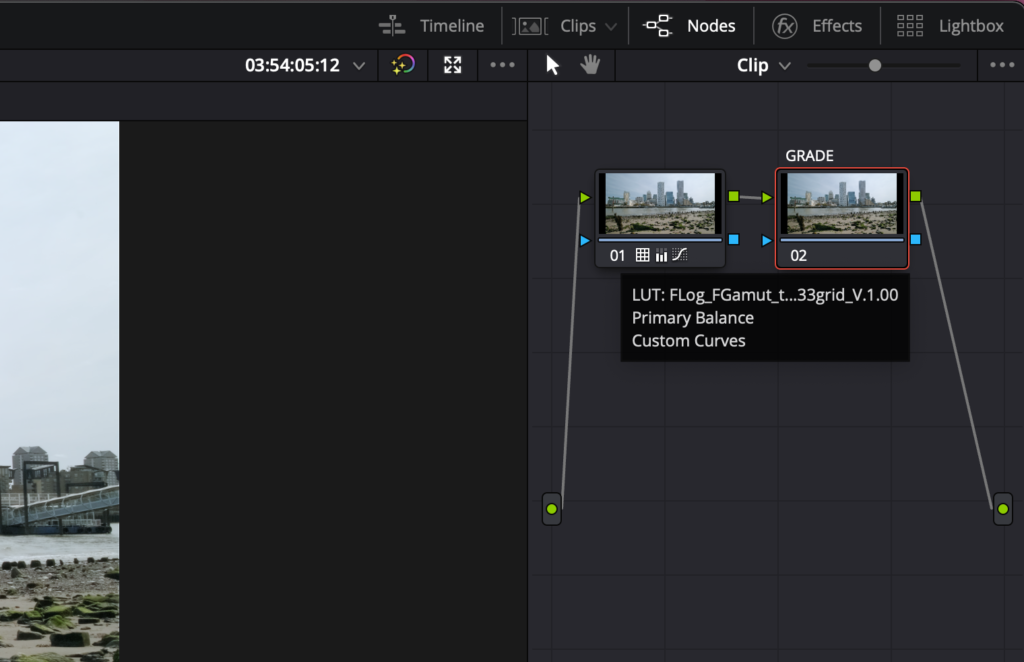
DaVinci Resolve uses a system called Nodes. These are not dissimilar to adjustment layers in Photoshop in that they allow us to manipulate without affecting the base image. I am not going to go too much into Nodes as they are somewhat complicated. For this tutorial, we will just use one extra node for the grade.
Make sure the nodes tab is open and then select the main clip node. Right-click on the thumbnail and select Add Serial Node. You will see a now thumbnail appear. This is the “layer” on which we will grade our clip. We can rename it to suit.
To get the look we return to the Primary wheels. We use the Offset to reduce the exposure making the image darker. We then use the gain to return some of the lost contrast.
Returning to the Offset, we now use the move the color wheel towards the blue/green areas. This has the effect of making the whole clip blue.
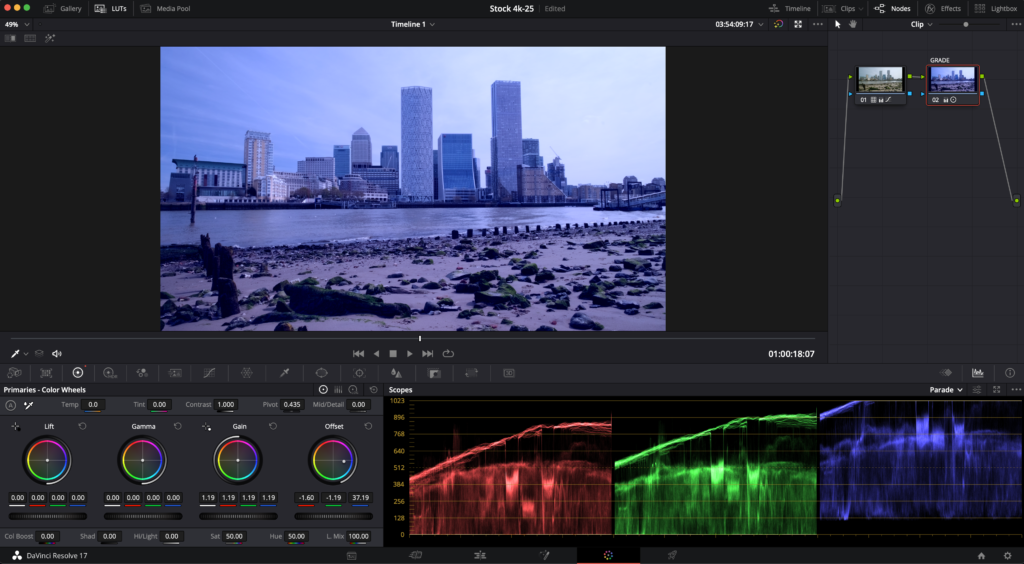
However, we want to return some of the colors to the mid and shadow regions. We can add the opposite color using the gamma and lift controls. This gives us a little bit of color back in the beach area but maintains the overall cold look or grade of the image. We play around with the color wheels until we get the desired final look.
As you can see there is quite a difference between the original, corrected clip and the final, graded clip.
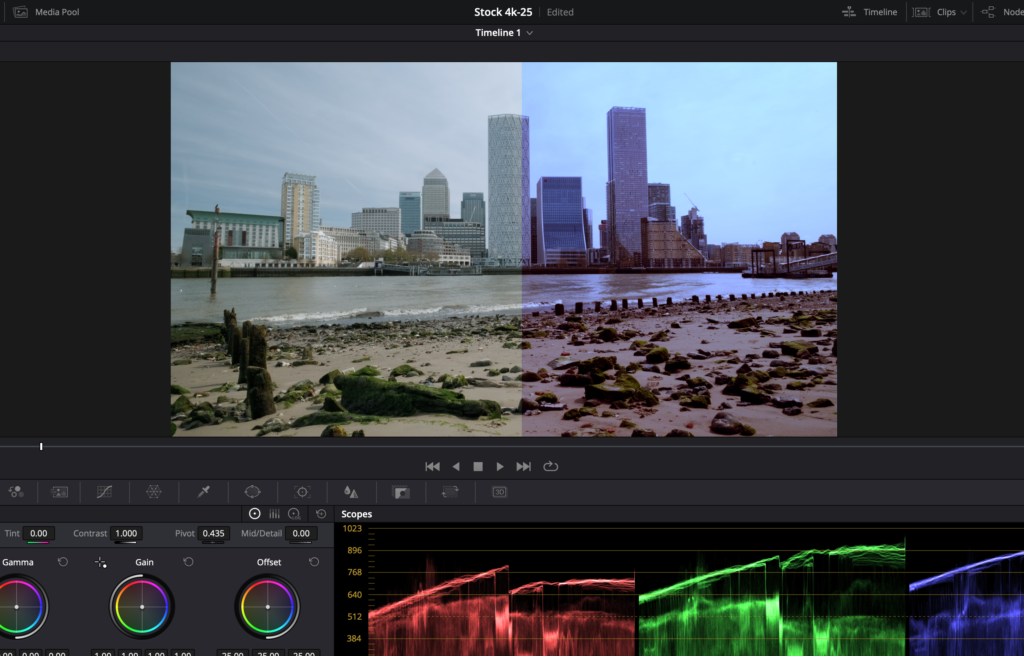
This is only a very basic introduction to the concept of grading your footage. It is designed to give you an idea of the processes and steps you need to take to apply a “look” to your footage. DaVinci Resolve and other editing suites have other, more powerful tools to help you fine-tune a specific look and apply it to your entire movie. That, however, is beyond the scope is this simple tutorial. There are some excellent free tutorials on correcting and grading footage on Blackmagic’s website.
Further Reading:
- Here Is A Detailed Review Of The Datacolor SpyderX Pro
- How to Use Lightroom’s Color Wheels To Grade Your Photos Beautifully
- Want Untouchable Cinematic And Dramatic Shots? Master Color Grading: The Guide
- How To Color Grade Photos Like A Pro
- Guide to Color Grading: How to Color Grade Video Footage
- Get Cinematic Colors


