Use This Guide To Learn How Create A Panorama In Lightroom As Well As Some Technical Background Knowledge
When Adobe introduced HDR and Panorama merging to Lightroom, they changed the game completely. Pretty neat for us Lightroom fans!
However, HDR and Panorama merging was nothing new to the photography world, so what was so special to the introduction of these features in Lightroom?

Before HDR in Lightroom, HDR was a bit of an oversaturated “tone mapped” mess that looked like you are on some heavy narcotics. Yes, I am aware that it's a matter of taste, but then again, realistic looking pictures is what the industry is all about.
The output was usually a 32 bit .TIFF file which was supposed to provide loads of editing options, but it didn’t.
I would assume that it is some kind of an 8 bit compressed .jpeg packed as a 32 bit .TIFF file. The issue is that non-photographer folks sort of liked that look since it made a pretty unique looking photograph.
Well, at least they did for a while. The trend went away, and so did the interest in HDR photography. A slump occurred.
The damage that trend did still ripples today. When you mention HDR everybody thinks “oh, no, over saturated weird images again.” And many clients won’t even accept HDR photos. It's almost as though they've grown allergic to it.
When The Ability To Create A Panorama In Lightroom Became Reality
What Adobe did when they brought HDR in Lightroom was the fact that it was true HDR. HDR as it is supposed to be, a High Dynamic Range Image. As simple as that. To create a panorama in lightroom was now a beautiful reality.
The shooting process is the same, you shoot bracketed images, as many as you want (I usually do 5), you load them in Lightroom, and instead of using some weird plugins, you merge them inside Lightroom itself.
The difference is that you use RAW files (you can do jpegs, but what is the point?) and as a result, you get a .DNG file, which is basically as close as it gets to a RAW file.
The resulting image looks exactly like the 0 EV image from the bracketed shots (the middle one). Well at least at first glance. On a 100% crop, you’ll notice that there is less noise (which is the opposite effect of old school HDR).
And you’ll notice that you can do highlight and shadow recovery to ridiculous levels. Shadow recovery doesn’t introduce that much noise or any noise on a reasonable recovery, and the highlights are recovered with a significant amount of more detail.
Compared to a regular image, the highlights can be recovered dramatically more.
Now, when Adobe introduced the “Merge to Panorama” option in Lightroom, it made it so it works with RAW files, and it produces a .DNG file again.
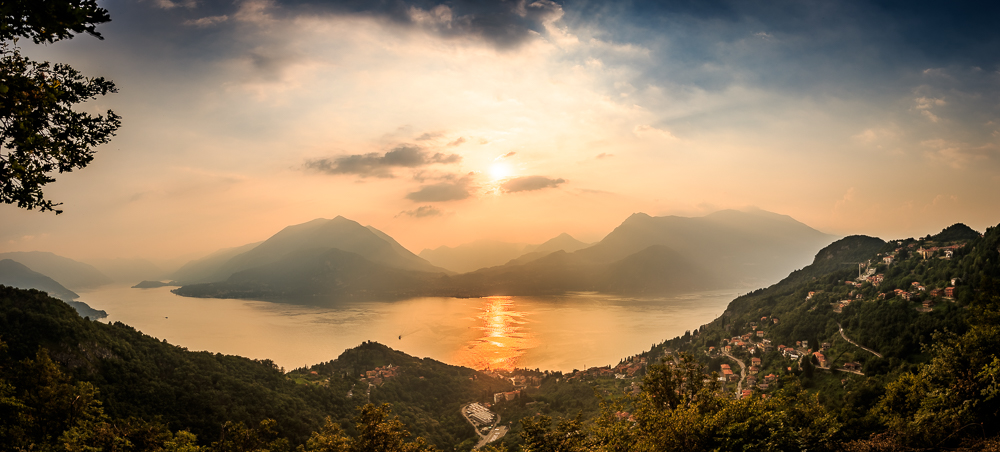
The most powerful thing they did (even though they didn’t really advertise it) is that it enables you to merge .DNG files to a panorama that also applies for HDR .DNG files, but you also get a HDR Panorama with the dynamic range that the HDR shots had.
Ridiculously epic!
The best thing about being able to create a panorama in Lightroom from HDR images is that they look like regular images, just with 16+ stops of dynamic range. No weird oversaturated images that look like you're spinning out.
Further Learning
Want to learn serious skills behind creating breathtaking HDRs?! Yes, is probably the answer. With Jimmy McIntyre, you can learn “The Art of HDR Photography” at your own pace and have yet more skills than you could imagine, complimented by a stunning portfolio of HDR work!
1. The Technique: How To Shoot HDR…
First of all you’ll need a tripod. You can do it hand held if the shutter speed is quick enough, but using a tripod will result in a sharper image overall.
Next, set your camera to automatic exposure bracketing (AEB) and pick the number of shots you are going to do. I tend to do 3 shots when shooting handheld, 2 EV apart (-2, 0, +2) and 5 shots when I’m shooting on a tripod, also 5 EV apart (-4, -2, 0, +2, +4).

Top Tip!
Make sure that your camera is set to high speed burst (if the option is available) and that silent shooting mode is turned off. Basically, you want the fastest burst rate possible in order to minimize the time between shots as much as possible to avoid ghosting.
If you want to reduce the noise in the picture, shoot one stop overexposed. This works better with 5 images instead of 3. Since you are doing HDR there will be enough room to recover slightly clipped highlights, and the -4 EV shot will take care of that.
Additionally, make sure that the white balance, shutter speed, aperture, ISO and focus are set to manual.
Even though the shutter speed will change automatically to compensate for the EV differences between shots, it is good to have it set to manual in order to meter properly.
After you have the images, import them to Lightroom, select the set of 3 or 5 or whatever amount of images you shoot for your HDR, and merge them to HDR.
In the dialog box you’ll have the option for automatic alignment, select that, then deselect automatic tone (since you’ll do it anyway) and pick the amount of ghosting removal.
Top Tip!
Be careful with it though, since in the areas where the ghosting is removed there will be more noise.
2. The Other Technique: How To Shoot HDR Panorama…
Treat HDR panoramas as regular panoramas with a twist. The rules remain the same, every setting on manual (including White Balance and focus).
Remember: Each frame needs to overlap with the previous by at least 30%, and each row of frames needs to overlap 30% with the neighbouring rows.
The difference is in the frames. Instead of shooting a single one, you shoot bracketed frames.
How To Create A Panorama In Lightroom – Merging the HDRs
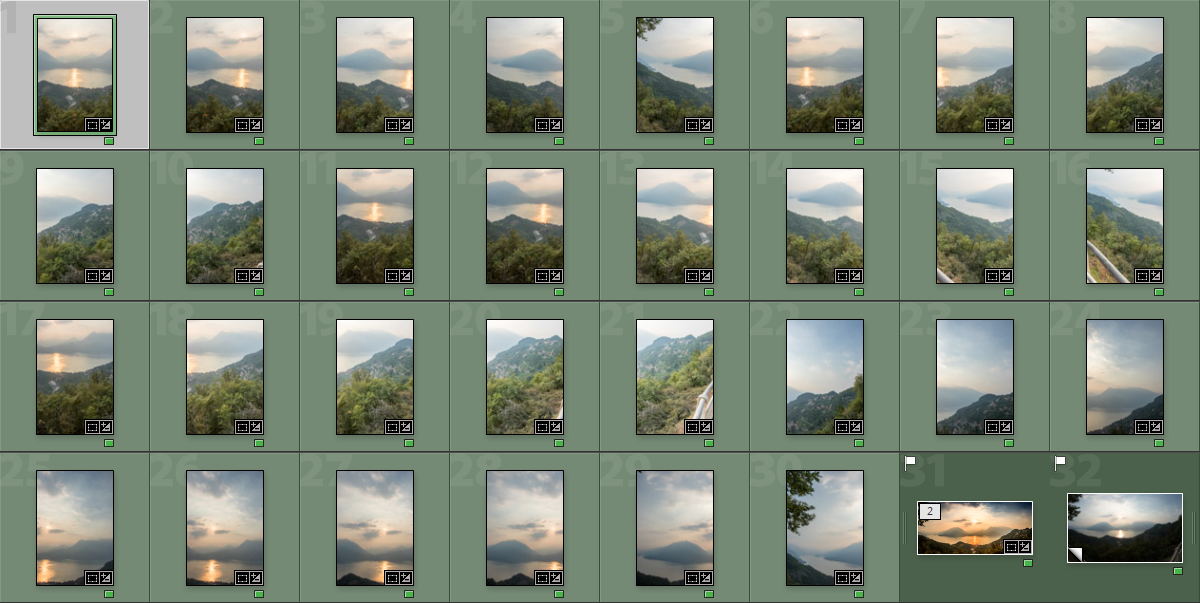
When you stitch the panorama, you need to merge the HDR photos first.
Merge them, but don’t post process them, since you’ll do the post processing on the whole panorama. The merging process is quite slow, but you can speed it up.
- Select the first set of bracketed frames, and hit CTRL+H (reminder, this is happening in Lightroom)
- Choose your settings in the preview and hit Merge
- Now, for every next set of bracketed frames, just hit CTRL+SHIFT+H to skip the settings dialog and preview which will speed things up
- After it is done, mark the merged shots as you like, then filter by the same markings, select them all and merge them to a panorama.
In the latest edition of Lightroom, there are really awesome tools that allow better panorama creation by warping empty areas of the stitched image!
You can also utilize the new transform utility inside Lightroom to fine tune the image to perfection.
And there you go, you have your HDR panorama all set and ready to go.
Now process it as you would process any other photo in Lightroom.
Summary
Having the power of true HDR and HDR Panoramas at your disposal will impact your photography significantly. It allows for better post processing and yet realistic, significant amount of detail in the shadows and highlights, clearer image, and so forth.
What more can one possibly need? It's like HDR heaven…but panoramic.
Create A Panorama In Lightroom – Top Takeaways
- Firstly, get yourself familiar with Automatic Exposure Bracketing – AEB – and figure out how many shots you'll require
- Get practicing with manual mode – make sure that the white balance, shutter speed, aperture, ISO and focus are all set manually
- Remember the 30% overlap rule
Further Resources
- How to Make a Panorama – A Simple Tutorial by Dzvonko Petrovski
- How to Use the New Panoramic and HDR tools in Lightroom CC by Jason Row
- Exposure Compensation: Use it to Master Exposure and to Explore Your Creativity by Sheen Watkins
- 10 Very Useful Tutorials on Lightroom for Landscape Photographers by Light Stalking
Further Learning
Want to learn more about the skills behind creating beautiful HDRs? Yes, is probably the answer. With Jimmy McIntyre, you can learn “The Art of HDR Photography” at your own pace and have yet more skills than before you began reading this article!?


3 Comments
A warning about shooting HDR, even using the 32-bit HDR merge in Lightroom. When combining in the over exposed frames of backlit scenes, you will often get unattractive ghosting where there are areas of high contrast. This is because the whites of the overexposed areas “bleed” into the darks of the high contrast foreground. Even with the lower resolution example provided in this article, you can see this happening on the right hand side where the dark of the foreground mountain is contrasted against the much lighter background. The effect is particularly bad where there is backlit foliage. I, too, shoot 3-5 bracketed exposures, but more and more I am tossing out the 1 or 2 brightest exposures when I merge the HDR to avoid this problem.
Hi Jerry,
Thank you for your advise and for sharing your experience with us 🙂
Does Lightroom 5 have this feature or is only available in newer versions?