Black and white, to this day, remains one of the most powerful creative tools we have as photographers. There is an emotion to black and white that often cannot be replicated in color photography. The fact that black and white remains as relevant, in a highly colorized digital world, as it did in the days of wet plates is a testament to that power.
As digital photographers, it is very easy for us to shoot black and white. It is a thoughtless process. And therein lies the problem. We can convert any photo we have ever taken into monochrome with the click of a mouse button. It does not require that we think like a monochrome photographer, nor does it require us even understand the monochrome thought process. For that reason, many of our black and white images are actually just color images without color, not a truly well thought out monochrome.
Today we are going to look at how to shoot monochrome digital shots using a black and white film mindset.

Why Shoot In A Film Mindset?
The film is dead, isn’t it? Well not really, there are plenty of people shooting and processing film images. That however is not the point. We are shooting digital but applying a film-based mindset and there are good reasons to do that.
Most of those reasons are educational. We can learn a lot about modern digital photography by applying a film mentality. We can learn about tonal range, zone systems, and how the use of filters can affect the look of our black and white image. We can also learn to think in monochrome, to spot the subtle areas of light and shade, textures and geometry that can make a black and white shot so great.
Let’s start by setting up our camera to shoot black and white.
Black And White Camera Settings
If your camera has a black and white mode or picture style, DO NOT use it. Wait, I hear you shout? We should not be using a black and white mode to shoot black and white, what planet are you on? Hear me out, however.
On most cameras, going into a black and white mode will turn both your LCD screen and viewfinder into monochrome. AND, I hear you cry? Did film-based cameras have a monochrome viewfinder? Of course not, but there is another reason why we should be viewing out potential images in color. Monochrome shots are all about color. The light and shade that define a black and white shot are as much about the color of the subject as the amount of light falling on it.
To get as close as possible to the concept of shooting on film we really should be using a digital negative, aka the RAW file. The RAW will not have any sharpness, contrast, or saturation tweaks made to it, giving us the creative freedom to play with those in our digital darkroom.
As for the rest of the settings, if you want to be a purist, then focus manually, and use manual exposure mode. These are not vital, however, as from the early 80s film cameras had auto modes to cover these. One thing we should set though is our metering mode to spot metering or as close to it as your camera will get. This enables us to use the zone metering system.
Whilst obviously RAW does not need a white balance setting, it is actually preferable to set a fixed preset closest to the light you are shooting in. The reason for this is that when we put filters over the camera, the LCD/Viewfinder will not show us the true effect if we are in auto white balance.
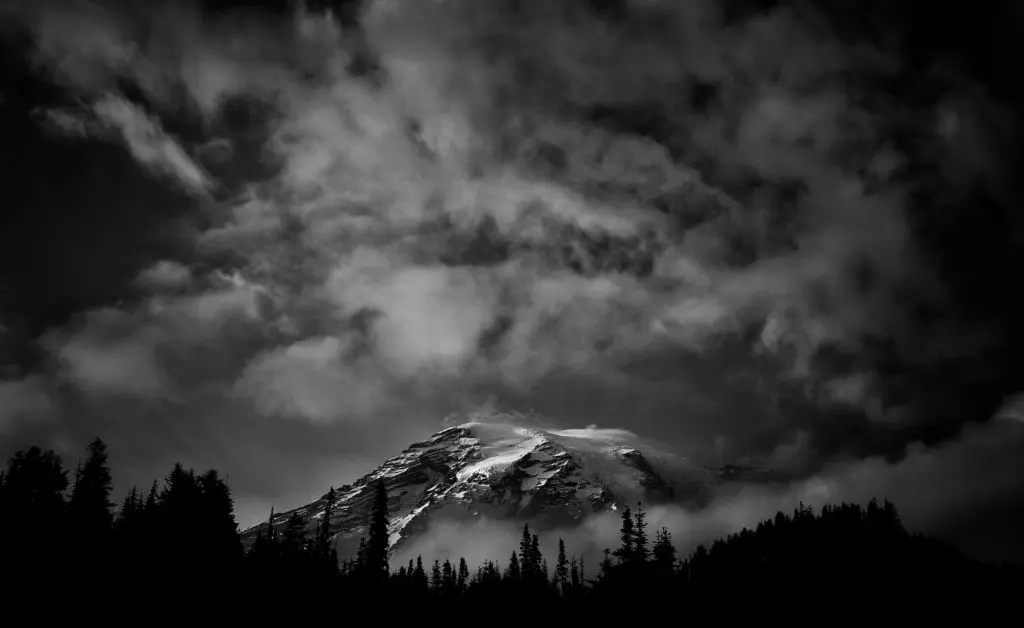
Metering The Ansel Adams Way
Ansel Adams was one of the greatest landscape photographers of all time. His zone metering system is the basis even for our own modern matrix metering modes. However whilst matrix metering modes are great, learning to expose using a zone system is a great learning tool.
Adams, split his system into 11 zones, ranging from pure black with no detail to pure, again with no detail. He would expose for the shadows and recover the highlights in the darkroom.
Now as you know, recovering highlights in digital images is nigh on impossible, so we should reverse his thought process and expose for highlights.
Whilst you don’t need to measure 11 different zones, you should first aim to meter from the very brightest part of the image. Use your spot metering to obtain exposure for the very whitest part of the shot. You can then measure the very darkest part of the image and make a quick mental calculation. If the dynamic range of the scene exceeds the capability of your sensor, then aim your final exposure at holding the highlights. If you have some extra dynamic range available you can reduce your exposure a little, aiming to make the very darkest parts of the image black.
Filters For Black And White Photography
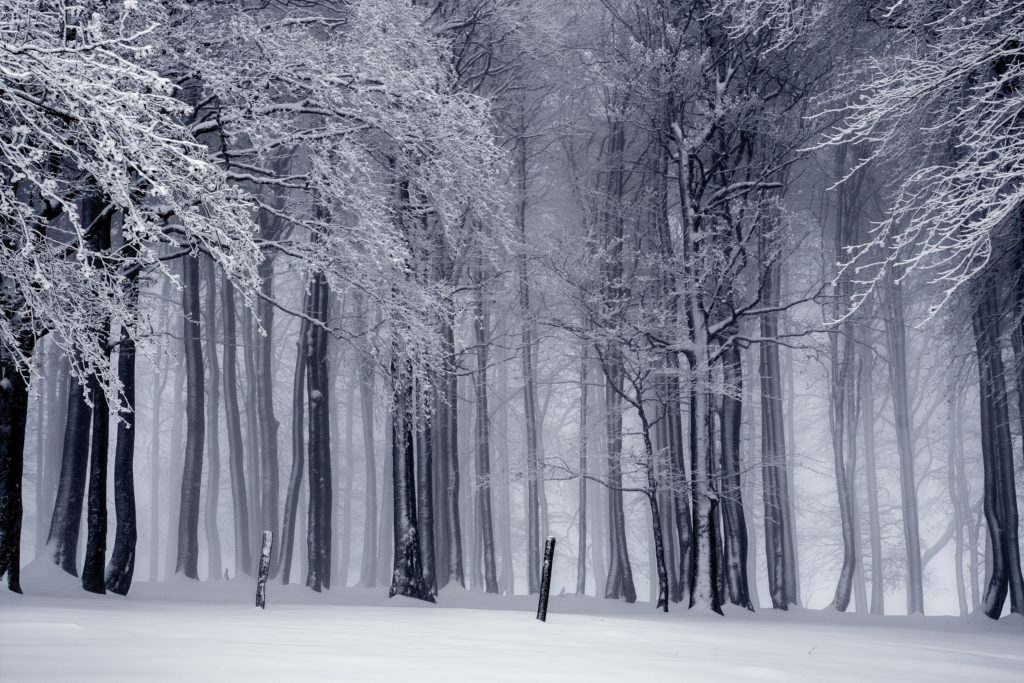
Did I mention that black and white photography was a lot about color? The way we control the intensity of that color is to use filters. These are simple plain color filters, each one will allow the light of its particular color to pass through whilst holding back the colors on the opposite side of the color wheel.

Yellow, orange, and red filters are the most common types. Both will lighten colors such as yellows, reds, and oranges but darken, in particular blues. Red in particular is a powerful filter for making blue skies go very dark, enhancing the whiteness of any clouds in them. Orange filters will also enhance a blue sky but with less effect. They can reduce the effect of fog or haze as well as being excellent in reducing blemishes in the skin.
Green filters are very useful in shooting flora in monochrome. They lighten and separate the green tones, helping differentiate between different shades of green plants.
Blue filters are the least used of the monochrome filters, they tend to darken most colors in a landscape as well as reducing the overall contrast.
The great thing about using color filters in your monochrome photography is that they can teach you the power and effect of different colors on your black and white shot.
The Post Production
The primary reason for shooting black and white with a film mindset is to reduce the need for post-production. That said, just as Ansel Adams made his images in the darkroom so we will need to work on ours in post.
The main corrections however will be contrast-based. Rather than simply desaturate, use a dedicated black and white conversion, both Lightroom and Photoshop have these. As we have used the zone system and color filters, much of the raw information we have been aiming for is embedded into the RAW.
As we shot for the highlights, we can look at bringing up some of the shadow detail using the shadow slider. It's important to raise shadows and not blacks, the darkest points in the image should remain black in order to give us that beautiful monochromatic contrast.
At the highlight end, we should be making sure that our highlights are pushed out but not clipping. If our main subject is highlight-based, then we should be making sure there is still plenty of detail in it.
Try to avoid using color sliders such as HSL in Lightroom as we should have already established which colors to highlight by using filters on the camera.
Shooting black and white with a film-based mindset is a great learning tool. We can learn the nuances of light and shade through the zone system. We can learn the importance of color in monochromatic shots. Most importantly it teaches us to simply think more about how a shot will look in black and white.


